





Kubernetes CI/CD Pipeline: Automating Application Deployment

by Tim
August 3, 2025
A Kubernetes CI/CD pipeline automates the process of application deployment, making updates faster and more reliable. By implementing a strong CI/CD pipeline, development teams can focus on writing code while automating the testing and deployment phases. This approach reduces manual errors, provides consistent release cycles, and improves overall software quality [1].
This article explores the core components of a Kubernetes CI/CD pipeline, its benefits, and the tools that can be used to build one. Readers will gain insights into how to streamline their K8s environment, supporting efficient and consistent application deployments.
Key Takeaways
- Kubernetes CI/CD pipelines automate software release processes, offering faster cycles and improved code quality.
- Key components include version control (Git), build tools (Maven, Gradle), containerization (Docker), image registries, testing frameworks, and deployment tools (Helm, Kubectl).
- Setting up a pipeline involves creating a Git repository, Dockerfile, configuring a CI tool (Jenkins, GitLab CI), and Kubernetes deployment manifests.
- Helm simplifies Kubernetes application deployment using charts, enabling packaging, versioning, and sharing of applications.
- Best practices include Infrastructure as Code (IaC) with tools like Terraform, automated testing (unit, integration, end-to-end), and security considerations like image scanning.
- Monitoring and logging using tools like Prometheus, Grafana, and the EFK stack are crucial for tracking performance and identifying issues.
- Kubegrade simplifies Kubernetes management, offering secure and automated operations, monitoring, upgrades, and optimization for CI/CD workflows.
Table of Contents
Introduction to Kubernetes CI/CD Pipelines

Kubernetes (K8s) has become critical for deploying applications [1]. Its ability to manage containerized applications at scale makes it a key part of modern software development [1].
CI/CD pipelines automate the software release process [2]. CI (Continuous Integration) focuses on merging code changes frequently into a central repository, followed by automated testing [2]. CD (Continuous Delivery or Continuous Deployment) automates the release of code changes to production [2]. Together, they offer faster release cycles, better code quality, and fewer manual errors [2].
This article guides DevOps engineers and developers to learn about and implement Kubernetes CI/CD pipelines. It explains how to automate application deployment and ensure smooth updates in a K8s environment.
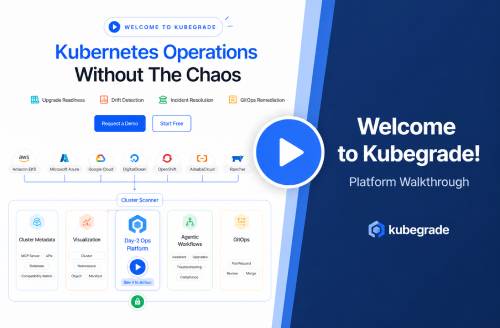
Kubegrade simplifies Kubernetes cluster management. It is a platform for secure and automated K8s operations, enabling monitoring, upgrades, and optimization. By streamlining K8s management, Kubegrade supports the benefits of efficient CI/CD processes.
The Core Components of a Kubernetes CI/CD Pipeline
A Kubernetes CI/CD pipeline includes several key components that work together to automate software delivery. These components and their roles are detailed below.
- Version Control Systems (e.g., Git): These systems manage changes to the source code [3]. Git allows teams to collaborate, track modifications, and revert to previous versions if needed [3].
- Build Tools (e.g., Maven, Gradle): Build tools compile source code, manage dependencies, and create executable artifacts [4]. Maven and Gradle automate the build process, guaranteeing consistency across different environments [4].
- Containerization (Docker): Docker packages applications and their dependencies into containers [5]. This guarantees that the application runs consistently, regardless of the environment [5].
- Image Registry (e.g., Docker Hub, Google Container Registry): This stores and manages Docker images [6]. It provides a central location for teams to access and share container images [6].
- Testing Frameworks: These frameworks automate the testing process, including unit tests, integration tests, and end-to-end tests [7]. Automated testing helps identify and fix bugs early in the development cycle [7].
- Deployment Tools (e.g., Helm, Kubectl): These tools deploy applications to Kubernetes [8, 9]. Helm simplifies the deployment of complex applications by using charts, while Kubectl provides command-line access to the Kubernetes API [8, 9].
These components interact within the pipeline to automate the software delivery process. Each stage is important for a reliable deployment. For example, code changes are first tracked using Git, then compiled using Maven or Gradle, containerized with Docker, and stored in an image registry. Testing frameworks validate the code, and deployment tools like Helm or Kubectl deploy the application to Kubernetes.
Version Control Systems: Git and Beyond
Version control systems are important for managing source code and enabling collaboration in a CI/CD pipeline. Git is a popular choice, allowing teams to track changes, collaborate, and revert to previous versions if needed [3].
Git facilitates branching, merging, and tracking changes. Branching allows developers to work on new features or bug fixes in isolation without affecting the main codebase [3]. Merging integrates these changes back into the main branch after they have been reviewed and tested [3]. Tracking changes provides a history of all modifications, making it easier to identify and resolve issues [3]. These capabilities are important for continuous integration, where code changes are frequently merged and tested.
Common Git workflows in Kubernetes projects include Gitflow and GitHub Flow. Gitflow uses multiple branches (e.g., develop, release, hotfix) to manage different stages of development [10]. GitHub Flow uses a simpler approach with a single main branch and feature branches [11].
While Git is widely used, other version control systems exist. Examples include Mercurial and Subversion. These systems may be suitable for projects with specific requirements or legacy systems.
Build Tools and Containerization: Docker’s Role
Build tools like Maven and Gradle compile and package applications. They automate the process of managing dependencies and creating executable artifacts [4]. This ensures that the build process is consistent across different environments [4].
Docker containerization packages applications with their dependencies into a standardized unit [5]. This ensures that the application runs the same way, regardless of where it is deployed [5]. Docker achieves this by using containers, which include the application code, runtime, system tools, and settings [5].
Creating Docker images involves writing a Dockerfile, which is a text file that contains instructions for building the image. The Dockerfile specifies the base image, copies application code, installs dependencies, and defines the entry point for the application. The docker build command then creates a Docker image based on the instructions in the Dockerfile.
Docker is important for creating portable and reproducible builds for Kubernetes deployments. By containerizing applications, Docker ensures that they can be easily deployed and scaled in a Kubernetes environment.
Image Registries: Storing and Managing Container Images
Container image registries, such as Docker Hub and Google Container Registry, store and distribute container images [6]. They act as central repositories where teams can manage and share images used in their applications [6].
These registries enable versioning, tagging, and access control for images. Versioning allows teams to track different versions of an image, making it easier to roll back to previous versions if needed. Tagging provides a way to label images with descriptive names, making it easier to identify and organize them. Access control restricts who can push or pull images, guaranteeing that only authorized users have access.
Pushing an image to a registry involves using the docker push command, which uploads the image to the registry. Pulling an image from a registry involves using the docker pull command, which downloads the image to the local machine.
Using a secure and reliable image registry is important for managing container images in a Kubernetes CI/CD pipeline. It guarantees that images are stored securely and are readily available for deployment.
Deployment Tools: Helm and Kubectl
Deployment tools like Helm and Kubectl deploy and manage applications on Kubernetes [8, 9]. They automate and streamline the deployment process, making it easier to manage complex applications in a Kubernetes CI/CD pipeline.
Helm simplifies the deployment of complex applications by using charts [8]. A Helm chart is a collection of files that describe a set of Kubernetes resources [8]. Helm charts allow teams to package, version, and share applications, making it easier to deploy them consistently across different environments [8].
Kubectl provides a command-line interface for interacting with the Kubernetes API [9]. It allows teams to create, update, and delete Kubernetes resources, as well as manage deployments, services, and pods [9].
Creating and applying Kubernetes manifests involves defining the desired state of the application in a YAML file. This file specifies the resources that need to be created, such as deployments, services, and configmaps. The kubectl apply command then creates or updates these resources in the Kubernetes cluster.
Building a Kubernetes CI/CD Pipeline: Step-by-Step Guide
This section provides a step-by-step guide to building a Kubernetes CI/CD pipeline. Follow these steps to automate your application deployments.
- Set Up a Git Repository:Start by creating a Git repository for your application code. This repository will store your source code, Dockerfile, and Kubernetes manifests.
git init git add . git commit -m "Initial commit" - Create a Dockerfile:Create a
Dockerfilein the root of your repository. This file defines how to build your container image.FROM node:14 WORKDIR /app COPY package*.json ./ RUN npm install COPY . . EXPOSE 3000 CMD ["npm", "start"] - Configure a CI Tool:Choose a CI tool such as Jenkins, GitLab CI, or CircleCI. Configure the tool to automate builds, run tests, and push images to a container registry.
Here’s an example of a
.gitlab-ci.ymlfile for GitLab CI:stages: - build - test - deploy build: image: docker:latest stage: build services: - docker:dind before_script: - docker login -u "$CI_REGISTRY_USER" -p "$CI_REGISTRY_PASSWORD" $CI_REGISTRY script: - docker build -t $CI_REGISTRY_IMAGE:$CI_COMMIT_SHA . - docker push $CI_REGISTRY_IMAGE:$CI_COMMIT_SHA test: image: node:14 stage: test script: - npm install - npm test deploy: image: kubectl:latest stage: deploy before_script: - kubectl config set-cluster k8s --server=$K8S_URL --certificate-authority=$K8S_CA_CERTIFICATE - kubectl config set-credentials admin --token=$K8S_TOKEN - kubectl config set-context default --cluster=k8s --user=admin - kubectl config use-context default script: - kubectl apply -f kubernetes/deployment.yaml - kubectl apply -f kubernetes/service.yaml - Create Kubernetes Deployment Manifests:Create Kubernetes deployment manifests (e.g.,
deployment.yaml,service.yaml) to define how your application should be deployed in Kubernetes.Example
deployment.yaml:apiVersion: apps/v1 kind: Deployment metadata: name: my-app spec: replicas: 3 selector: matchLabels: app: my-app template: metadata: labels: app: my-app spec: containers: - name: my-app image: your-registry/my-app:latest ports: - containerPort: 3000Example
service.yaml:apiVersion: v1 kind: Service metadata: name: my-app-service spec: selector: app: my-app ports: - protocol: TCP port: 80 targetPort: 3000 type: LoadBalancer - Use Helm to Manage Deployments (Optional):Use Helm to package and deploy your application. Create a Helm chart for your application and use Helm commands to deploy it to Kubernetes.
helm create my-app helm install my-app ./my-app
By following these steps, you can implement a Kubernetes CI/CD pipeline to automate the deployment of your applications.
Setting Up Your Git Repository and Dockerfile
The first step in building a Kubernetes CI/CD pipeline is setting up a Git repository and creating a Dockerfile. This section guides you through the process.
Setting Up Your Git Repository:
Create a Git repository for your application code. Structure the repository to include your source code, Dockerfile, Kubernetes manifests, and any other necessary configuration files. A typical repository structure might look like this:
my-app/??? src/ # Source code??? Dockerfile # Dockerfile??? kubernetes/ # Kubernetes manifests? ??? deployment.yaml? ??? service.yaml??? README.md # DocumentationInitialize a Git repository in the root directory:
git initgit add .git commit -m "Initial commit"Creating a Dockerfile:
A Dockerfile contains instructions for building a Docker image. Here are some best practices for writing efficient and secure Dockerfiles:
- Use a specific base image version to avoid unexpected changes.
- Use multi-stage builds to reduce the final image size.
- Avoid storing sensitive information in the Dockerfile.
- Use
.dockerignorefile to exclude unnecessary files from the image.
Here are example Dockerfiles for common application types:
Node.js:
FROM node:14-alpine AS builderWORKDIR /appCOPY package*.json ./RUN npm installCOPY . .RUN npm run buildFROM nginx:alpineCOPY --from=builder /app/dist /usr/share/nginx/htmlEXPOSE 80CMD ["nginx", "-g", "daemon off;"]Python:
FROM python:3.8-slim-busterWORKDIR /appCOPY requirements.txt .RUN pip install --no-cache-dir -r requirements.txtCOPY . .CMD ["python", "app.py"]Java:
FROM maven:3.6.3-jdk-11 AS builderWORKDIR /appCOPY pom.xml .COPY src ./srcRUN mvn clean installFROM openjdk:11-jre-slimWORKDIR /appCOPY --from=builder /app/target/*.jar app.jarCMD ["java", "-jar", "app.jar"]Versioning and Tagging in Git:
Use Git tags to mark releases. This allows you to easily identify and revert to previous versions if needed.
git tag -a v1.0.0 -m "Release v1.0.0"git push origin v1.0.0By following these guidelines, you can set up your Git repository and create a Dockerfile for your application, laying the foundation for a successful Kubernetes CI/CD pipeline.
Configuring Your CI Tool: Jenkins or GitLab CI
This section provides instructions on configuring either Jenkins or GitLab CI to automate builds, run tests, and push images to a container registry.
Option 1: Jenkins
- Install Jenkins:Follow the official Jenkins documentation to install Jenkins on your server or cloud environment.
- Install Required Plugins:Install the necessary plugins, such as:
- Git Plugin
- Docker Plugin
- Kubernetes Plugin
- Create a New Pipeline:Create a new pipeline in Jenkins and configure it to use a
Jenkinsfilefrom your Git repository. - Define Pipeline Stages in Jenkinsfile:Define the pipeline stages in your
Jenkinsfile. Here’s an example:pipeline { agent { docker { image 'node:14' } } stages { stage('Build') { steps { sh 'npm install' } } stage('Test') { steps { sh 'npm test' } } stage('Build Docker Image') { steps { sh 'docker build -t my-app .' } } stage('Push Docker Image') { steps { sh 'docker login -u "$DOCKER_USERNAME" -p "$DOCKER_PASSWORD"' sh 'docker push my-app' } } stage('Deploy to Kubernetes') { steps { sh 'kubectl apply -f kubernetes/deployment.yaml' sh 'kubectl apply -f kubernetes/service.yaml' } } } } - Configure Triggers:Configure the pipeline to trigger on Git commits by setting up a webhook in your Git repository.
- Set Up Environment Variables and Secrets:Set up environment variables and secrets in Jenkins to securely store sensitive information such as Docker credentials and Kubernetes API tokens.
Option 2: GitLab CI
- Create a
.gitlab-ci.ymlFile:Create a.gitlab-ci.ymlfile in the root of your Git repository. This file defines your CI/CD pipeline. - Define Pipeline Stages:Define the pipeline stages in your
.gitlab-ci.ymlfile. Here’s an example:stages: - build - test - deploy build: image: docker:latest stage: build services: - docker:dind before_script: - docker login -u "$CI_REGISTRY_USER" -p "$CI_REGISTRY_PASSWORD" $CI_REGISTRY script: - docker build -t $CI_REGISTRY_IMAGE:$CI_COMMIT_SHA . - docker push $CI_REGISTRY_IMAGE:$CI_COMMIT_SHA test: image: node:14 stage: test script: - npm install - npm test deploy: image: kubectl:latest stage: deploy before_script: - kubectl config set-cluster k8s --server=$K8S_URL --certificate-authority=$K8S_CA_CERTIFICATE - kubectl config set-credentials admin --token=$K8S_TOKEN - kubectl config set-context default --cluster=k8s --user=admin - kubectl config use-context default script: - kubectl apply -f kubernetes/deployment.yaml - kubectl apply -f kubernetes/service.yaml - Configure Environment Variables and Secrets:Configure environment variables and secrets in GitLab CI to securely store sensitive information.
By following these instructions, you can configure Jenkins or GitLab CI to automate your CI/CD pipeline.
Creating Kubernetes Deployment Manifests
Kubernetes deployment manifests are YAML files that define the desired state of your application in a Kubernetes cluster. This section guides you through the process of creating these manifests.
Types of Kubernetes Resources:
- Deployments: Manage the desired state of your application, guaranteeing that the specified number of replicas are running [12].
- Services: Expose your application to the network, providing a stable IP address and DNS name [13].
- Ingress: Manage external access to your services, typically by providing HTTP routing [14].
Example Deployment Manifest:
apiVersion: apps/v1kind: Deploymentmetadata: name: my-appspec: replicas: 3 selector: matchLabels: app: my-app template: metadata: labels: app: my-app spec: containers: - name: my-app image: your-registry/my-app:latest ports: - containerPort: 3000Example Service Manifest:
apiVersion: v1kind: Servicemetadata: name: my-app-servicespec: selector: app: my-app ports: - protocol: TCP port: 80 targetPort: 3000 type: LoadBalancerExample Ingress Manifest:
apiVersion: networking.k8s.io/v1kind: Ingressmetadata: name: my-app-ingressspec: rules: - host: myapp.example.com http: paths: - path: / pathType: Prefix backend: service: name: my-app-service port: number: 80Using Labels and Selectors:
Labels and selectors are important for managing deployments in Kubernetes. Labels are key-value pairs that are attached to resources, while selectors are used to select resources based on their labels. In the above examples, the app: my-app label is used to associate the deployment, service, and pods.
By creating these deployment manifests, you can define how your application should be deployed and managed in a Kubernetes cluster.
Managing Deployments with Helm
Helm simplifies the deployment and management of applications on Kubernetes. This section details how to use Helm to manage your deployments.
What are Helm Charts?
Helm uses a packaging format called charts. A Helm chart is a collection of files that describe a set of Kubernetes resources [8]. Charts allow you to package, version, and share your applications, making it easier to deploy them consistently across different environments [8].
Creating a Helm Chart:
To create a Helm chart, use the helm create command:
helm create my-appThis command creates a directory named my-app with the following structure:
my-app/??? Chart.yaml # Information about the chart??? values.yaml # Default values for the chart??? templates/ # Kubernetes manifest templates? ??? deployment.yaml? ??? service.yaml? ??? ...??? ...Packaging, Deploying, and Upgrading Applications with Helm:
- Customize the Chart:Modify the
templates/directory to define your Kubernetes resources. Use thevalues.yamlfile to define configurable parameters. - Package the Chart:Package the chart using the
helm packagecommand:helm package my-app - Install the Chart:Install the chart using the
helm installcommand:helm install my-app ./my-app-0.1.0.tgz - Upgrade the Chart:Upgrade the chart using the
helm upgradecommand:helm upgrade my-app ./my-app-0.2.0.tgz
Example Helm Chart:
Here’s an example of a simple Helm chart for a Node.js application:
Chart.yaml:
apiVersion: v2name: my-appdescription: A simple Node.js applicationtype: applicationversion: 0.1.0appVersion: "1.0"values.yaml:
replicaCount: 3image: repository: your-registry/my-app tag: latestservice: port: 80 targetPort: 3000templates/deployment.yaml:
apiVersion: apps/v1kind: Deploymentmetadata: name: {{ .Release.Name }}-deploymentspec: replicas: {{ .Values.replicaCount }} selector: matchLabels: app: {{ .Release.Name }} template: metadata: labels: app: {{ .Release.Name }} spec: containers: - name: {{ .Chart.Name }} image: "{{ .Values.image.repository }}:{{ .Values.image.tag }}" ports: - containerPort: {{ .Values.service.targetPort }}Benefits of Using Helm:
- Simplifies the deployment of complex applications
- Provides a consistent and repeatable deployment process
- Simplifies upgrades and rollbacks
- Allows you to share and reuse applications
By using Helm, you can simplify the management of your Kubernetes deployments and streamline your CI/CD pipeline.
Best Practices for Optimizing Your Kubernetes CI/CD Pipeline

Optimizing your Kubernetes CI/CD pipeline involves implementing several best practices to improve its efficiency, reliability, and security. This section outlines these practices and how to implement them.
- Infrastructure as Code (IaC):Manage your infrastructure using code, allowing you to automate the creation and management of your Kubernetes clusters. Tools like Terraform and CloudFormation enable you to define your infrastructure in code, making it easier to version, test, and deploy [15].
- Automated Testing Strategies:Implement automated testing at various stages of the pipeline, including:
- Unit Tests: Test individual components of your application in isolation [7].
- Integration Tests: Test the interaction between different components of your application [7].
- End-to-End Tests: Test the entire application workflow, from the user interface to the database [7].
- Security Considerations:Incorporate security checks into your pipeline to identify and address vulnerabilities early in the development cycle.
- Image Scanning: Scan your Docker images for vulnerabilities using tools like Clair and Anchore [16].
- Vulnerability Management: Implement a process for identifying, prioritizing, and addressing vulnerabilities in your application and infrastructure [17].
- Monitoring and Logging Practices:Implement monitoring and logging to track the performance and health of your application and infrastructure. Tools like Prometheus and Grafana can be used to monitor your Kubernetes deployments, while tools like Elasticsearch and Kibana can be used to collect and analyze logs [18, 19].
Real-World Examples and Case Studies:
Companies that have implemented these best practices have seen significant improvements in their CI/CD pipelines. For example, Netflix uses IaC to manage its cloud infrastructure, allowing it to deploy changes quickly and reliably [20]. Google uses automated testing to ensure the quality of its software, catching bugs early in the development cycle [21].
Kubegrade can assist in monitoring and optimizing your Kubernetes deployments. It provides tools for monitoring the performance and health of your applications, allowing you to identify and address issues quickly. By integrating Kubegrade into your CI/CD pipeline, you can ensure that your deployments are efficient, reliable, and secure.
Infrastructure as Code (IaC) for Kubernetes CI/CD
Infrastructure as Code (IaC) is the practice of managing and provisioning infrastructure through code, rather than through manual processes. This approach brings several benefits to managing Kubernetes infrastructure, including improved consistency, repeatability, and disaster recovery [15].
Principles of IaC:
- Version Control: Infrastructure code is stored in version control systems like Git, allowing you to track changes and collaborate on infrastructure configurations [3].
- Automation: Infrastructure provisioning and management are automated, reducing the risk of human error and improving efficiency.
- Idempotence: IaC tools ensure that applying the same configuration multiple times results in the same outcome, regardless of the initial state of the infrastructure.
- Declarative Configuration: Infrastructure is defined in a declarative manner, specifying the desired state rather than the steps to achieve it.
Using Terraform or Pulumi:
Tools like Terraform and Pulumi enable you to define and provision Kubernetes resources using code. Terraform uses a declarative configuration language, while Pulumi allows you to use general-purpose programming languages like Python and JavaScript.
Example Terraform Code for Creating a Kubernetes Cluster:
resource "google_container_cluster" "primary" { name = "my-cluster" location = "us-central1-a" initial_node_count = 3 node_config { machine_type = "n1-standard-1" }}Example Terraform Code for Creating a Kubernetes Namespace:
resource "kubernetes_namespace" "example" { metadata { name = "my-namespace" }}Example Terraform Code for Creating a Kubernetes Deployment:
resource "kubernetes_deployment" "example" { metadata { name = "my-app-deployment" namespace = "my-namespace" } spec { replicas = 3 selector { match_labels = { app = "my-app" } } template { metadata { labels = { app = "my-app" } } spec { container { image = "your-registry/my-app:latest" name = "my-app" port { container_port = 80 } } } } }}Versioning and Automating Infrastructure Changes:
Store your IaC code in a version control system and use a CI/CD pipeline to automate infrastructure changes. This allows you to test and validate changes before applying them to your production environment.
Benefits of IaC:
- Improved Consistency: IaC ensures that your infrastructure is configured consistently across different environments.
- Repeatability: IaC allows you to easily recreate your infrastructure, making it easier to recover from disasters.
- Disaster Recovery: IaC simplifies disaster recovery by allowing you to quickly provision new infrastructure in the event of a failure.
By implementing IaC, you can improve the management of your Kubernetes infrastructure and streamline your CI/CD pipeline.
Automated Testing Strategies: Unit, Integration, and End-to-End
Automated testing is a key part of a successful Kubernetes CI/CD pipeline. It helps guarantee code quality, prevent regressions, and reduce the risk of deploying faulty code to production [7]. This section outlines different automated testing strategies, including unit tests, integration tests, and end-to-end tests.
Unit Tests:
Unit tests verify the functionality of individual components or functions in isolation. They are typically written by developers and are run frequently during the development process. Unit tests should be fast and focused, covering all possible scenarios and edge cases [7].
Example:
If you have a function that calculates the sum of two numbers, a unit test would verify that the function returns the correct sum for different inputs.
Tools:
- Jest (JavaScript)
- JUnit (Java)
- pytest (Python)
Integration Tests:
Integration tests verify the interaction between different components or services. They guarantee that the components work together correctly. Integration tests are more complex than unit tests and may require setting up test environments [7].
Example:
If you have a web application that interacts with a database, an integration test would verify that the application can successfully connect to the database and perform CRUD operations.
Tools:
- Testcontainers
- Mockito
- Spring Test
End-to-End Tests:
End-to-end tests verify the entire application workflow, from the user interface to the database. They simulate real user interactions and guarantee that the application functions correctly from start to finish. End-to-end tests are the most complex and time-consuming type of test, but they provide the highest level of confidence in the application’s functionality [7].
Example:
An end-to-end test for an e-commerce application would simulate a user browsing the catalog, adding items to the cart, and completing the checkout process.
Tools:
- Selenium
- Cypress
- Puppeteer
Importance of Comprehensive Testing:
Comprehensive testing is important for guaranteeing code quality and preventing regressions. By implementing a combination of unit tests, integration tests, and end-to-end tests, you can catch bugs early in the development cycle and reduce the risk of deploying faulty code to production.
Security Considerations: Image Scanning and Vulnerability Management
Security is a key aspect of any Kubernetes CI/CD pipeline. Integrating security checks into the pipeline helps prevent vulnerable code from reaching production. This section details security best practices, focusing on image scanning and vulnerability management [16, 17].
Image Scanning:
Image scanning involves analyzing container images for known vulnerabilities. Tools like Clair and Trivy can be used to scan images and identify potential security issues. These tools compare the software packages in the image against vulnerability databases, such as the National Vulnerability Database (NVD) [16].
Example using Trivy:
trivy image your-registry/my-app:latestThis command scans the your-registry/my-app:latest image for vulnerabilities and outputs a report listing any identified issues.
Vulnerability Management:
Vulnerability management involves identifying, prioritizing, and remediating security issues in container images and Kubernetes deployments. This process includes:
- Identifying Vulnerabilities: Use image scanning tools to identify vulnerabilities in your container images.
- Prioritizing Vulnerabilities: Prioritize vulnerabilities based on their severity and potential impact.
- Remediating Vulnerabilities: Remediate vulnerabilities by updating software packages, applying security patches, or reconfiguring your application.
- Verifying Remediation: Verify that the vulnerabilities have been successfully remediated by rescanning the image.
Integrating Security Checks into the CI/CD Pipeline:
Integrate security checks into your CI/CD pipeline to automatically scan images for vulnerabilities and prevent vulnerable code from reaching production. This can be done by adding a security scanning stage to your pipeline that runs after the image is built and before it is deployed.
Example GitLab CI configuration:
stages: - build - test - security - deploysecurity: image: aquasec/trivy:latest stage: security script: - trivy image --exit-code 0 --severity HIGH your-registry/my-app:latest || trivy image --exit-code 1 --severity CRITICAL your-registry/my-app:latest artifacts: reports: container_scanning: gl-container-scanning-report.jsonBy integrating security checks into your CI/CD pipeline, you can identify and address vulnerabilities, reducing the risk of security incidents and improving the overall security posture of your Kubernetes deployments.
Monitoring and Logging Practices for Kubernetes CI/CD
Monitoring and logging are important for tracking the performance and health of your Kubernetes CI/CD pipeline. Implementing effective monitoring and logging practices allows you to identify and resolve issues quickly, guaranteeing a smooth and reliable deployment process [18, 19].
Using Prometheus and Grafana:
Prometheus is a popular open-source monitoring solution that collects metrics from your Kubernetes cluster and applications. Grafana is a data visualization tool that allows you to create dashboards and visualize the metrics collected by Prometheus [18, 19].
Example Prometheus configuration for monitoring Kubernetes deployments:
apiVersion: apps/v1kind: Deploymentmetadata: name: prometheusspec: replicas: 1 selector: matchLabels: app: prometheus template: metadata: labels: app: prometheus spec: containers: - name: prometheus image: prom/prometheus:latest ports: - containerPort: 9090 volumeMounts: - name: prometheus-config mountPath: /etc/prometheus volumes: - name: prometheus-config configMap: name: prometheus-configCollecting and Analyzing Logs:
Collecting and analyzing logs from your Kubernetes applications and infrastructure is important for troubleshooting issues and identifying performance bottlenecks. Tools like Elasticsearch, Fluentd, and Kibana (EFK stack) can be used to collect, process, and visualize logs [19].
Example Fluentd configuration for collecting logs from Kubernetes pods:
@type tail path /var/log/containers/*.log pos_file /var/log/fluentd-kubernetes.pos tag kubernetes.* read_from_head true @type json @type elasticsearch host elasticsearch port 9200 index_name kubernetes flush_interval 5sImportance of Monitoring and Logging:
Monitoring and logging are important for:
- Identifying performance bottlenecks
- Troubleshooting issues
- Detecting security incidents
- Tracking resource utilization
Kubegrade can assist in monitoring and optimizing your Kubernetes deployments. It provides tools for monitoring the performance and health of your applications, allowing you to identify and address issues quickly. By integrating Kubegrade into your CI/CD pipeline, you can guarantee that your deployments are efficient and reliable.
Conclusion
Implementing a Kubernetes CI/CD pipeline offers significant benefits, including faster deployment speeds, improved code quality, and increased efficiency. By automating the software delivery process, teams can release new features and bug fixes more quickly and reliably.
This article covered the key components of a Kubernetes CI/CD pipeline, including version control systems, build tools, containerization, image registries, testing frameworks, and deployment tools. It also provided a step-by-step guide to building a pipeline and outlined best practices for optimizing its performance, security, and reliability.
It is recommended that you implement these strategies in your own Kubernetes environments to realize these benefits. By automating your deployments and integrating security checks into your pipeline, you can improve the overall quality and security of your applications.
Kubegrade simplifies Kubernetes management and enables smooth CI/CD workflows. Its platform offers secure and automated K8s operations, enabling monitoring, upgrades, and optimization.
Explore Kubegrade further for your Kubernetes needs and discover how it can streamline your deployments and improve your overall efficiency.

