


A Comprehensive Guide to Kubernetes Upgrade Process

by Tim
November 4, 2025
Upgrading Kubernetes is important for accessing new features, security patches, and performance improvements. However, it can be a complex operation requiring careful planning and execution. The process involves updating various components, including the API server, controller manager, scheduler, kubelet, and kube-proxy. A successful upgrade makes sure the system continues to function smoothly, minimizing disruptions to running applications.
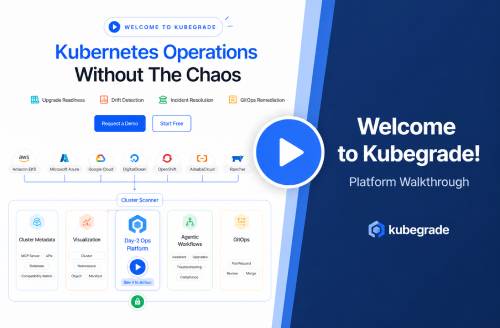
This article provides a comprehensive guide to the Kubernetes upgrade process, outlining the steps involved and offering best practices for a smooth transition. Kubegrade simplifies Kubernetes cluster management with secure, adaptable, and automated K8s operations, making upgrades and optimization more manageable.
Planning and Preparation
Before starting the upgrade, thorough planning is crucial. This involves several key steps to make sure a smooth and successful process:
Review Release Notes and Change Logs
It is important to carefully examine the Kubernetes release notes and change logs to understand the changes, new features, and any breaking changes or deprecations in the new version.
Compatibility Checks
Verify that all components, add-ons, third-party tools, and custom applications are compatible with the new Kubernetes version. Check the compatibility of CoreDNS, kube-proxy, VPC CNI, and storage drivers.
Test in Non-Production Environments
Testing the upgrade in non-production environments helps identify and resolve issues before applying changes to the production cluster. This can be achieved by building a continuous integration workflow to test application behavior against the new Kubernetes version.
Backup etcd
Take a snapshot of etcd, the key-value store for cluster data, to ensure a copy of the production cluster data is available in case of a loss of all master nodes.
Make Sure a Downgrade Path for etcd
Confirm that the newer version of etcd supports rolling back to the current version. This provides a fallback option if the newer version proves unstable or incompatible with other cluster components.
Upgrade Process
The Kubernetes upgrade process typically involves the following steps:
Upgrading Control Plane Nodes
The control plane nodes should be upgraded first. This involves:
- Draining the node to evict all pods.
- Upgrading kubeadm, kubelet, and kubectl.
- Uncordoning the node to make it schedulable again.
The command kubeadm upgrade apply is used to upgrade the control plane.
Upgrading Worker Nodes
After upgrading the control plane, the worker nodes need to be upgraded. This involves:
- Draining the node.
- Upgrading kubelet and kube-proxy.
- Restarting the kubelet service.
- Uncordoning the node.
The command kubeadm upgrade node is used to upgrade the worker nodes.
Verifying the Upgrade
After upgrading all nodes, verify the status of the cluster using kubectl get nodes to make sure all nodes are in the Ready state.
Best Practices
To make sure a smooth Kubernetes upgrade, consider the following best practices:
- Incremental Upgrades: Upgrade one minor version at a time to mitigate risks and make sure stability.
- Monitor the Upgrade: Closely monitor the upgrade process to identify any issues promptly. Use tools like Prometheus and Grafana to monitor cluster health and performance during and after the upgrade.
- Develop a Disaster Recovery Plan: Have a well-defined disaster recovery plan to quickly restore the cluster to a stable state if something goes wrong.
- Automated Upgrades: Kubegrade provides automated solutions for Kubernetes upgrades, simplifying the process and minimizing downtime.
Kubegrade: Simplifying Kubernetes Upgrades
Kubegrade simplifies Kubernetes cluster management by providing secure, adaptable, and automated K8s operations. Its features include:
- Automated Upgrades: Kubegrade automates the upgrade process, reducing the risk of human error and minimizing downtime.
- Monitoring and Optimization: Kubegrade provides tools to monitor cluster health and performance, making sure optimal resource utilization.
- Secure Operations: Kubegrade makes sure secure K8s operations, protecting your cluster from vulnerabilities and exploits.
Conclusion
Upgrading Kubernetes is a critical task that requires careful planning and execution. By following the steps and best practices outlined in this guide, organizations can make sure a smooth transition to the latest version, taking advantage of new features and security enhancements. Kubegrade offers automated solutions to simplify the upgrade process, making it more manageable and less prone to errors. With Kubegrade, organizations can focus on their core business while making sure their Kubernetes infrastructure remains up-to-date and secure.
Key Takeaways
- Kubernetes upgrades are essential for security, performance, and new features, but can be complex and risky.
- Preparation is crucial, including backing up data, assessing cluster health, reviewing release notes, and creating a rollback plan.
- Draining nodes before upgrading is necessary to safely evict pods and prevent scheduling new ones.
- Upgrading the control plane involves updating master nodes, while upgrading worker nodes requires updating kubelet and kube-proxy.
- Monitoring the upgrade progress and troubleshooting issues are vital for a successful outcome.
- Rolling updates and blue/green deployments minimize downtime during upgrades.
- Pod Disruption Budgets (PDBs) protect applications by ensuring a minimum number of available pods during upgrades.
Table of Contents
- Planning and Preparation
- Upgrade Process
- Best Practices
- Kubegrade: Simplifying Kubernetes Upgrades
- Conclusion
- Introduction to Kubernetes Upgrades
- Preparing for a Kubernetes Upgrade
- Step-by-Step Kubernetes Upgrade Guide
- Post-Upgrade Verification and Testing
- Best Practices for Minimizing Downtime During Upgrades
- Conclusion
- Frequently Asked Questions
“`html
Introduction to Kubernetes Upgrades
Kubernetes has become a cornerstone of modern application deployment, offering a platform for managing containerized workloads at scale . Its ability to automate deployment, scaling, and operations of application containers across clusters of hosts makes it an invaluable tool for organizations seeking agility and efficiency .
The Kubernetes upgrade process is vital for several reasons. Upgrading provides access to the latest security patches, performance improvements, and new features that can improve application capabilities and operational efficiency . Staying current with Kubernetes versions helps to mitigate potential vulnerabilities and maintain a competitive edge by leveraging the newest functionalities .
However, Kubernetes upgrades can be intricate and challenging. Potential issues include downtime during the upgrade, compatibility problems between different Kubernetes components, and the risk of application disruptions . These challenges can be concerning for organizations, potentially leading to delays or reluctance to upgrade. Kubegrade addresses these intricacies by providing automation and monitoring tools that streamline the Kubernetes upgrade process, allowing for a smoother, more predictable transition .
“““html
Preparing for a Kubernetes Upgrade
Before starting a Kubernetes upgrade process, thorough preparation is crucial to minimize risks and avoid potential disruptions. The following steps will help prepare for a smooth transition:
Back Up Critical Data
Data loss can be catastrophic, so backing up all critical data is paramount. This includes etcd data, Kubernetes resource definitions, and persistent volumes. Regularly test backups to confirm their integrity and recoverability. For example, use etcdctl snapshot save to back up etcd data .
Assess Current Cluster Health
Evaluate the current state of the Kubernetes cluster. Check the health of all nodes, pods, and services. Address any existing issues before proceeding with the upgrade. Use kubectl get nodes to check node statuses and kubectl get pods --all-namespaces to monitor pod health .
Review Release Notes
Thoroughly review the release notes for the target Kubernetes version. Understand the new features, deprecations, and any known issues. Pay close attention to breaking changes that may impact applications or infrastructure. The Kubernetes website provides detailed release notes for each version .
Compatibility Checks
Verify the compatibility of applications and dependencies with the new Kubernetes version. Check if the current application versions are supported on the target Kubernetes version. Update applications and dependencies as needed to ensure compatibility. This may involve testing applications in a staging environment that mirrors the production setup .
Create a Rollback Plan
Develop a detailed rollback plan in case the upgrade fails or introduces unforeseen issues. The rollback plan should include steps to revert to the previous Kubernetes version and restore the cluster to its pre-upgrade state. Test the rollback plan to confirm its effectiveness. Document all steps and commands required for the rollback procedure .
Kubegrade Assistance
Kubegrade helps with pre-upgrade assessments and compatibility testing. It automates the process of checking cluster health, reviewing release notes, and verifying application compatibility. Kubegrade also assists in creating and testing rollback plans, providing a comprehensive solution for managing the Kubernetes upgrade process .
Checklist for Kubernetes Upgrade Preparation:
- Backup etcd data and Kubernetes resource definitions.
- Assess the health of all nodes, pods, and services.
- Review release notes for the target Kubernetes version.
- Verify application and dependency compatibility.
- Create and test a rollback plan.
- Use Kubegrade for automated assessments and testing.
“““html
Backing Up Your Kubernetes Cluster
Backing up a Kubernetes cluster before an upgrade is vital for data protection and disaster recovery. A comprehensive backup strategy safeguards against data loss or corruption during the upgrade process, allowing for a quick return to a stable state if issues arise. There are two primary areas to think about when backing up a Kubernetes cluster: etcd data and application data.
Etcd Backups
Etcd is Kubernetes’ primary datastore, containing all cluster state and configuration data. Backing up etcd is key for preserving the cluster’s overall state. Here?s how to back up etcd:
- Using etcdctl: The
etcdctlcommand-line tool can create snapshots of the etcd data. Use the following command:
etcdctl snapshot save snapshot.db --endpoints=<etcd_endpoints> --cacert=<path_to_ca_cert> --cert=<path_to_cert> --key=<path_to_key> - Replace
<etcd_endpoints>with the etcd endpoint URLs, and provide the paths to the CA certificate, client certificate, and key if using TLS authentication.
- Scheduling Backups: Automate etcd backups using cron jobs or similar scheduling tools to ensure regular data protection.
Application Data Backups
Application data includes persistent volumes, databases, and any other data stored by applications running on the cluster. Different methods can back up this data, depending on the storage solution used.
- Velero: Velero is an open-source tool for backing up and restoring Kubernetes resources and persistent volumes. Here?s how to use Velero:
velero backup create my-backup --include-namespaces <namespace> --default-volumes-to-fs-backup - This command creates a backup of all resources in the specified namespace, including persistent volumes.
- Volume Snapshots: Many cloud providers offer volume snapshot features for persistent volumes. Create snapshots of the volumes using the cloud provider’s tools or Kubernetes StorageClass parameters.
- Database Backups: For databases running in the cluster, use the database’s native backup tools (e.g.,
pg_dumpfor PostgreSQL,mongodumpfor MongoDB) to create backups. Store these backups in a secure location, separate from the cluster.
Kubegrade simplifies the backup process by providing automated backup schedules and secure storage options. It integrates with Velero and other backup tools, making it easier to manage and protect Kubernetes cluster data. By automating these tasks, Kubegrade reduces the risk of human error and helps make sure that backups are performed regularly and consistently.
“““html
Assessing Cluster Health and Compatibility
Before beginning a Kubernetes upgrade, evaluating the cluster’s health and compatibility is important. This assessment identifies potential issues that could cause upgrade failures or application disruptions. A healthy cluster ensures a smoother upgrade process and minimizes the risk of unexpected problems.
Checking Node Status
Verify that all nodes in the cluster are in a healthy state. Use kubectl get nodes to check the status of each node. Look for nodes in the Ready state. Investigate any nodes that are NotReady or have other issues.
kubectl get nodes NAME STATUS ROLES AGE VERSION node1 Ready <none> 30d v1.25.0 node2 Ready <none> 30d v1.25.0 node3 NotReady <none> 30d v1.25.0 If a node is NotReady, describe the node to get more details about the issue:
kubectl describe node node3 Address any node-related problems before proceeding with the upgrade.
Monitoring Resource Utilization
Monitor CPU, memory, and disk utilization across the cluster. High resource utilization can lead to performance issues during the upgrade. Use tools like kubectl top or monitoring solutions like Prometheus to track resource usage.
kubectl top node NAME CPU(cores) CPU% MEMORY(bytes) MEMORY% node1 500m 25% 2Gi 50% node2 600m 30% 3Gi 75% Identify any resource bottlenecks and take corrective actions, such as scaling up resources or optimizing application configurations.
Identifying Potential Issues
Check for any ongoing issues or errors in the cluster. Review logs for pods, deployments, and other Kubernetes resources. Look for error messages, warnings, or other anomalies that could indicate problems.
kubectl logs pod/my-app-pod -n my-namespace Address any identified issues before starting the upgrade.
Compatibility Checks
Verify the compatibility of applications, APIs, and dependencies with the target Kubernetes version. Check if the current application versions are supported on the new Kubernetes version. Review the Kubernetes release notes for any breaking changes or deprecations that may impact applications.
- API Compatibility: Check for deprecated APIs that are used by applications. Replace deprecated APIs with the supported alternatives.
- Application Dependencies: Verify that application dependencies, such as libraries and frameworks, are compatible with the new Kubernetes version.
Kubegrade helps automate health checks and compatibility assessments. It provides tools to monitor node status, track resource utilization, and identify potential issues. Kubegrade also assists in verifying application compatibility, making it easier to prepare for a Kubernetes upgrade. By automating these tasks, Kubegrade reduces the risk of overlooking critical issues and helps ensure a smooth upgrade process.
“““html
Creating a Rollback Plan
A rollback plan is a critical component of preparing for a Kubernetes upgrade. In the event of an upgrade failure or the discovery of critical issues post-upgrade, a well-defined rollback plan allows for a quick and efficient return to the previous, stable state. This minimizes downtime and ensures business continuity.
Documenting the Current Cluster State
Before starting the upgrade, document the current state of the Kubernetes cluster. This includes:
- Kubernetes Version: Record the current Kubernetes version using
kubectl version. - Node Configuration: Capture the configuration of each node, including operating system, container runtime, and kubelet version.
- Application Deployments: Document the current state of all application deployments, including the number of replicas, resource limits, and container images.
- Network Configuration: Record the network configuration, including CNI plugin, network policies, and service configurations.
Backing Up Configurations
Back up all Kubernetes resource definitions and configurations. This includes:
- etcd Data: Create a snapshot of the etcd data, as described in the “Backing Up Your Kubernetes Cluster” section.
- YAML Files: Back up all YAML files used to define Kubernetes resources, such as deployments, services, and configmaps.
kubectl get deployment my-app -n my-namespace -o yaml > my-app-deployment.yaml - Helm Charts: If using Helm, back up the Helm charts and values files used to deploy applications.
Testing the Rollback Procedure
Before starting the upgrade, test the rollback procedure to ensure it works as expected. This involves:
- Simulating a Failure: Simulate an upgrade failure in a test environment.
- Reverting to the Previous Version: Use the backed-up configurations and data to revert to the previous Kubernetes version.
- Verifying Application Functionality: Verify that all applications are functioning correctly after the rollback.
Reverting to the Previous Version
If a rollback is necessary, follow these steps:
- Stop the Upgrade: Halt the upgrade process immediately.
- Restore etcd Data: Restore the etcd snapshot taken before the upgrade.
etcdctl snapshot restore snapshot.db --data-dir=/var/lib/etcd --endpoints=<etcd_endpoints> --cacert=<path_to_ca_cert> --cert=<path_to_cert> --key=<path_to_key> - Revert Node Configurations: Revert the node configurations to the previous state. This may involve downgrading the kubelet version and restoring the original container runtime configuration.
- Restore Application Deployments: Restore the application deployments using the backed-up YAML files or Helm charts.
kubectl apply -f my-app-deployment.yaml - Verify Application Functionality: Verify that all applications are functioning correctly after the rollback.
Kubegrade facilitates rollback operations with automated snapshots and version control. It automatically backs up configurations and provides tools to quickly revert to the previous Kubernetes version. By automating these tasks, Kubegrade reduces the risk of human error and helps ensure a smooth and reliable rollback process.
“““html
Step-by-Step Kubernetes Upgrade Guide
This section provides a detailed guide on performing a Kubernetes upgrade process. The steps include draining nodes, upgrading the control plane, and upgrading worker nodes. This guide includes specific commands and configurations to help with a smooth transition. Note that Kubegrade automates many of these steps, reducing manual effort and potential errors.
1. Draining Nodes
Before upgrading a node, it needs to be drained to evict all pods safely. Draining a node prevents new pods from being scheduled on it and evicts existing pods. Use the following command:
kubectl drain <node-name> --ignore-daemonsets --delete-emptydir-data --force <node-name>: The name of the node to drain.--ignore-daemonsets: Ignore DaemonSet-managed pods.--delete-emptydir-data: Delete data in emptyDir volumes.--force: Force drain even if there are unresponsive pods.
After running the command, verify that all pods have been evicted from the node using kubectl get pods -o wide --all-namespaces. Make sure the drained node shows no running pods (excluding DaemonSet pods).
2. Upgrading the Control Plane
The control plane consists of the master nodes that manage the Kubernetes cluster. The upgrade process typically starts with the control plane nodes.
2.1. Upgrade the First Master Node
Connect to the first master node and upgrade the Kubernetes components (kube-apiserver, kube-controller-manager, kube-scheduler). The specific steps depend on the method used to deploy Kubernetes (e.g., kubeadm, kops, or a managed service).
Example using kubeadm:
- Uncordon the node:
kubectl uncordon <node-name> - Upgrade kubeadm:
apt update && apt install -y kubeadm=<target-version> - Plan the upgrade:
kubeadm upgrade plan - Apply the upgrade:
kubeadm upgrade apply <target-version> - Upgrade the kubelet and kubectl:
apt install -y kubelet=<target-version> kubectl=<target-version> systemctl restart kubelet 2.2. Upgrade Remaining Master Nodes
Repeat the process for the remaining master nodes. After upgrading each master node, verify its status using kubectl get nodes. Make sure all master nodes are in the Ready state and running the target Kubernetes version.
3. Upgrading Worker Nodes
After upgrading the control plane, upgrade the worker nodes. This involves draining the node, upgrading the kubelet, and uncordoning the node.
- Drain the node:
kubectl drain <node-name> --ignore-daemonsets --delete-emptydir-data --force - Upgrade the kubelet and kubectl:
apt update && apt install -y kubelet=<target-version> kubectl=<target-version> systemctl restart kubelet - Uncordon the node:
kubectl uncordon <node-name> - Verify the node status:
kubectl get nodes Make sure the node is in the Ready state and running the target Kubernetes version.
4. Monitoring the Upgrade Progress
Monitor the upgrade progress by checking the status of nodes, pods, and services. Use kubectl get nodes, kubectl get pods --all-namespaces, and kubectl get services --all-namespaces to monitor the cluster’s health.
Also, monitor the logs of Kubernetes components (kube-apiserver, kube-controller-manager, kube-scheduler, and kubelet) for any errors or warnings.
5. Troubleshooting Common Issues
- Node NotReady: If a node is not in the
Readystate, check the kubelet logs for errors. Common issues include network connectivity problems, resource exhaustion, or kubelet configuration errors. - Pod Eviction Failures: If pods fail to evict during the draining process, force the drain operation using the
--forceflag. - API Incompatibility: If applications fail after the upgrade, check for API incompatibilities. Update the application configurations to use the supported APIs.
Kubegrade automates these steps, reducing manual effort and potential errors. It provides a user-friendly interface to manage the Kubernetes upgrade process, monitor progress, and troubleshoot issues. Kubegrade also automates node draining, control plane upgrades, and worker node upgrades, helping with a smooth and efficient transition.
“““html
Draining Nodes for Upgrade
Before upgrading a Kubernetes node, it is vital to drain it. Draining a node involves safely evicting all pods running on the node, preventing new pods from being scheduled there. This process minimizes disruption to applications and helps with a smooth upgrade. The primary tool for draining nodes is kubectl drain.
Using kubectl drain
The kubectl drain command evicts all pods from a node while respecting application availability. Here?s the basic syntax:
kubectl drain <node-name> [options] <node-name>: Specifies the name of the node to drain.[options]: Includes various options to customize the draining process.
Commonly used options include:
--ignore-daemonsets: Ignores pods managed by DaemonSets. DaemonSets typically run one pod per node and are key for cluster functionality (e.g., logging, monitoring).--delete-emptydir-data: Deletes data inemptyDirvolumes.emptyDirvolumes provide temporary storage to pods.--force: Forces the drain operation even if there are pods that cannot be evicted. Use this option with caution, as it may lead to data loss or application disruption.--grace-period=<seconds>: Specifies the grace period for pod termination. The default is 30 seconds.--timeout=<seconds>: Specifies the total time to wait for the drain to complete.
Handling Different Types of Workloads
- Stateless Applications: Stateless applications can be drained without significant concern, as they do not store persistent data on the node.
- Stateful Applications: Stateful applications require careful handling to avoid data loss or corruption. Make sure that the application’s data is properly replicated or backed up before draining the node.
- DaemonSets: DaemonSet-managed pods are typically ignored during the drain operation, as they are key for cluster functionality.
Drain Commands and Strategies
Here are some practical examples of drain commands and strategies:
- Basic Drain Command:
kubectl drain node1 --ignore-daemonsets --delete-emptydir-data This command drains node1, ignoring DaemonSet-managed pods and deleting data in emptyDir volumes.
- Forceful Drain Command:
kubectl drain node2 --ignore-daemonsets --delete-emptydir-data --force --grace-period=10 This command forcefully drains node2, even if there are unresponsive pods, setting a grace period of 10 seconds for pod termination.
- Draining Multiple Nodes:
kubectl get nodes -l role=worker -o name | xargs kubectl drain --ignore-daemonsets --delete-emptydir-data This command drains all nodes with the label role=worker.
Minimizing Disruption
To minimize disruption during the drain process:
- Use Pod Disruption Budgets (PDBs): PDBs specify the minimum number of pod replicas that must be available at any time. This makes sure that applications remain available during the drain operation.
- Monitor Application Health: Continuously monitor the health of applications during the drain process to detect and address any issues promptly.
By following these steps, you can safely and effectively drain nodes as part of the Kubernetes upgrade process, minimizing disruption and helping with a smooth transition.
“““html
Upgrading the Control Plane
The control plane is the heart of a Kubernetes cluster, managing and coordinating all activities. Upgrading the control plane involves updating the core components: the API server, scheduler, and controller manager. The upgrade method depends on how the Kubernetes cluster was initially deployed (e.g., using kubeadm, kops, or a cloud provider-managed service).
Methods for Upgrading the Control Plane
- kubeadm: A popular tool for bootstrapping Kubernetes clusters. It simplifies the upgrade process by providing commands to upgrade each control plane component.
- Cloud Provider-Managed Services (e.g., GKE, EKS, AKS): Cloud providers offer managed Kubernetes services that automate control plane upgrades. The specific steps vary depending on the provider.
Upgrading the Control Plane with kubeadm
Here?s a detailed guide on upgrading the control plane using kubeadm:
- Upgrade kubeadm: On the first master node, upgrade the kubeadm package to the target version.
apt update && apt install -y kubeadm=<target-version> - Plan the Upgrade: Use
kubeadm upgrade planto check the available upgrade versions and identify any potential issues.
kubeadm upgrade plan - Apply the Upgrade: Apply the upgrade using
kubeadm upgrade apply, specifying the target version.
kubeadm upgrade apply <target-version> - Upgrade the kubelet and kubectl: Upgrade the kubelet and kubectl packages on the master node.
apt install -y kubelet=<target-version> kubectl=<target-version> - Restart the kubelet: Restart the kubelet service to apply the changes.
systemctl restart kubelet - Repeat for Remaining Master Nodes: Repeat the process on the remaining master nodes, one at a time.
Upgrading the Control Plane with Cloud Provider-Managed Services
Cloud providers typically offer a simplified process for upgrading the control plane. For example:
- Google Kubernetes Engine (GKE): Use the GKE console or the
gcloudcommand-line tool to initiate the upgrade. GKE automates the upgrade process, minimizing manual intervention. - Amazon Elastic Kubernetes Service (EKS): Use the EKS console or the
aws eks update-cluster-versioncommand to upgrade the cluster. EKS manages the control plane upgrade, providing high availability. - Azure Kubernetes Service (AKS): Use the AKS portal or the
az aks upgradecommand to upgrade the cluster. AKS automates the upgrade process, providing a seamless experience.
Verifying the Control Plane Upgrade
After upgrading the control plane, verify that all components are running the target version. Use kubectl version to check the version of the API server, scheduler, and controller manager.
kubectl version Also, check the status of the control plane components using kubectl get pods -n kube-system. Make sure that all control plane pods are in the Running state.
Kubegrade simplifies control plane upgrades with automated procedures. It automates the steps involved in upgrading the API server, scheduler, and controller manager, reducing manual effort and potential errors. Kubegrade also provides a user-friendly interface to monitor the upgrade progress and troubleshoot any issues.
“““html
Upgrading Worker Nodes
Worker nodes are the machines in a Kubernetes cluster that run the applications. Upgrading worker nodes involves updating the kubelet and kube-proxy components. The upgrade method depends on how the Kubernetes cluster was initially deployed (e.g., using kubeadm, node pools, or custom scripts).
Methods for Upgrading Worker Nodes
- kubeadm: Can upgrade worker nodes by updating the kubelet and kube-proxy components.
- Node Pools (e.g., GKE, EKS, AKS): Cloud providers offer node pools that simplify worker node upgrades. Node pools allow for rolling updates, minimizing disruption to applications.
- Custom Scripts: Some organizations use custom scripts to automate worker node upgrades. These scripts typically involve draining the node, updating the components, and uncordoning the node.
Upgrading Worker Nodes with kubeadm
Here?s a detailed guide on upgrading worker nodes using kubeadm:
- Drain the Node: Drain the worker node to evict all pods safely.
kubectl drain <node-name> --ignore-daemonsets --delete-emptydir-data --force - Upgrade the kubelet and kubectl: Upgrade the kubelet and kubectl packages on the worker node.
apt update && apt install -y kubelet=<target-version> kubectl=<target-version> systemctl restart kubelet - Uncordon the Node: Uncordon the worker node to allow new pods to be scheduled on it.
kubectl uncordon <node-name> - Verify the Node Status: Verify that the worker node is in the
Readystate and running the target Kubernetes version.
kubectl get nodes Upgrading Worker Nodes with Node Pools
Cloud providers offer node pools that simplify worker node upgrades. For example:
- Google Kubernetes Engine (GKE): Use the GKE console or the
gcloudcommand-line tool to upgrade the node pool. GKE automates the upgrade process, performing rolling updates to minimize disruption. - Amazon Elastic Kubernetes Service (EKS): Use the EKS console or the
aws eks update-nodegroup-versioncommand to upgrade the node group. EKS manages the worker node upgrade, providing high availability. - Azure Kubernetes Service (AKS): Use the AKS portal or the
az aks nodepool upgradecommand to upgrade the node pool. AKS automates the upgrade process, providing a seamless experience.
Verifying the Worker Node Upgrade
After upgrading the worker nodes, verify that all nodes are running the target version. Use kubectl get nodes to check the version of the kubelet on each node.
kubectl get nodes -o wide Also, check the status of the worker nodes using kubectl get pods --all-namespaces. Make sure that all pods are running correctly on the upgraded nodes.
Kubegrade automates worker node upgrades with rolling updates. It automates the steps involved in draining the node, upgrading the kubelet and kube-proxy, and uncordoning the node, reducing manual effort and potential errors. Kubegrade also provides a user-friendly interface to monitor the upgrade progress and troubleshoot any issues.
“““html
Monitoring the Upgrade Progress and Troubleshooting
During a Kubernetes upgrade, monitoring progress and quickly addressing issues are key for a successful outcome. Several tools and techniques can track the upgrade status and troubleshoot common problems.
Tools and Techniques for Monitoring
- kubectl: The command-line tool provides real-time information about the status of nodes, pods, and services.
- Dashboards (e.g., Kubernetes Dashboard, Grafana): Dashboards offer a visual representation of the cluster’s health and performance.
- Logging Systems (e.g., Elasticsearch, Fluentd, Kibana): Logging systems collect and analyze logs from Kubernetes components, helping identify errors and anomalies.
Using kubectl for Monitoring
Here are some useful kubectl commands for monitoring the upgrade progress:
- Check Node Status:
kubectl get nodes This command displays the status of all nodes in the cluster. Look for nodes in the Ready state.
- Check Pod Status:
kubectl get pods --all-namespaces This command displays the status of all pods in all namespaces. Look for pods in the Running or Completed state.
- Check Service Status:
kubectl get services --all-namespaces This command displays the status of all services in all namespaces. Verify that services are accessible and functioning correctly.
- Check Upgrade History:
kubectl rollout history deployment/<deployment-name> -n <namespace> This command displays the rollout history of a deployment, including the status of each revision.
Troubleshooting Common Issues
- Node NotReady: If a node is not in the
Readystate, check the kubelet logs for errors. Common causes include network connectivity problems, resource exhaustion, or kubelet configuration errors.
journalctl -u kubelet -f - Pod Eviction Failures: If pods fail to evict during the draining process, force the drain operation using the
--forceflag. Check the pod logs for errors.
kubectl logs pod/<pod-name> -n <namespace> - API Incompatibility: If applications fail after the upgrade, check for API incompatibilities. Update the application configurations to use the supported APIs. Review the Kubernetes release notes for any breaking changes.
- Control Plane Issues: If the control plane is not functioning correctly, check the logs of the API server, scheduler, and controller manager.
kubectl logs pod/<api-server-pod-name> -n kube-system kubectl logs pod/<scheduler-pod-name> -n kube-system kubectl logs pod/<controller-manager-pod-name> -n kube-system Example Error Messages and Solutions
- Error:
kubelet is not running
Solution: Restart the kubelet service.
systemctl restart kubelet - Error:
connection refused
Solution: Check network connectivity between nodes. Verify that the Kubernetes API server is accessible.
- Error:
image pull failed
Solution: Check the container image name and tag. Verify that the image repository is accessible.
Kubegrade provides real-time monitoring and alerting during upgrades. It integrates with monitoring systems like Prometheus and Grafana, providing a comprehensive view of the cluster’s health. Kubegrade also sends alerts when issues arise, enabling quick intervention and resolution.
“““html
Post-Upgrade Verification and Testing
After completing a Kubernetes upgrade process, verifying its success is important. This involves testing application functionality, monitoring cluster performance, and checking for errors or warnings. Proper validation ensures the new version is stable and compatible with existing tools and services.
Testing Application Functionality
Verify that all applications are functioning correctly after the upgrade. Perform the following tests:
- Functional Tests: Run functional tests to verify that applications are behaving as expected. These tests should cover all key features and use cases.
- Integration Tests: Run integration tests to verify that applications are interacting correctly with other services and dependencies.
- User Acceptance Tests (UAT): Perform UAT to verify that applications meet the needs of end-users.
Address any issues identified during testing before moving the upgraded cluster into production.
Monitoring Cluster Performance
Monitor cluster performance to identify any performance degradation or resource bottlenecks. Use the following tools and techniques:
- kubectl top: Monitor CPU and memory utilization of nodes and pods.
kubectl top node kubectl top pod --all-namespaces - Prometheus and Grafana: Monitor cluster metrics, such as CPU usage, memory usage, disk I/O, and network traffic.
- Logging Systems: Collect and analyze logs from Kubernetes components and applications to identify errors and anomalies.
Optimize application configurations and scale resources as needed to maintain optimal performance.
Checking for Errors and Warnings
Check for any errors or warnings in the Kubernetes components and applications. Review logs and events to identify potential issues.
- Kubernetes Events: Check for events in all namespaces to identify any errors or warnings.
kubectl get events --all-namespaces - Kubernetes Component Logs: Review logs from the API server, scheduler, controller manager, and kubelet.
- Application Logs: Review logs from applications to identify any errors or warnings.
Address any identified issues promptly to maintain cluster stability.
Validating the New Version
Validate that the new Kubernetes version is functioning correctly and is compatible with existing tools and services. Perform the following checks:
- API Compatibility: Verify that all APIs used by applications are functioning correctly in the new version. Check for deprecated APIs and update application configurations as needed.
- CNI Plugin Compatibility: Verify that the CNI plugin is compatible with the new Kubernetes version. Test network connectivity between pods and services.
- Storage Plugin Compatibility: Verify that the storage plugin is compatible with the new Kubernetes version. Test persistent volume provisioning and access.
Address any compatibility issues before moving the upgraded cluster into production.
Kubegrade provides post-upgrade monitoring and reporting to ensure optimal performance. It automates the process of testing application functionality, monitoring cluster performance, and checking for errors or warnings. Kubegrade also provides detailed reports on the upgrade process, helping organizations validate the success of the upgrade and maintain cluster stability.
“““html
Verifying Application Functionality
After a Kubernetes upgrade, it’s important to verify that all applications are functioning correctly. This ensures that the upgrade didn’t introduce any regressions or compatibility issues. The verification process should include testing key application features, checking for errors or performance degradation, and validating data integrity.
Testing Key Application Features
Perform functional tests to verify that the core features of each application are working as expected. These tests should simulate real-world user scenarios and cover the most critical aspects of the application. Examples include:
- Web Applications: Test user login, form submissions, navigation, and data display.
- API Services: Test API endpoints with various inputs and validate the responses.
- Database Applications: Test data read, write, update, and delete operations.
- Message Queues: Test message production and consumption.
Automate these tests whenever possible to ensure consistent and repeatable results.
Checking for Errors or Performance Degradation
Monitor application logs and performance metrics to identify any errors or performance degradation. Use the following techniques:
- Log Analysis: Review application logs for errors, warnings, and exceptions. Look for any new or increased error rates after the upgrade.
kubectl logs pod/<pod-name> -n <namespace> - Performance Monitoring: Monitor key performance indicators (KPIs) such as response time, throughput, and error rate. Compare these metrics to pre-upgrade baselines to identify any degradation.
Tools like Prometheus and Grafana can help visualize and analyze performance metrics.
Validating Data Integrity
If the application involves data storage, validate data integrity to ensure that no data was lost or corrupted during the upgrade. This may involve running data consistency checks or comparing data snapshots before and after the upgrade.
For example, if the application uses a database, run queries to verify that critical data is present and accurate.
Application-Specific Tests
In addition to the general tests described above, perform application-specific tests to cover unique features and requirements. For example:
- E-commerce Applications: Test the checkout process, payment integration, and order management.
- Content Management Systems (CMS): Test content creation, editing, and publishing.
- Streaming Applications: Test video or audio streaming, playback, and recording.
Kubegrade helps automate application testing and validation post-upgrade. It provides tools to define and run functional tests, monitor application performance, and validate data integrity. By automating these tasks, Kubegrade reduces the risk of overlooking critical issues and helps ensure that applications are running as expected after the upgrade.
“““html
Monitoring Cluster Performance
After a Kubernetes upgrade, monitoring cluster performance is crucial to ensure that the upgrade has not introduced any performance regressions and that the cluster is operating optimally. Key performance indicators (KPIs) such as CPU utilization, memory usage, network latency, and disk I/O should be closely monitored.
Key Performance Indicators (KPIs)
- CPU Utilization: Monitor CPU usage across all nodes and pods to identify any CPU-bound workloads or resource contention.
- Memory Usage: Monitor memory usage across all nodes and pods to identify any memory leaks or excessive memory consumption.
- Network Latency: Monitor network latency between pods and services to identify any network bottlenecks or connectivity issues.
- Disk I/O: Monitor disk I/O operations on nodes to identify any disk-related performance issues.
Monitoring Tools: Prometheus and Grafana
Prometheus and Grafana are popular open-source tools for monitoring Kubernetes clusters. Prometheus collects metrics from Kubernetes components and applications, while Grafana provides a user-friendly interface for visualizing and analyzing these metrics.
Here?s how to use Prometheus and Grafana to monitor cluster performance:
- Deploy Prometheus: Deploy Prometheus in the Kubernetes cluster using Helm or other deployment tools.
- Configure Prometheus: Configure Prometheus to scrape metrics from Kubernetes components and applications.
- Deploy Grafana: Deploy Grafana in the Kubernetes cluster using Helm or other deployment tools.
- Create Grafana Dashboards: Create Grafana dashboards to visualize key performance indicators (KPIs) such as CPU utilization, memory usage, network latency, and disk I/O.
Grafana dashboards can be customized to display metrics specific to the applications and services running in the cluster.
Identifying and Resolving Performance Bottlenecks
If performance bottlenecks are identified, take the following steps to resolve them:
- Identify the Bottleneck: Use monitoring tools to pinpoint the specific component or application that is causing the performance issue.
- Analyze Resource Utilization: Analyze CPU, memory, network, and disk I/O utilization to identify resource constraints.
- Optimize Application Configurations: Optimize application configurations to reduce resource consumption and improve performance.
- Scale Resources: Scale up resources (e.g., CPU, memory, disk) as needed to address resource bottlenecks.
Kubegrade provides comprehensive cluster monitoring and reporting post-upgrade. It integrates with monitoring systems like Prometheus and Grafana, providing a comprehensive view of the cluster’s health. Kubegrade also provides detailed reports on cluster performance, helping organizations identify and resolve performance bottlenecks.
“““html
Validating the Kubernetes Version and Compatibility
After a Kubernetes upgrade, validating that the Kubernetes version has been successfully upgraded and that the cluster is compatible with existing tools and services is key. This ensures that the cluster is functioning as expected and that applications can continue to operate without disruption.
Checking the Kubernetes API Version
Verify that the Kubernetes API version has been successfully upgraded. Use the kubectl version command to check the API server version.
kubectl version The output should display the target Kubernetes version for both the client and the server.
Verifying kubectl Command Functionality
Verify that kubectl commands are functioning correctly after the upgrade. Run common kubectl commands to check the status of nodes, pods, and services.
kubectl get nodes kubectl get pods --all-namespaces kubectl get services --all-namespaces If any kubectl commands fail, investigate the issue and resolve it before proceeding.
Testing Integrations with Other Systems
Test integrations with other systems to verify that they are compatible with the new Kubernetes version. This may involve testing integrations with:
- CI/CD Pipelines: Verify that CI/CD pipelines are functioning correctly and can deploy applications to the upgraded cluster.
- Monitoring Systems: Verify that monitoring systems (e.g., Prometheus, Grafana) are collecting metrics from the upgraded cluster.
- Logging Systems: Verify that logging systems (e.g., Elasticsearch, Fluentd, Kibana) are collecting logs from the upgraded cluster.
- Networking Systems: Verify that networking systems (e.g., CNI plugins, service meshes) are functioning correctly and providing network connectivity to applications.
- Storage Systems: Verify that storage systems (e.g., persistent volume providers) are functioning correctly and providing storage to applications.
Example Validation Tests
- API Server Version Check: Verify that the API server version matches the target Kubernetes version.
- kubectl Command Test: Run
kubectl get nodesand verify that the output is correct. - CI/CD Pipeline Test: Trigger a CI/CD pipeline and verify that it successfully deploys an application to the upgraded cluster.
- Monitoring System Test: Verify that Prometheus is collecting metrics from the upgraded cluster.
Kubegrade helps make sure compatibility with various Kubernetes versions and tools. It provides tools to validate the Kubernetes version, verify kubectl command functionality, and test integrations with other systems. By automating these tasks, Kubegrade reduces the risk of overlooking compatibility issues and helps to make sure that the cluster is running the correct version and is compatible with the existing ecosystem.
“““html
Best Practices for Minimizing Downtime During Upgrades

Minimizing downtime during Kubernetes upgrades is a critical concern for organizations. Several strategies can maintain application availability throughout the upgrade process. These include rolling updates, blue/green deployments, and proper configuration of pod disruption budgets (PDBs).
Rolling Updates
Rolling updates gradually update the application instances without interrupting service. Kubernetes deployments support rolling updates by default. The deployment controller updates pods in a rolling update fashion unless you specify another strategy.
Key configurations for rolling updates include:
maxSurge: Specifies the maximum number of pods that the deployment can create over the desired number of pods.maxUnavailable: Specifies the maximum number of pods that can be unavailable during the update process.
Example Deployment Configuration:
apiVersion: apps/v1 kind: Deployment metadata: name: my-app spec: replicas: 3 strategy: type: RollingUpdate rollingUpdate: maxSurge: 1 maxUnavailable: 1 template: metadata: labels: app: my-app spec: containers: - name: my-app image: my-app:v1 In this example, the deployment is configured to allow one additional pod (maxSurge: 1) and one unavailable pod (maxUnavailable: 1) during the update process.
Blue/Green Deployments
Blue/green deployments involve running two identical environments: the “blue” environment (the current production version) and the “green” environment (the new version). During the upgrade, traffic is gradually shifted from the blue environment to the green environment.
Steps for implementing blue/green deployments:
- Deploy the green environment with the new Kubernetes version.
- Test the green environment to verify that it is functioning correctly.
- Gradually shift traffic from the blue environment to the green environment using a service mesh or ingress controller.
- Monitor the green environment to ensure that it is stable.
- Decommission the blue environment once the green environment is fully operational.
Pod Disruption Budgets (PDBs)
Pod Disruption Budgets (PDBs) limit the number of pods that can be voluntarily disrupted at any one time. PDBs help make sure that applications remain available during planned maintenance, such as Kubernetes upgrades.
Example PDB Configuration:
apiVersion: policy/v1 kind: PodDisruptionBudget metadata: name: my-app-pdb spec: minAvailable: 2 selector: matchLabels: app: my-app This PDB specifies that at least two pods with the label app: my-app must be available at all times.
Real-World Examples and Case Studies
- Netflix: Netflix uses rolling updates and PDBs to maintain high availability during Kubernetes upgrades. They also use chaos engineering to test the resilience of their applications.
- Spotify: Spotify uses blue/green deployments to minimize downtime during Kubernetes upgrades. They gradually shift traffic from the blue environment to the green environment, monitoring performance and stability.
Kubegrade’s automated upgrade process minimizes downtime by automating rolling updates and properly configuring PDBs. It also provides tools to monitor application health and performance during the upgrade process, allowing for quick intervention if any issues arise. By implementing these best practices, organizations can make sure that their applications remain available throughout the Kubernetes upgrade process.
“““html
Leveraging Rolling Updates
Rolling updates are a deployment strategy that minimizes downtime during Kubernetes upgrades by gradually updating application instances. Instead of taking down all instances at once, rolling updates incrementally replace old instances with new ones, supporting continuous application availability.
Configuration Options for Rolling Updates
Kubernetes provides several configuration options to control the behavior of rolling updates. The most important options are maxSurge and maxUnavailable.
- maxSurge: Specifies the maximum number of pods that the deployment can create above the desired number of pods during the update process. This value can be an absolute number (e.g., 2) or a percentage of the desired number of pods (e.g., 25%).
- maxUnavailable: Specifies the maximum number of pods that can be unavailable during the update process. This value can also be an absolute number or a percentage.
apiVersion: apps/v1 kind: Deployment metadata: name: my-app spec: replicas: 3 strategy: type: RollingUpdate rollingUpdate: maxSurge: 1 maxUnavailable: 1 template: metadata: labels: app: my-app spec: containers: - name: my-app image: my-app:v2 In this example, the deployment is configured to allow one additional pod (maxSurge: 1) and one unavailable pod (maxUnavailable: 1) during the update process. This configuration supports that at least two pods are always available, even during the update.
Supporting Continuous Application Availability
Rolling updates support continuous application availability by gradually replacing old pods with new ones. Here?s how it works:
- The deployment controller creates a new ReplicaSet with the updated pod template (e.g., a new image version).
- The deployment controller gradually scales up the new ReplicaSet while scaling down the old ReplicaSet.
- The
maxSurgeandmaxUnavailableparameters control the pace of the update. - Kubernetes services automatically route traffic to the available pods, supporting that users are not affected by the update.
Example Rolling Update Deployment
Consider a deployment with three replicas. During a rolling update, Kubernetes might perform the following steps:
- Create a new pod with the updated image (new ReplicaSet).
- Terminate one of the old pods (old ReplicaSet).
- Wait for the new pod to become ready.
- Repeat steps 1-3 until all old pods have been replaced with new pods.
Throughout this process, at least two pods are always available, supporting continuous application availability.
Kubegrade automates rolling updates for seamless upgrades. It automatically configures the maxSurge and maxUnavailable parameters to minimize disruption while supporting application availability. Kubegrade also monitors the progress of the rolling update, providing real-time feedback on the status of the upgrade.
“““html
Implementing Blue/Green Deployments
Blue/green deployment is an advanced technique for minimizing downtime during Kubernetes upgrades. It involves running two identical environments, “blue” (the current production environment) and “green” (the new environment with the upgraded Kubernetes version), and switching traffic between them.
Setting Up Blue and Green Environments
To set up blue and green environments:
- Create Two Identical Environments: Create two separate Kubernetes namespaces or clusters that are identical in terms of application code, configurations, and infrastructure.
- Deploy Applications: Deploy the applications to both the blue and green environments. The blue environment should be running the current production version, while the green environment should be running the new version with the upgraded Kubernetes.
- Configure Services: Configure Kubernetes services to route traffic to the appropriate environment. Initially, all traffic should be routed to the blue environment.
Switching Traffic Between Environments
To switch traffic between the blue and green environments:
- Test the Green Environment: Thoroughly test the green environment to verify that it is functioning correctly and that there are no issues with the upgraded Kubernetes version.
- Gradually Shift Traffic: Use a load balancer, service mesh, or ingress controller to gradually shift traffic from the blue environment to the green environment. This can be done by adjusting the weights or percentages of traffic routed to each environment.
- Monitor Performance: Monitor the performance of both the blue and green environments to ensure that there are no performance regressions or errors.
- Complete the Switch: Once the green environment is stable and performing as expected, complete the switch by routing all traffic to the green environment.
Rolling Back if Necessary
If any issues arise after switching traffic to the green environment, it?s important to have a rollback plan in place. To roll back to the blue environment:
- Shift Traffic Back: Immediately shift all traffic back to the blue environment.
- Investigate the Issues: Investigate the issues in the green environment and resolve them.
- Redeploy the Green Environment: Once the issues have been resolved, redeploy the green environment and repeat the testing and traffic-shifting process.
Example Blue/Green Deployment Configuration
Here?s an example of how to configure a blue/green deployment using Kubernetes services and labels:
- Label Pods: Label the pods in the blue environment with
environment: blueand the pods in the green environment withenvironment: green.
apiVersion: v1 kind: Service metadata: name: my-app spec: selector: app: my-app environment: blue ports: - protocol: TCP port: 80 targetPort: 8080 - Update the Service: To switch traffic to the green environment, update the service selector to
environment: green.
Best Practices for Blue/Green Deployments
- Automate the Process: Automate the entire blue/green deployment process, including environment creation, application deployment, traffic shifting, and rollback.
- Monitor Performance: Continuously monitor the performance of both the blue and green environments to identify any issues.
- Test Thoroughly: Thoroughly test the green environment before shifting traffic to it.
- Have a Rollback Plan: Have a well-defined rollback plan in place in case any issues arise.
Kubegrade simplifies blue/green deployments with automated traffic management. It provides tools to easily create and manage blue and green environments, shift traffic between them, and roll back if necessary. By automating these tasks, Kubegrade reduces the risk of human error and helps support a smooth and reliable blue/green deployment process.
“““html
Configuring Pod Disruption Budgets (PDBs)
Pod Disruption Budgets (PDBs) are a key tool for minimizing the impact of Kubernetes upgrades on running applications. PDBs allow you to specify the minimum number of pod replicas that must be available at any time, protecting applications from disruptions caused by voluntary actions, such as node draining or pod evictions.
PDB Options
PDBs provide several options to control the level of protection for applications:
- minAvailable: Specifies the minimum number of pods that must be available at all times. This value can be an absolute number (e.g., 2) or a percentage of the desired number of pods (e.g., 50%).
- maxUnavailable: Specifies the maximum number of pods that can be unavailable at any time. This value can also be an absolute number or a percentage.
- selector: Specifies a label selector that matches the pods to which the PDB applies.
Protecting Applications from Disruptions
PDBs protect applications from disruptions by preventing voluntary actions that would violate the specified availability constraints. For example, if a PDB specifies that at least two pods must be available at all times, Kubernetes will prevent any voluntary action that would reduce the number of available pods below two.
If a voluntary action would violate the PDB, Kubernetes will either delay the action or reject it altogether. This makes sure that applications remain available throughout the upgrade process.
Example PDB Configurations
Here are some examples of PDB configurations:
- Example 1: Require at least two pods to be available.
apiVersion: policy/v1 kind: PodDisruptionBudget metadata: name: my-app-pdb spec: minAvailable: 2 selector: matchLabels: app: my-app - Example 2: Allow at most one pod to be unavailable.
apiVersion: policy/v1 kind: PodDisruptionBudget metadata: name: my-app-pdb spec: maxUnavailable: 1 selector: matchLabels: app: my-app - Example 3: Require at least 50% of pods to be available.
apiVersion: policy/v1 kind: PodDisruptionBudget metadata: name: my-app-pdb spec: minAvailable: 50% selector: matchLabels: app: my-app Best Practices for PDBs
- Define PDBs for All Critical Applications: Define PDBs for all critical applications to protect them from disruptions.
- Choose Appropriate Availability Constraints: Choose availability constraints that are appropriate for the application’s requirements. Consider the application’s tolerance for downtime and the impact of disruptions on users.
- Test PDBs: Test PDBs to make sure that they are functioning correctly and that they are protecting applications as expected.
- Monitor PDBs: Monitor PDBs to identify any violations or issues.
Kubegrade helps manage PDBs for optimal application availability. It provides tools to easily create, update, and delete PDBs. Kubegrade also monitors PDBs to identify any violations or issues, allowing for quick intervention and resolution. By using Kubegrade to manage PDBs, organizations can support that their applications remain available throughout the Kubernetes upgrade process.
“““html
Conclusion
A well-planned and executed Kubernetes upgrade process is key for organizations seeking to use the benefits of this effective container orchestration platform. This guide has outlined the key steps, from preparing the cluster and backing up data to performing the upgrade and verifying its success. Upgrading Kubernetes is vital for maintaining a secure, performant, and feature-rich environment, enabling organizations to stay ahead in today’s fast-paced technology environment.
Kubegrade simplifies and automates the Kubernetes upgrade process, making sure of a smooth and efficient transition. Its features for pre-upgrade assessments, compatibility testing, automated upgrades, and post-upgrade monitoring provide a comprehensive solution for managing Kubernetes clusters. By automating these tasks, Kubegrade reduces the risk of human error and helps organizations maintain application availability throughout the upgrade process.
Explore Kubegrade’s features to experience a streamlined and reliable Kubernetes upgrade process. Learn more about how Kubegrade can transform your Kubernetes cluster management.
“`

