


Understanding Kubernetes Resource Utilization: Monitoring and Optimization

by Tim
November 5, 2025
Kubernetes (K8s) has become a cornerstone of modern application deployment, offering a platform for automating the deployment, scaling, and management of containerized applications. Effectively managing resource utilization in Kubernetes is crucial for cost optimization, application performance, and growth. This involves monitoring key metrics like CPU, memory, and storage to understand how applications consume resources within the cluster.
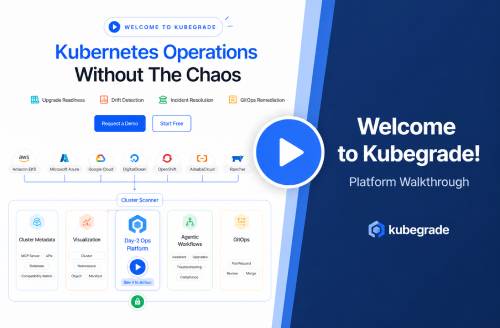
By gaining visibility into resource usage, organizations can make informed decisions about sizing and capacity planning, as well as reducing CPU or memory waste. It’s important to distinguish between requested resources and actual resource usage to ensure fair allocation and prevent resource contention. Tools like kubectl top, Prometheus, and Grafana provide insights and historical data for effective monitoring. Kubegrade simplifies Kubernetes cluster management with a platform for secure and automated K8s operations, enabling monitoring, upgrades, and optimization.
Key Takeaways
- Kubernetes resource utilization involves monitoring and optimizing CPU, memory, and storage to ensure application performance, cost efficiency, and cluster health.
- Key metrics for monitoring include CPU requests/limits/throttling, memory requests/limits/RSS, and storage I/O (disk reads/writes, volume capacity).
- Tools like `kubectl top`, Prometheus, Grafana, Kubernetes Dashboard, and Kubegrade can be used to monitor resource usage, each with varying features, ease of use, scalability, and cost.
- Best practices for optimization include right-sizing containers, implementing resource quotas and limit ranges, and using Horizontal and Vertical Pod Autoscaling (HPA/VPA).
- Optimizing application code for efficiency (reducing memory leaks, using efficient algorithms, minimizing I/O) is crucial for reducing resource consumption.
- Common issues like CPU throttling, OOM errors, and storage bottlenecks can be diagnosed and resolved by analyzing metrics, adjusting resource limits, optimizing code, and upgrading storage.
- Kubegrade offers an integrated solution for monitoring, upgrading, and optimizing Kubernetes clusters, providing real-time insights and automated recommendations.
Table of Contents
“`html
Introduction to Kubernetes Resource Utilization

Kubernetes (K8s) has become a key tool for deploying and managing applications . It allows for automating deployment, scaling, and operations of application containers across clusters of hosts . In essence, Kubernetes helps to manage complex deployments, making sure applications are running how and where they should .
In Kubernetes, resource utilization refers to how much of the available CPU, memory, and storage your applications are using . Monitoring and optimizing resource utilization is important for several reasons:
- Application Performance: Efficient resource use ensures applications have the necessary resources to operate smoothly .
- Cost Efficiency: By optimizing resource allocation, you can reduce waste and lower infrastructure costs .
- Cluster Health: Proper resource management prevents any single application from monopolizing resources, which can lead to instability .
This article will cover CPU, memory, and storage, offering insights into how to monitor and manage them effectively. Solutions like Kubegrade can help simplify Kubernetes cluster management, enabling monitoring, upgrades, and optimization .
“““html
Key Metrics for Monitoring Resource Utilization
To effectively manage Kubernetes resources, it’s important to monitor key metrics that provide insights into how your applications are performing. These metrics help you see if your applications have enough resources, are over-provisioned, or are experiencing bottlenecks.
CPU Usage
- CPU Requests vs. Limits: CPU requests are the minimum CPU resources guaranteed to a container. Limits are the maximum CPU resources a container can use. If a container exceeds its CPU limit, it may be throttled, affecting performance.
- CPU Throttling: This occurs when a container is restricted from using more CPU than its allocated limit. High CPU throttling indicates that the container is CPU-constrained and needs optimization.
Memory Usage
- Memory Requests vs. Limits: Similar to CPU, memory requests are the minimum memory guaranteed to a container, while limits are the maximum memory it can use. If a container exceeds its memory limit, it may be terminated by the OOM (Out of Memory) killer.
- Resident Set Size (RSS): RSS indicates the amount of memory a container is using in RAM. Monitoring RSS helps you see the actual memory footprint of your applications.
Storage I/O
- Disk Reads/Writes: Monitoring disk I/O helps identify applications that are disk-intensive. High disk I/O can indicate performance bottlenecks, especially if using slower storage.
- Volume Capacity: It’s important to monitor the capacity of your persistent volumes to ensure you don’t run out of storage space.
Interpreting Metrics
These metrics are key to maintaining application performance. For example, if you notice high CPU throttling or frequent OOM kills, it indicates that your containers need more CPU or memory. Conversely, if your containers are using far less resources than requested, you may be able to reduce the resource requests and limits to improve overall cluster utilization.
Using Kubectl Top
kubectl top is a command-line tool that allows you to view resource usage. Here?s how to use it:
- View CPU and memory usage for nodes:
kubectl top node - View CPU and memory usage for pods:
kubectl top pod These commands provide a quick snapshot of resource usage, helping you identify potential issues.
Kubegrade provides real-time insights into cluster performance, making it easier to monitor these key metrics and optimize resource utilization. With Kubegrade, you can gain a better view of your cluster’s performance and make informed decisions about resource allocation .
“““html
CPU Usage Metrics
CPU usage is a critical aspect of Kubernetes resource management. Proper allocation and monitoring of CPU resources are important for application performance and cluster stability. The key metrics are CPU requests, CPU limits, and CPU throttling.
CPU Requests
CPU requests define the minimum amount of CPU that a pod is guaranteed to receive. When you specify a CPU request for a container, the Kubernetes scheduler uses this information to find a node that can satisfy the request. It makes sure that the node has enough available CPU to meet the pod’s requirements. If a node cannot satisfy the CPU requests of all pods, new pods may remain in a pending state until sufficient resources become available .
CPU Limits
CPU limits, define the maximum amount of CPU that a pod is allowed to use. A pod can burst up to this limit if there are available CPU resources on the node. However, if a pod continuously exceeds its CPU limit, it may be throttled. Throttling restricts the pod’s CPU usage, which can lead to reduced performance and responsiveness .
CPU Throttling
CPU throttling occurs when a pod is forced to reduce its CPU consumption because it has exceeded its defined CPU limit. The kernel enforces this by limiting the amount of time the pod’s processes can run on the CPU. High CPU throttling indicates that the CPU limit is set too low for the pod’s workload, which can result in performance degradation. Applications may experience increased latency, slower processing times, and overall reduced efficiency .
Scenarios Where CPU Limits Cause Throttling
Consider a scenario where an application experiences a sudden spike in traffic. If the CPU limit is set too low, the application may be throttled, preventing it from efficiently processing the increased workload. This can lead to a poor user experience, with slow response times and potential service disruptions. Another scenario is a batch processing job that requires significant CPU resources. If the job exceeds its CPU limit, it may take longer to complete, affecting overall processing time .
Monitoring CPU Usage with Kubectl Top Pod
You can use kubectl top pod to monitor CPU usage and identify potential bottlenecks:
kubectl top pod --containers This command provides real-time CPU usage data for a specific pod, allowing you to see if the pod is approaching or exceeding its CPU limit. Monitoring CPU usage helps you make informed decisions about adjusting CPU requests and limits to improve performance .
“““html
Analyzing Memory Usage Metrics
Efficient memory management is crucial for the stability and performance of applications in Kubernetes. Key metrics for monitoring memory usage include memory requests, memory limits, and Resident Set Size (RSS). Proper monitoring and allocation of memory resources can prevent issues such as OOMKilled errors and ensure applications run smoothly.
Memory Requests
Memory requests specify the minimum amount of memory that a pod is guaranteed to have. When a pod defines a memory request, the Kubernetes scheduler ensures that the node has enough available memory to meet this request. If a node cannot satisfy the memory requests of all pods, new pods may remain in a pending state until sufficient resources become available .
Memory Limits
Memory limits define the maximum amount of memory that a pod is allowed to use. If a pod attempts to use more memory than its defined limit, it may be terminated by the OOM (Out of Memory) killer. Setting appropriate memory limits is important to prevent a single pod from consuming all available memory on a node, which can cause instability and affect other applications .
Resident Set Size (RSS)
Resident Set Size (RSS) indicates the amount of memory a pod is using in RAM. This metric provides insights into the actual memory footprint of the application. Monitoring RSS helps you understand how much memory your applications are actively using, which can differ from the requested memory. It’s a more accurate representation of actual memory consumption .
Difference Between Requested Memory and Actual Memory Usage
The requested memory is the amount of memory that a pod asks for, while actual memory usage (RSS) is the amount of memory the pod is actively using. A pod may request more memory than it actually needs, leading to overallocation of resources. Conversely, a pod may request too little memory and experience performance issues or OOMKilled errors. Monitoring RSS helps you fine-tune memory requests to match actual usage, optimizing resource allocation .
Implications of Exceeding Memory Limits and the Risk of OOMKilled Errors
If a pod exceeds its memory limit, the OOM killer may terminate the pod to free up memory for other applications. OOMKilled errors can cause service disruptions and data loss. Setting appropriate memory limits and monitoring memory usage are important to prevent these issues. It’s also important to analyze why a pod is exceeding its memory limit, which could indicate a memory leak or inefficient code .
Monitoring Memory Usage Using Kubectl
You can use kubectl top pod to monitor memory usage:
kubectl top pod --containers This command displays the current memory usage for a specific pod. Besides, you can use kubectl describe pod to view the memory requests and limits configured for the pod .
“““html
Monitoring Storage I/O Metrics
Monitoring storage I/O is important for maintaining the performance and reliability of applications in Kubernetes. Storage I/O metrics, such as disk reads/writes and volume capacity, provide insights into how efficiently your applications are using storage resources. By monitoring these metrics, you can identify and address storage-related bottlenecks that may affect application performance.
Importance of Monitoring Storage I/O Metrics
Monitoring storage I/O metrics helps you understand how your applications are interacting with storage resources. High disk reads/writes can indicate that an application is performing a large number of I/O operations, which can impact performance if the storage system is slow or overloaded. Monitoring volume capacity ensures that you have enough storage space available for your applications to store data. Running out of storage space can lead to application failures and data loss .
Impact of Slow Storage on Application Performance
Slow storage can significantly impact application performance. Applications that rely on fast storage I/O may experience increased latency, slower processing times, and overall reduced efficiency if the underlying storage is not performing well. For example, a database application that frequently reads and writes data to disk will be heavily affected by slow storage. Monitoring storage I/O metrics helps you identify these issues and take corrective actions, such as upgrading to faster storage or optimizing application I/O patterns .
Monitoring Storage I/O Using Kubernetes Tools and Cloud Provider Dashboards
While Kubernetes itself does not provide built-in tools for monitoring storage I/O at a detailed level, you can use several methods to monitor storage I/O:
- Cloud Provider Dashboards: Most cloud providers offer dashboards that provide detailed storage I/O metrics for your Kubernetes volumes. For example, AWS provides CloudWatch metrics for EBS volumes, Azure provides metrics for Azure Disks, and GCP provides metrics for Persistent Disks .
- Node-Level Monitoring Tools: You can use node-level monitoring tools such as
iostatto monitor disk I/O on the nodes where your Kubernetes pods are running. These tools provide detailed information about disk reads, writes, and utilization .
“““html
Tools for Monitoring Kubernetes Resource Utilization
Several tools are available for monitoring Kubernetes resource utilization, each with its own strengths and weaknesses. These tools range from open-source solutions to commercial platforms, offering different features, ease of use, how well they scale, and cost. Choosing the right tool depends on your specific needs and requirements.
Prometheus
Prometheus is a popular open-source monitoring and alerting toolkit designed for reliability and how well it scales. It collects metrics from Kubernetes components and applications using a pull-based model. Prometheus is highly configurable and supports a wide range of exporters for collecting metrics from various sources .
- Features: Multi-dimensional data model, effective query language (PromQL), alerting capabilities, and integration with Grafana for visualization.
- Ease of Use: Requires some expertise to set up and configure, especially for complex monitoring scenarios.
- Scalability: Scales well and can handle large Kubernetes clusters.
- Cost: Open-source and free to use, but requires infrastructure for storage and compute.
Grafana
Grafana is an open-source data visualization and dashboarding tool that works well with Prometheus. It allows you to create custom dashboards to visualize resource utilization data, set up alerts, and explore metrics in detail .
- Features: Customizable dashboards, support for multiple data sources, alerting, and user-friendly interface.
- Ease of Use: Relatively easy to use for creating dashboards, but requires some of Prometheus and PromQL.
- Scalability: Scales well and can handle large volumes of data.
- Cost: Open-source and free to use, but requires infrastructure for storage and compute.
Kubernetes Dashboard
The Kubernetes Dashboard is a web-based UI that provides a general overview of your Kubernetes cluster. It allows you to view the status of your deployments, pods, and services, as well as monitor resource utilization .
- Features: Basic monitoring, deployment management, and resource visualization.
- Ease of Use: Easy to use for basic monitoring, but lacks advanced features.
- Scalability: Limited how well it scales and may not be suitable for large clusters.
- Cost: Open-source and free to use.
Kubegrade
Kubegrade simplifies Kubernetes cluster management by providing a comprehensive and integrated monitoring experience. It offers real-time insights into cluster performance, automated upgrades, and optimization recommendations .
- Features: Real-time monitoring, automated upgrades, optimization recommendations, and integrated dashboard.
- Ease of Use: User-friendly interface and simplified setup.
- Scalability: Designed for how well it scales and can handle large clusters.
- Cost: Commercial solution with subscription-based pricing.
Kubegrade provides a visual representation of resource usage trends, making it easier to identify and address potential issues. It also offers alerts for storage-related issues and helps in predicting memory needs based on historical data .
“““html
Prometheus and Grafana
Prometheus has become a popular open-source monitoring solution for Kubernetes environments. It is great at collecting and storing metrics, providing a foundation for in-depth analysis of resource utilization. When paired with Grafana, these metrics can be transformed into informative dashboards, offering visibility into cluster performance.
How Prometheus Collects and Stores Metrics
Prometheus uses a pull-based model to collect metrics from various Kubernetes components and applications. It scrapes metrics from exposed HTTP endpoints at regular intervals. These endpoints are typically provided by exporters, which are small applications that translate metrics from different systems into the Prometheus format. Prometheus stores the collected metrics in a time-series database, allowing for efficient querying and analysis .
Visualizing Prometheus Data with Grafana
Grafana connects to Prometheus as a data source and uses PromQL (Prometheus Query Language) to query and visualize the collected metrics. Grafana allows you to create custom dashboards designed to your specific monitoring needs. These dashboards can display a wide range of resource utilization metrics, providing insights into CPU usage, memory consumption, storage I/O, and network traffic .
Common Grafana Dashboards for Kubernetes Monitoring
Some common Grafana dashboards for Kubernetes monitoring include:
- Node Exporter Full: Provides detailed metrics about the CPU, memory, disk, and network usage of individual nodes in the cluster .
- Kubernetes Compute Resources / Pod: Displays CPU and memory usage for each pod in the cluster, allowing you to identify resource-intensive pods .
- Kubernetes Cluster Monitoring: Offers a high-level overview of the cluster’s health and resource utilization, including CPU, memory, and storage capacity .
Learning Curve
Setting up and managing Prometheus and Grafana can have a learning curve, especially for those new to monitoring systems. It requires knowing Prometheus configuration, PromQL, and Grafana dashboard creation. However, many online resources and tutorials are available to help you get started. Despite the initial learning curve, the combination of Prometheus and Grafana provides a capable and flexible monitoring solution for Kubernetes .
“““html
Kubernetes Dashboard
The Kubernetes Dashboard is a web-based user interface (UI) that provides a general overview of a Kubernetes cluster. It allows users to manage and monitor their applications through a graphical interface, offering a view into the cluster’s resources and the status of deployed applications.
Features for Viewing Resource Utilization
The Kubernetes Dashboard provides basic resource utilization metrics for nodes, pods, and deployments. Users can view CPU and memory usage, as well as storage capacity and network traffic. These metrics are presented in a simple, easy-to-understand format, making it accessible for users without deep technical expertise .
Managing Deployments and Troubleshooting Issues
Besides monitoring resource utilization, the Kubernetes Dashboard allows users to manage deployments, scale applications, and update configurations. It also provides tools for troubleshooting issues, such as viewing pod logs and executing commands inside containers. These features make it easier to manage and maintain applications running in Kubernetes .
Limitations for Advanced Monitoring and Analysis
While the Kubernetes Dashboard is useful for basic monitoring and management tasks, it has limitations for advanced monitoring and analysis. It lacks the advanced querying and visualization capabilities of tools like Prometheus and Grafana. It also does not provide long-term storage of metrics, making it difficult to track resource utilization trends over time. For more in-depth monitoring and analysis, it’s often necessary to use other tools in conjunction with the Kubernetes Dashboard .
“““html
Kubegrade: An Integrated Monitoring Solution
Kubegrade offers a comprehensive and integrated approach to Kubernetes resource utilization monitoring. It aims to simplify the difficult parts of Kubernetes cluster management by providing a user-friendly interface and useful information for optimizing resource allocation. With its array of features, ease of use, and scalability, Kubegrade helps teams efficiently manage their Kubernetes environments.
Comprehensive Features
Kubegrade provides a wide range of features for monitoring Kubernetes resource utilization, including:
- Real-time Monitoring: Provides real-time insights into CPU usage, memory consumption, storage I/O, and network traffic across the cluster .
- Automated Alerts: Configurable alerts notify teams of potential issues, such as high CPU usage or low storage capacity .
- Historical Data Analysis: Allows teams to analyze historical resource utilization trends to identify patterns and optimize resource allocation .
- Optimization Recommendations: Provides recommendations for optimizing resource utilization based on historical data and real-time monitoring .
Ease of Use
Kubegrade is designed with ease of use in mind. Its user-friendly interface simplifies the monitoring process, making it accessible for both experienced Kubernetes administrators and those new to the platform. The intuitive dashboard provides a clear overview of cluster performance, allowing teams to quickly identify and address potential issues .
Scalability
Kubegrade is designed for scalability and can handle large Kubernetes clusters. Its architecture allows it to efficiently collect and process metrics from a large number of nodes and pods, providing a comprehensive view of resource utilization across the entire cluster .
Integration with Other Kubernetes Management Tools
Kubegrade integrates with other Kubernetes management tools, such as deployment pipelines and configuration management systems. This integration allows teams to automate resource allocation and optimization tasks, improving overall efficiency .
Specific Examples of Kubegrade’s Monitoring Capabilities
Some specific examples of Kubegrade’s monitoring capabilities include:
- Identifying Over-Provisioned Resources: Kubegrade can identify pods and nodes that are over-provisioned, allowing teams to reduce resource allocations and save costs .
- Detecting Resource Bottlenecks: Kubegrade can detect resource bottlenecks, such as high CPU usage or low memory, allowing teams to address these issues before they impact application performance .
- Predicting Future Resource Needs: Kubegrade can predict future resource needs based on historical data, allowing teams to allocate resources ahead of time and prevent performance issues .
“““html
Best Practices for Optimizing Resource Utilization
Optimizing resource utilization in Kubernetes is important for achieving high performance, reducing costs, and maintaining a healthy cluster. By implementing the right strategies, you can make sure that your applications have the resources they need without wasting valuable resources. Here are some effective practices for optimizing Kubernetes resource utilization:
Right-Sizing Containers
Right-sizing containers involves setting appropriate resource requests and limits for each container. Resource requests define the minimum amount of resources a container needs, while resource limits define the maximum amount of resources a container can use. Setting these values correctly makes sure that containers have enough resources to operate efficiently without consuming excessive resources. To right-size containers:
- Monitor Resource Usage: Use monitoring tools like Prometheus and Grafana to track the actual resource usage of your containers over time.
- Set Realistic Requests: Set resource requests based on the average resource usage of the container, making sure it has enough resources to handle normal workloads.
- Set Appropriate Limits: Set resource limits to prevent containers from consuming excessive resources and affecting other applications.
- Test and Adjust: Continuously test and adjust resource requests and limits based on performance and resource utilization data.
Implementing Resource Quotas and Limit Ranges
Resource quotas and limit ranges provide a way to control resource consumption at the namespace level. Resource quotas limit the total amount of resources that can be consumed by all pods in a namespace, while limit ranges enforce minimum and maximum resource requests and limits for containers in a namespace. Implementing these policies helps prevent resource starvation and makes sure fair resource allocation across different teams and applications .
Using Horizontal Pod Autoscaling (HPA) and Vertical Pod Autoscaling (VPA)
Horizontal Pod Autoscaling (HPA) automatically adjusts the number of pod replicas in a deployment based on CPU utilization or other metrics. Vertical Pod Autoscaling (VPA) automatically adjusts the CPU and memory requests and limits of containers based on their actual resource usage. Using HPA and VPA can help you automatically scale your applications based on demand, optimizing resource utilization and improving performance .
Optimizing Application Code for Efficiency
Optimizing application code for efficiency can significantly reduce resource consumption. By identifying and addressing performance bottlenecks in your code, you can reduce CPU usage, memory consumption, and storage I/O. Some strategies for optimizing application code include:
- Profiling Code: Use profiling tools to identify performance bottlenecks in your code.
- Optimizing Algorithms: Choose efficient algorithms and data structures to reduce CPU usage and memory consumption.
- Reducing I/O Operations: Minimize the number of disk I/O operations by caching data and optimizing database queries.
- Using Compression: Use compression to reduce the size of data stored on disk and transmitted over the network.
“““html
Right-Sizing Containers
Right-sizing containers involves accurately setting resource requests and limits to match the actual needs of your applications. This practice makes sure that containers have enough resources to operate efficiently without wasting valuable resources. It’s a balance between providing sufficient resources for performance and avoiding over-provisioning, which can lead to higher costs and inefficient resource utilization.
Determining Appropriate Values for CPU and Memory
Determining the appropriate values for CPU and memory requests and limits requires a combination of analysis, testing, and monitoring. Here are some guidelines:
- Start with a Baseline: Begin by setting initial resource requests and limits based on what you know about the application’s requirements. You can use historical data from previous deployments or similar applications as a starting point .
- Monitor Resource Usage: Use monitoring tools to track the actual CPU and memory usage of your containers under different workloads. Pay attention to average usage, peak usage, and any spikes in resource consumption .
- Analyze Usage Patterns: Analyze resource usage patterns to identify trends and anomalies. Look for periods of high CPU usage, memory leaks, or inefficient code that may be contributing to resource consumption .
- Set Realistic Requests: Set CPU and memory requests based on the average resource usage of the container, making sure it has enough resources to handle normal workloads. Avoid setting requests too low, as this can lead to performance issues .
- Set Appropriate Limits: Set CPU and memory limits to prevent containers from consuming excessive resources and affecting other applications. Consider setting limits slightly higher than the peak usage to allow for occasional spikes in resource consumption .
Importance of Testing and Monitoring
Testing and monitoring are important for fine-tuning resource settings. After setting initial resource requests and limits, test your application under different workloads to ensure it performs as expected. Monitor resource usage continuously to identify any issues or areas for improvement. Adjust resource settings as needed based on testing and monitoring data .
Impact of Over-Provisioning and Under-Provisioning
Over-provisioning and under-provisioning can negatively affect performance and cost:
- Over-Provisioning: Over-provisioning occurs when you allocate more resources to a container than it actually needs. This can lead to wasted resources and higher costs, as you are paying for resources that are not being used .
- Under-Provisioning: Under-provisioning occurs when you allocate fewer resources to a container than it actually needs. This can lead to performance issues, such as slow response times, increased latency, and application crashes .
“““html
Implementing Resource Quotas and Limit Ranges
Resource quotas and limit ranges are Kubernetes policies that help enforce resource constraints on namespaces and pods. These policies are important for preventing resource exhaustion, making sure fair resource allocation, and promoting efficient resource utilization. By implementing resource quotas and limit ranges, you can control the amount of resources that can be consumed by different teams and applications, preventing any single entity from monopolizing cluster resources.
How Resource Quotas Prevent Resource Exhaustion and Ensure Fair Resource Allocation
Resource quotas limit the total amount of resources that can be consumed by all pods in a namespace. You can set quotas for various resources, such as CPU, memory, storage, and the number of pods. When a resource quota is defined for a namespace, Kubernetes enforces these limits, preventing users from creating new pods or increasing resource requests if it would exceed the quota. This helps prevent resource exhaustion and makes sure that resources are fairly allocated across different teams and applications .
How Limit Ranges Set Default Resource Limits for Pods Within a Namespace
Limit ranges set default resource limits for pods within a namespace. You can define minimum and maximum resource requests and limits for containers, as well as default values for containers that do not specify their own resource requests and limits. When a limit range is defined for a namespace, Kubernetes applies these constraints to all new pods, making sure that they meet the defined resource requirements. This helps prevent containers from consuming excessive resources and promotes consistent resource utilization across the namespace .
Examples of How to Configure Resource Quotas and Limit Ranges
Here are some examples of how to configure resource quotas and limit ranges:
- Resource Quota:
apiVersion: v1 kind: ResourceQuota metadata: name: example-resource-quota spec: hard: pods: "10" cpu: "20" memory: "40Gi" This resource quota limits the number of pods in the namespace to 10, the total CPU usage to 20 cores, and the total memory usage to 40Gi .
- Limit Range:
apiVersion: v1 kind: LimitRange metadata: name: example-limit-range spec: limits: - default: cpu: "2" memory: "4Gi" defaultRequest: cpu: "1" memory: "2Gi" max: cpu: "4" memory: "8Gi" min: cpu: "0.5" memory: "1Gi" type: Container This limit range sets default CPU and memory requests and limits for containers in the namespace, as well as minimum and maximum allowed values .
“““html
Leveraging Horizontal and Vertical Pod Autoscaling
Horizontal Pod Autoscaling (HPA) and Vertical Pod Autoscaling (VPA) are Kubernetes features that allow you to automatically adjust resource allocation based on application demand. By using HPA and VPA, you can ensure that your applications have the resources they need to handle varying workloads, optimizing resource utilization and improving performance.
How HPA Scales the Number of Pods Based on CPU or Memory Utilization
Horizontal Pod Autoscaling (HPA) automatically adjusts the number of pod replicas in a deployment based on CPU utilization, memory utilization, or custom metrics. When CPU or memory utilization exceeds a defined threshold, HPA increases the number of pod replicas to handle the increased load. Conversely, when CPU or memory utilization falls below a defined threshold, HPA decreases the number of pod replicas to reduce resource consumption. This allows you to scale your applications horizontally, adding or removing pods as needed to meet demand .
How VPA Automatically Adjusts the CPU and Memory Requests and Limits of Pods
Vertical Pod Autoscaling (VPA) automatically adjusts the CPU and memory requests and limits of pods based on their actual resource usage. VPA monitors the resource consumption of pods over time and recommends appropriate CPU and memory requests and limits. It can also automatically update the resource requests and limits of pods, either by restarting the pods or by using in-place updates. This allows you to fine-tune the resource allocation of individual pods, optimizing resource utilization and improving performance .
Examples of How to Configure HPA and VPA
Here are some examples of how to configure HPA and VPA:
- Horizontal Pod Autoscaling (HPA):
apiVersion: autoscaling/v2beta2 kind: HorizontalPodAutoscaler metadata: name: example-hpa spec: scaleTargetRef: apiVersion: apps/v1 kind: Deployment name: example-deployment minReplicas: 1 maxReplicas: 10 metrics: - type: Resource resource: name: cpu target: type: Utilization averageUtilization: 70 This HPA configuration scales the number of replicas for the example-deployment deployment between 1 and 10, based on CPU utilization, with a target average utilization of 70% .
- Vertical Pod Autoscaling (VPA):
apiVersion: autoscaling.k8s.io/v1 kind: VerticalPodAutoscaler metadata: name: example-vpa spec: targetRef: apiVersion: apps/v1 kind: Deployment name: example-deployment updatePolicy: updateMode: Auto This VPA configuration automatically adjusts the CPU and memory requests and limits for the pods in the example-deployment deployment, using the Auto update mode .
“““html
Optimizing Application Code for Efficiency
Optimizing application code is a key aspect of reducing resource consumption and improving overall performance in Kubernetes. Efficient code requires fewer resources, allowing you to run more applications on the same infrastructure and reduce costs. By addressing performance bottlenecks and improving code efficiency, you can significantly reduce the resource footprint of your applications.
Tips for Improving Code Efficiency
Here are some tips for improving code efficiency:
- Reduce Memory Leaks: Memory leaks can cause applications to consume increasing amounts of memory over time, leading to performance degradation and eventual crashes. Use memory profiling tools to identify and fix memory leaks in your code .
- Optimize Algorithms: Choose efficient algorithms and data structures to reduce CPU usage and memory consumption. Avoid using inefficient algorithms that can lead to performance bottlenecks .
- Use Efficient Data Structures: Use efficient data structures, such as hash tables and balanced trees, to reduce the time complexity of your code .
- Minimize I/O Operations: Minimize the number of disk I/O operations by caching data and optimizing database queries. Disk I/O operations can be slow and resource-intensive, so reducing them can significantly improve performance .
- Use Compression: Use compression to reduce the size of data stored on disk and transmitted over the network. Compression can reduce storage costs and improve network performance .
Using Profiling Tools to Identify Performance Bottlenecks
Profiling tools can be used to identify performance bottlenecks in application code. These tools provide detailed information about the CPU usage, memory consumption, and I/O activity of your code, allowing you to pinpoint areas that need optimization. Some popular profiling tools include:
- gprof: A command-line profiling tool for C, C++, and Fortran programs .
- perf: A performance analysis tool for Linux systems .
- Java VisualVM: A visual tool for profiling Java applications .
- Xdebug: A PHP extension for debugging and profiling PHP code .
By using profiling tools, you can identify the most resource-intensive parts of your code and focus your optimization efforts on those areas .
“““html
Troubleshooting Common Resource Utilization Issues

Even with careful planning and resource allocation, issues related to Kubernetes resource utilization can arise. These issues can negatively affect application performance and cluster stability. Addressing these issues quickly and effectively is important for maintaining a healthy and efficient Kubernetes environment. Here are some common resource utilization issues and steps for troubleshooting them:
CPU Throttling
CPU throttling occurs when a container is restricted from using more CPU than its allocated limit. This can lead to reduced performance, increased latency, and overall application slowdown. Here are some troubleshooting steps for CPU throttling:
- Identify Throttled Containers: Use the
kubectl top podcommand to identify containers that are experiencing CPU throttling. Look for containers with high CPU usage that are close to their CPU limit . - Check CPU Limits: Verify that the CPU limits for the throttled containers are set appropriately. If the limits are too low, increase them to allow the containers to use more CPU .
- Analyze Application Code: Analyze the application code to identify any performance bottlenecks or inefficient algorithms that may be contributing to high CPU usage. Optimize the code to reduce CPU consumption .
- Use Profiling Tools: Use profiling tools to identify the most CPU-intensive parts of the application code and focus your optimization efforts on those areas .
Out-of-Memory (OOM) Errors
Out-of-memory (OOM) errors occur when a container attempts to use more memory than its allocated limit. This can lead to application crashes and service disruptions. Here are some troubleshooting steps for OOM errors:
- Identify OOMKilled Pods: Use the
kubectl get podscommand to identify pods that have been OOMKilled. Look for pods with aReasonofOOMKilled. - Check Memory Limits: Verify that the memory limits for the OOMKilled pods are set appropriately. If the limits are too low, increase them to allow the containers to use more memory .
- Analyze Memory Usage: Use monitoring tools to track the memory usage of the OOMKilled pods over time. Look for memory leaks or inefficient code that may be contributing to high memory consumption .
- Use Memory Profiling Tools: Use memory profiling tools to identify the parts of the application code that are consuming the most memory and focus your optimization efforts on those areas .
Storage Bottlenecks
Storage bottlenecks occur when the storage system cannot keep up with the I/O demands of the applications. This can lead to reduced performance, increased latency, and overall application slowdown. Here are some troubleshooting steps for storage bottlenecks:
- Identify Slow Storage: Use monitoring tools to track the I/O performance of the storage system. Look for high latency, low throughput, or high I/O utilization .
- Optimize I/O Patterns: Analyze the application code to identify any inefficient I/O patterns that may be contributing to storage bottlenecks. Optimize the code to reduce the number of I/O operations .
- Use Caching: Use caching to reduce the number of disk I/O operations. Caching can significantly improve performance by storing frequently accessed data in memory .
- Upgrade Storage: Consider upgrading to a faster storage system, such as SSDs, to improve I/O performance .
“““html
Diagnosing and Resolving CPU Throttling
CPU throttling can significantly impact application performance in Kubernetes. Identifying and resolving CPU throttling issues promptly is important for maintaining a healthy and efficient cluster. This section explains how to diagnose CPU throttling and provides troubleshooting steps for resolving it.
Identifying CPU Throttling
You can identify CPU throttling in Kubernetes using kubectl and monitoring tools:
- Using Kubectl: Use the
kubectl top podcommand to view the CPU usage of pods. If a pod is consistently using close to its CPU limit, it may be experiencing CPU throttling . You can also usekubectl describe podto view the pod’s status and look for events related to CPU throttling. - Using Monitoring Tools: Use monitoring tools like Prometheus and Grafana to track CPU throttling metrics. These tools provide detailed information about CPU usage, CPU limits, and CPU throttling events, allowing you to identify pods that are experiencing CPU throttling over time .
Common Causes of CPU Throttling
Some common causes of CPU throttling include:
- Exceeding CPU Limits: The most common cause of CPU throttling is exceeding the defined CPU limit for a container. When a container attempts to use more CPU than its allocated limit, it may be throttled by the kernel .
- Noisy Neighbors: Noisy neighbors are other pods on the same node that are consuming excessive CPU resources, leaving fewer resources available for other pods. This can lead to CPU throttling, even if the affected pods are not exceeding their CPU limits .
- Inefficient Code: Inefficient code can consume excessive CPU resources, leading to CPU throttling. This can be caused by inefficient algorithms, memory leaks, or other performance bottlenecks .
Troubleshooting Steps for Resolving CPU Throttling
Here are some troubleshooting steps for resolving CPU throttling:
- Increase CPU Limits: If a container is consistently exceeding its CPU limit, increase the CPU limit to allow it to use more CPU resources. Use the
kubectl edit deploymentorkubectl patch deploymentcommand to update the CPU limit for the deployment . - Optimize Application Code: Analyze the application code to identify any performance bottlenecks or inefficient algorithms that may be contributing to high CPU usage. Optimize the code to reduce CPU consumption .
- Isolate Workloads: If noisy neighbors are causing CPU throttling, isolate the affected workloads to different nodes. You can use node selectors or taints and tolerations to control which pods run on which nodes .
“““html
Handling Out-of-Memory (OOM) Errors
Out-of-Memory (OOM) errors are a common issue in Kubernetes that can lead to application crashes and service disruptions. It?s important to understand what OOM errors are, how they occur, and how to prevent them. This section provides guidance on handling OOM errors in Kubernetes.
What are OOM Errors and How Do They Occur?
OOM errors occur when a container attempts to use more memory than its allocated limit. When a container exceeds its memory limit, the kernel may terminate the container to free up memory for other processes. This is known as the OOM killer, and it can cause application crashes and service disruptions. OOM errors can be caused by various factors, such as memory leaks, inefficient code, or unexpected spikes in memory usage .
Identifying OOM Errors
You can identify OOM errors in Kubernetes using kubectl and monitoring tools:
- Using Kubectl: Use the
kubectl get podscommand to identify pods that have been OOMKilled. Look for pods with aReasonofOOMKilled. You can also usekubectl describe podto view the pod’s status and look for events related to OOM errors. - Using Monitoring Tools: Use monitoring tools like Prometheus and Grafana to track memory usage over time. Look for pods that are consistently using close to their memory limit or that have experienced sudden spikes in memory usage .
Troubleshooting Steps for Preventing OOM Errors
Here are some troubleshooting steps for preventing OOM errors:
- Increase Memory Limits: If a container is consistently exceeding its memory limit, increase the memory limit to allow it to use more memory resources. Use the
kubectl edit deploymentorkubectl patch deploymentcommand to update the memory limit for the deployment . - Optimize Memory Usage: Analyze the application code to identify any memory leaks or inefficient algorithms that may be contributing to high memory consumption. Optimize the code to reduce memory consumption .
- Use Memory Profiling Tools: Use memory profiling tools to identify the parts of the application code that are consuming the most memory and focus your optimization efforts on those areas .
- Set Memory Requests: Set memory requests to ensure that pods have enough memory to start and operate normally. Memory requests define the minimum amount of memory that a pod is guaranteed to have .
“““html
Addressing Storage Bottlenecks
Storage bottlenecks can significantly affect application performance in Kubernetes, leading to increased latency and reduced throughput. Identifying and resolving storage bottlenecks is important for maintaining a responsive and efficient cluster. This section explains how to identify storage bottlenecks and provides troubleshooting steps for resolving them.
Identifying Storage Bottlenecks
You can identify storage bottlenecks in Kubernetes by monitoring storage I/O metrics and analyzing application behavior:
- Monitor Storage I/O Metrics: Use monitoring tools to track storage I/O metrics, such as disk reads/writes, I/O latency, and I/O utilization. Look for high latency, low throughput, or high I/O utilization, which can indicate a storage bottleneck .
- Analyze Application Behavior: Analyze application behavior to identify any inefficient data access patterns that may be contributing to storage bottlenecks. Look for applications that are performing a large number of small I/O operations or that are accessing the same data repeatedly .
- Use Kubectl: Use
kubectl describe podandkubectl logsto inspect pod behavior and identify potential storage-related issues.
Common Causes of Storage Bottlenecks
Some common causes of storage bottlenecks include:
- Overloaded Storage Systems: Overloaded storage systems can be unable to keep up with the I/O demands of the applications, leading to storage bottlenecks .
- Inefficient Data Access Patterns: Inefficient data access patterns, such as performing a large number of small I/O operations or accessing the same data repeatedly, can contribute to storage bottlenecks .
- Slow Storage Devices: Slow storage devices, such as traditional hard drives, can limit I/O performance and contribute to storage bottlenecks .
- Network Bottlenecks: Network bottlenecks between the pods and the storage system can also limit I/O performance and contribute to storage bottlenecks .
Troubleshooting Steps for Resolving Storage Bottlenecks
Here are some troubleshooting steps for resolving storage bottlenecks:
- Optimize Storage Configurations: Optimize storage configurations to improve I/O performance. This may involve adjusting storage parameters, such as the I/O queue depth or the block size .
- Use Faster Storage Devices: Consider upgrading to faster storage devices, such as solid-state drives (SSDs), to improve I/O performance .
- Optimize Application Code: Analyze the application code to identify any inefficient data access patterns that may be contributing to storage bottlenecks. Optimize the code to reduce the number of I/O operations or to use more efficient data access patterns .
- Use Caching: Use caching to reduce the number of disk I/O operations. Caching can significantly improve performance by storing frequently accessed data in memory .
“““html
Conclusion
To conclude, monitoring and optimizing Kubernetes resource utilization is important for application performance, cost savings, and overall cluster stability. By carefully monitoring key metrics, implementing best practices, and addressing common issues, you can ensure that your applications have the resources they need without wasting valuable resources. Efficient resource management leads to improved application performance, reduced infrastructure costs, and a more stable and reliable Kubernetes environment.
Kubegrade simplifies Kubernetes cluster management, enabling monitoring, upgrades, and optimization. It provides real-time insights into cluster performance and helps you make informed decisions about resource allocation. For those seeking to streamline their Kubernetes management and optimize resource utilization, exploring what Kubegrade offers is a worthwhile step .
“`

