


Kubernetes Optimization: Proven Strategies for Peak Performance

by Tim
August 12, 2025
Kubernetes Optimization: Proven Strategies for Peak Performance
Kubernetes is a system, but it can be easy to waste resources if it’s not carefully managed. Over-provisioned resources and poor visibility into usage can increase costs quickly. Optimizing Kubernetes means applications meet performance and reliability needs, while also using the least amount of resources. It’s not just about saving money, but also about knowing where resources are going.
Kubernetes optimization is important because it allows applications to take full advantage of its cloud-native architecture. By optimizing applications for Kubernetes, organizations can reduce costs, improve user experience and ensure applications are always available and working correctly. Kubegrade simplifies Kubernetes cluster management, offering a platform for secure, and automated K8s operations, including monitoring, upgrades, and optimization.
Key Takeaways
- Kubernetes optimization improves application performance, reduces cloud costs, and enables easier scaling.
- Efficient resource management involves setting resource requests and limits, using resource quotas and namespaces, and employing monitoring tools.
- Horizontal Pod Autoscaling (HPA) automatically scales the number of pods based on resource utilization, while Vertical Pod Autoscaling (VPA) adjusts the CPU and memory of individual pods.
- Load balancing and traffic management distribute traffic evenly across pods, preventing overload and maintaining performance.
- Network policies isolate applications and restrict traffic flow, enhancing security, while secrets management tools protect sensitive information.
- Persistent volumes (PVs) and persistent volume claims (PVCs) manage storage for stateful applications, allowing data persistence across pod restarts.
- Configuration management tools like Helm and Kustomize simplify application deployments and ensure consistency across different environments.
Table of Contents
- Kubernetes Optimization: Proven Strategies for Peak Performance
- Introduction to Kubernetes Optimization
- Efficient Resource Management in Kubernetes
- Scaling Strategies for Optimal Performance
- Configuration Best Practices for Kubernetes
- Conclusion: Achieving Peak Kubernetes Performance with Optimization
- Frequently Asked Questions
Introduction to Kubernetes Optimization

Kubernetes has become critical for deploying applications [1]. Its ability to automate deployment, scaling, and management makes it a favorite for modern development [1]. As more businesses adopt Kubernetes, the need to use it efficiently grows.
Kubernetes optimization means improving how well your Kubernetes clusters work. This includes making them faster, cheaper, and more able to grow when needed. Getting the most out of Kubernetes requires careful planning and ongoing adjustments [2].
Why is this optimization so important? Efficient Kubernetes setups lead to better application performance. They also lower cloud costs and allow for easier scaling to meet user demands [2].
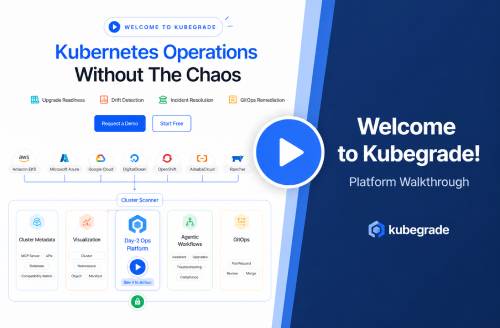
Kubegrade simplifies Kubernetes cluster management. It’s a platform for secure, and automated K8s operations, enabling monitoring, upgrades, and optimization. Kubegrade helps teams ensure their Kubernetes environments are well-managed.
This article covers key areas for Kubernetes optimization. It will review resource management, scaling strategies, and configuration tips. Readers will learn practical steps to improve their Kubernetes performance and reduce costs [2].
Efficient Resource Management in Kubernetes
Resource management is important in Kubernetes. It focuses on how CPU and memory are allocated to ensure applications run smoothly [2]. Poor resource management can lead to performance issues and wasted resources.
Setting Resource Requests and Limits
Resource requests define the minimum amount of CPU and memory a container needs. Limits set the maximum amount a container can use [3]. Setting these correctly prevents one container from using all available resources, which can starve others [3].
For example, a Deployment configuration might include:
resources: requests: cpu: "250m" memory: "512Mi" limits: cpu: "500m" memory: "1Gi"This configuration ensures the container is allocated at least 250m CPU and 512Mi of memory, but cannot exceed 500m CPU and 1Gi of memory [3].
Resource Quotas and Namespaces
Resource quotas limit the total resources a namespace can consume. Namespaces divide a cluster into multiple virtual clusters. Using these together helps manage resource use across different teams or applications [4].
For instance, a quota can limit a namespace to a maximum of 2 CPUs and 4Gi of memory:
apiVersion: v1kind: ResourceQuotametadata: name: compute-quotaspec: hard: cpu: "2" memory: "4Gi"Monitoring and Optimization
Monitoring tools help identify resource bottlenecks and optimize allocation. These tools track CPU and memory usage, helping to find containers that need adjustment [4].
Kubegrade provides resource monitoring and automated recommendations for resource optimization. This helps teams fine-tune their resource settings and maintain efficient clusters.
Managing Kubernetes Resource Requests and Limits
Resource requests and limits are important for managing resources in Kubernetes. Requests specify the minimum resources a pod needs, while limits define the maximum resources a pod can use [3].
When scheduling pods, Kubernetes uses resource requests to find a node that can meet those requirements. If no node can satisfy the request, the pod will not be scheduled [3]. Limits prevent a pod from consuming more than a specified amount of resources, protecting the node from being overwhelmed [3].
Here?s how to define resource requests and limits in a pod specification:
apiVersion: v1kind: Podmetadata: name: resource-demospec: containers: - name: main-app image: nginx:latest resources: requests: cpu: "250m" memory: "512Mi" limits: cpu: "500m" memory: "1Gi"In this example, the main-app container requests 250m CPU and 512Mi of memory, with limits set at 500m CPU and 1Gi of memory [3].
Setting resource requests too low can cause pods to be scheduled on under-resourced nodes, leading to performance issues. Setting limits too high can waste resources, as pods might reserve more than they actually need [3].
Accurately estimating resource requirements for each application component is important. Kubegrade can help by providing recommendations based on historical data, making it easier to set appropriate resource requests and limits.
Resource Quotas and Namespaces for Effective Management
Resource quotas and namespaces help manage resource use across different teams, projects, or environments. Namespaces provide isolated environments, while resource quotas limit the total resources each namespace can use [4].
Resource quotas can limit the total amount of CPU, memory, and storage a namespace can consume. This prevents any single team or project from using too many resources [4].
Here?s an example of setting up a namespace and assigning a resource quota:
# Create a namespaceapiVersion: v1kind: Namespacemetadata: name: development---# Define a resource quotaapiVersion: v1kind: ResourceQuotametadata: name: dev-quota namespace: developmentspec: hard: cpu: "2" memory: "4Gi" pods: "10"This configuration creates a namespace called development and assigns a resource quota that limits the namespace to 2 CPUs, 4Gi of memory, and 10 pods [4].
Using resource quotas prevents resource exhaustion and ensures fair allocation. It also helps control costs by limiting resource consumption within each namespace [4].
Kubegrade simplifies managing resource quotas and namespaces. It provides a user-friendly interface for setting and monitoring resource usage, making it easier to maintain efficient resource allocation.
Monitoring and Optimization Tools for Resource Bottlenecks
Monitoring tools are important for finding resource bottlenecks and improving resource allocation in Kubernetes. These tools track key performance metrics, helping to identify areas that need adjustment [4].
Several tools can be used for monitoring Kubernetes, including:
- Prometheus: A monitoring solution that collects metrics from Kubernetes components and applications [5].
- Grafana: A data visualization tool that creates dashboards from Prometheus metrics [6].
- Kubernetes Dashboard: A web-based UI for managing and monitoring Kubernetes clusters [4].
These tools can track CPU use, memory consumption, and other key metrics. By watching these metrics, it?s possible to identify pods or nodes that are under-resourced or over-utilized [5, 6].
Setting up alerts is important for detecting resource bottlenecks and performance issues. For example, an alert can be set to trigger when CPU use exceeds 80% on a node [6].
Kubegrade integrates with monitoring tools to provide real-time insights and automated recommendations for resource optimization. This helps teams quickly identify and resolve resource bottlenecks, to help maintain efficient cluster performance.
Scaling Strategies for Optimal Performance

Kubernetes offers several scaling strategies to maintain performance. These include Horizontal Pod Autoscaling (HPA) and Vertical Pod Autoscaling (VPA) [7].
Horizontal Pod Autoscaling (HPA)
HPA automatically changes the number of pods based on CPU use or custom metrics. It ensures that applications can handle increased traffic without manual intervention [7].
To configure HPA, define a HorizontalPodAutoscaler resource:
apiVersion: autoscaling/v2beta2kind: HorizontalPodAutoscalermetadata: name: example-hpaspec: scaleTargetRef: apiVersion: apps/v1 kind: Deployment name: example-deployment minReplicas: 1 maxReplicas: 10 metrics: - type: Resource resource: name: cpu target: type: Utilization averageUtilization: 70This HPA configuration scales the example-deployment between 1 and 10 replicas, targeting 70% CPU utilization [7].
Vertical Pod Autoscaling (VPA)
VPA recommends CPU and memory settings for pods. It can also automatically adjust these settings, but this requires careful consideration to avoid disruptions [8].
To use VPA, deploy the VPA admission controller and create a VerticalPodAutoscaler resource:
apiVersion: autoscaling.k8s.io/v1kind: VerticalPodAutoscalermetadata: name: example-vpaspec: targetRef: apiVersion: apps/v1 kind: Deployment name: example-deployment updatePolicy: updateMode: "Auto"This VPA configuration automatically adjusts the CPU and memory settings for the example-deployment [8].
Load Balancing and Traffic Management
Load balancing and traffic management are important for scaling applications effectively. Kubernetes Service objects distribute traffic across pods, while tools like Istio provide advanced traffic management features [9].
Kubegrade can automate scaling decisions based on real-time performance data and predictive analysis. This helps optimize resource use and maintain performance during peak loads.
Horizontal Pod Autoscaling (HPA) Explained
Horizontal Pod Autoscaling (HPA) automatically adjusts the number of pods in a deployment or replica set. It responds to changes in CPU utilization, memory consumption, or custom metrics [7].
The HPA controller monitors resource use and scales pods as needed. It checks metrics against target values and adjusts the number of replicas to maintain the desired performance [7].
Here?s a step-by-step guide to configuring HPA:
- Define a
HorizontalPodAutoscalerresource. - Specify the target deployment or replica set.
- Set the minimum and maximum number of replicas.
- Define the target utilization for CPU, memory, or custom metrics.
Here?s an example HPA configuration:
apiVersion: autoscaling/v2beta2kind: HorizontalPodAutoscalermetadata: name: example-hpaspec: scaleTargetRef: apiVersion: apps/v1 kind: Deployment name: example-deployment minReplicas: 1 maxReplicas: 10 metrics: - type: Resource resource: name: cpu target: type: Utilization averageUtilization: 70Using HPA ensures application availability and responsiveness under varying workloads. It automatically adjusts resources to meet demand, preventing performance issues [7].
Kubegrade can automate HPA configuration based on historical data and predictive analysis. This helps set optimal scaling policies and maintain performance.
Vertical Pod Autoscaling (VPA) Detailed Look
Vertical Pod Autoscaling (VPA) adjusts the CPU and memory requests and limits of pods. Unlike HPA, which changes the number of pods, VPA modifies the resources allocated to individual pods [8].
VPA operates in different modes:
- Auto: VPA automatically updates the pod’s resources.
- Initial: VPA only sets the resources during pod creation.
- Off: VPA provides recommendations but does not automatically update resources.
Here?s a step-by-step guide to configuring VPA:
- Deploy the VPA admission controller.
- Create a
VerticalPodAutoscalerresource. - Specify the target deployment or replica set.
- Set the update mode (Auto, Initial, Off).
Here?s an example VPA configuration:
apiVersion: autoscaling.k8s.io/v1kind: VerticalPodAutoscalermetadata: name: example-vpaspec: targetRef: apiVersion: apps/v1 kind: Deployment name: example-deployment updatePolicy: updateMode: "Auto"Using VPA optimizes resource use and reduces waste. It ensures that pods have the right amount of resources, improving overall efficiency [8].
Kubegrade can use VPA to fine-tune resource allocations and improve cluster efficiency. By analyzing resource usage patterns, Kubegrade can recommend optimal VPA settings.
Load Balancing and Traffic Management for Easily Expanded Applications
Load balancing and traffic management are important for scaling applications effectively in Kubernetes. They ensure that traffic is distributed evenly across pods, preventing overload and maintaining performance [9].
Different load balancing techniques include:
- Round Robin: Distributes traffic sequentially to each pod.
- Least Connections: Sends traffic to the pod with the fewest active connections.
- IP Hash: Routes traffic based on the client’s IP address.
Kubernetes Service objects provide a stable endpoint for accessing applications. They abstract the underlying pods, allowing traffic to be routed without needing to know the individual pod IPs [9].
Ingress controllers manage external traffic and route requests to the correct services. They provide a single point of entry for external traffic, simplifying routing and security [9].
Traffic management tools like Istio implement advanced routing policies. These policies include canary deployments and A/B testing, allowing for controlled rollouts of new features [9].
Kubegrade integrates with load balancing and traffic management solutions to ensure performance and availability. By monitoring traffic patterns, Kubegrade can optimize routing and load balancing configurations.
Configuration Best Practices for Kubernetes
Proper configuration is important for secure and efficient Kubernetes deployments. This includes best practices for security, networking, and storage [10].
Network Policies for Application Isolation
Network policies isolate applications and restrict traffic flow. They define rules that control communication between pods, enhancing security and preventing unauthorized access [11].
To configure network policies, define a NetworkPolicy resource:
apiVersion: networking.k8s.io/v1kind: NetworkPolicymetadata: name: example-network-policyspec: podSelector: matchLabels: app: my-app policyTypes: - Ingress ingress: - from: - podSelector: matchLabels: app: allowed-appThis policy allows traffic only from pods with the label app: allowed-app to pods with the label app: my-app [11].
Secrets Management for Sensitive Information
Secrets management tools protect sensitive information like passwords and API keys. Kubernetes Secrets store this information securely, preventing it from being exposed in configuration files [12].
Tools like HashiCorp Vault provide advanced secrets management, including encryption and access control [12].
Persistent Volumes and Persistent Volume Claims
Persistent volumes (PVs) and persistent volume claims (PVCs) manage storage for stateful applications. PVs define the storage resource, while PVCs request storage for a specific application [13].
This setup allows applications to persist data across pod restarts and deployments [13].
Configuration Management Tools
Configuration management tools like Helm and Kustomize simplify application deployments. Helm uses charts to package and deploy applications, while Kustomize customizes Kubernetes configurations [14].
These tools ensure consistency across different environments [14].
Kubegrade helps enforce configuration best practices and automate configuration management tasks. This ensures that Kubernetes deployments are secure and efficient.
Improving Security with Network Policies and Secrets Management
Implementing network policies isolates applications and restricts traffic flow within a Kubernetes cluster. This improves security by controlling communication between pods [11].
Here?s an example of defining a network policy using YAML:
apiVersion: networking.k8s.io/v1kind: NetworkPolicymetadata: name: example-network-policyspec: podSelector: matchLabels: app: my-app policyTypes: - Ingress ingress: - from: - podSelector: matchLabels: app: allowed-appThis policy allows traffic only from pods labeled app: allowed-app to pods labeled app: my-app [11].
Secrets management tools protect sensitive information like passwords, API keys, and certificates. Tools like HashiCorp Vault and Kubernetes Secrets securely store this data [12].
To securely store secrets in Kubernetes, use the kubectl create secret command or define a Secret resource in YAML [12]. Access secrets by mounting them as volumes or using environment variables [12].
The principle of least privilege should be followed, granting only necessary access to secrets. Regularly rotating secrets is also important to maintain security [12].
Kubegrade can automate security policy enforcement and secrets management. This helps ensure that Kubernetes deployments are secure and compliant with best practices.
Managing Storage with Persistent Volumes and Claims
Persistent volumes (PVs) and persistent volume claims (PVCs) manage storage for stateful applications in Kubernetes. They allow applications to persist data across pod restarts and deployments [13].
PVs define the storage resource, while PVCs request storage for a specific application. PVs are cluster-level resources, while PVCs are namespace-level resources [13].
Storage classes define how storage is automatically provisioned. They allow administrators to define different types of storage, such as SSD or HDD, and their associated parameters [13].
Here?s an example of configuring a PV and PVC using YAML:
# Persistent VolumeapiVersion: v1kind: PersistentVolumemetadata: name: example-pvspec: capacity: storage: 10Gi accessModes: - ReadWriteOnce persistentVolumeReclaimPolicy: Retain storageClassName: standard hostPath: path: "/data/example"---# Persistent Volume ClaimapiVersion: v1kind: PersistentVolumeClaimmetadata: name: example-pvcspec: accessModes: - ReadWriteOnce resources: requests: storage: 5Gi storageClassName: standardThis configuration defines a PV with 10Gi of storage and a PVC that requests 5Gi of storage. The storageClassName specifies the storage class to use [13].
Backing up and restoring persistent volumes is important for data protection. Tools like Velero can be used to back up and restore PVs [13].
Kubegrade simplifies storage management and provides insights into storage use. This helps optimize storage allocation and maintain data availability.
Streamlining Deployments with Helm and Kustomize
Configuration management tools like Helm and Kustomize simplify application deployments and ensure consistency across environments. They automate the deployment process and reduce the risk of errors [14].
Helm charts package and deploy applications in a repeatable way. A Helm chart contains all the necessary Kubernetes resources and configurations for an application [14].
Here?s a step-by-step guide on creating and deploying Helm charts:
- Create a Helm chart using the
helm createcommand. - Define the Kubernetes resources in the chart’s
templatesdirectory. - Customize the chart using values in the
values.yamlfile. - Deploy the chart using the
helm installcommand.
Kustomize customizes Kubernetes configurations without modifying the original YAML files. It uses overlays to apply changes to different environments [14].
Here?s an example of using Kustomize to manage different environments:
- Create a base directory with the original YAML files.
- Create overlay directories for each environment (e.g.,
development,staging,production). - Define the customizations in the
kustomization.yamlfile in each overlay directory. - Apply the customizations using the
kubectl apply -kcommand.
Kubegrade integrates with Helm and Kustomize to automate deployments and enforce configuration best practices. This ensures that applications are deployed consistently and efficiently.
Conclusion: Achieving Peak Kubernetes Performance with Optimization
This article covered key strategies for Kubernetes optimization. These include resource management, scaling strategies, and configuration best practices. By implementing these strategies, businesses can improve application performance and reduce costs [2].
Continuous monitoring and optimization are important for maintaining performance and cost-efficiency. Regularly reviewing resource use and adjusting configurations ensures that Kubernetes clusters operate efficiently [4].
Kubegrade simplifies Kubernetes cluster management and automates optimization tasks. It provides tools for monitoring, scaling, and configuring Kubernetes deployments, helping teams maintain performance [2].
Explore Kubegrade?s features to unlock the full potential of your Kubernetes deployments. By automating optimization, Kubegrade helps teams focus on development and innovation.
Start a free trial or request a demo of Kubegrade today to experience the benefits of simplified Kubernetes management.

