


Kubernetes Guide for Developers: A Practical Introduction

by Tim
July 29, 2025
Kubernetes can seem complex for developers starting out. This guide provides a practical introduction to Kubernetes, covering the core concepts and tools needed to deploy applications. It will help developers understand how Kubernetes works and how it simplifies application management.
This resource offers a clear path for developers to learn Kubernetes, from basic principles to deployment strategies. It focuses on the basics, providing a solid foundation for building and managing applications on Kubernetes. It also introduces Kubegrade, a platform designed to further streamline Kubernetes cluster management.
Key Takeaways
- Kubernetes automates the deployment, scaling, and management of containerized applications, offering scalability, resilience, and resource optimization.
- Key Kubernetes concepts include Pods (smallest deployable units), Deployments (managing Pod replicas), Services (exposing applications), Namespaces (organizing resources), and ConfigMaps/Secrets (managing configuration data).
- Local Kubernetes development environments can be set up using Minikube, Kind, or Docker Desktop, each providing a single-node cluster for testing and debugging.
- Application deployment involves creating YAML manifests for Deployments and Services, then using `kubectl apply` to deploy and manage the application.
- Updating and scaling applications can be achieved using `kubectl apply` for rolling updates and `kubectl scale` for adjusting the number of replicas.
- Best practices include using small, immutable container images, implementing health checks (liveness and readiness probes), and managing configurations with ConfigMaps and Secrets.
- Effective logging and monitoring strategies involve structured logging, log aggregation (e.g., EFK stack), and using Prometheus and Grafana for metric visualization and alerting.
Table of Contents
- Introduction to Kubernetes for Developers
- Core Kubernetes Concepts Every Developer Should Know
- Setting Up Your Kubernetes Development Environment
- Deploying and Managing Applications on Kubernetes
- Best Practices for Kubernetes Development
- Conclusion: Kubernetes and the Future of Application Development
- Frequently Asked Questions
Introduction to Kubernetes for Developers

Kubernetes is a container orchestration platform that has become important in modern application development. It automates the deployment, scaling, and management of containerized applications [1]. For developers new to Kubernetes, this guide offers a practical introduction to its core concepts, tools, and best practices.
Initially developed by Google and later donated to the Cloud Native Computing Foundation (CNCF), Kubernetes has evolved into a leading platform for managing container workloads [1]. Its history reflects the growing need for efficient and, able to be scaled, application deployment solutions.
The benefits of using Kubernetes are numerous. It provides the ability to be scaled, allowing applications to handle increased traffic and workload demands [1]. Kubernetes also improves resilience by making sure applications remain available even if individual containers or nodes fail [1]. Also, it optimizes resource utilization, maximizing efficiency and reducing costs [1].
This guide aims to equip developers with the knowledge and skills necessary to start building and deploying applications on Kubernetes. It covers the fundamental aspects of Kubernetes, providing developers with a solid foundation for further exploration.
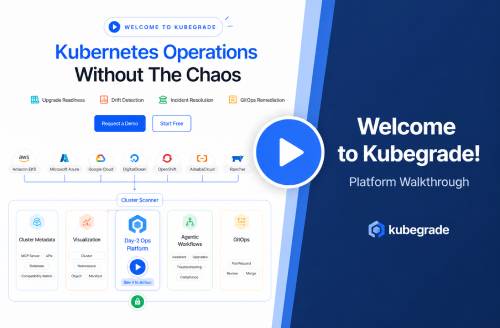
Kubegrade simplifies Kubernetes cluster management. It’s a platform for secure, able to be scaled, and automated K8s operations, enabling monitoring, upgrades, and optimization. For developers, Kubegrade offers streamlined workflows and simplified management, allowing them to focus on coding and innovation.
Core Kubernetes Concepts Every Developer Should Know
To work effectively with Kubernetes, developers should understand several core concepts. These components work together to manage and run applications [1]. Here’s a breakdown of the key concepts:
Pods
Pods are the smallest deployable units in Kubernetes [1]. A pod represents a single instance of a running process in a cluster and can contain one or more containers. If an application consists of multiple containers that need to work closely together, they can be encapsulated within a single pod. Think of a pod as a single apartment within a building, where the apartment houses all the necessary components for a specific function.
Example: A pod might contain an application server container and a logging agent container.
Deployments
Deployments manage Pod replicas, making sure that the desired number of pod instances are running at all times [1]. Deployments allow you to update applications without downtime by gradually replacing old pods with new ones. Imagine a deployment as a construction manager overseeing the building and maintenance of apartments, making sure there are always enough available and up-to-date units.
Example: A deployment might make sure that three replicas of a web application pod are always running, automatically replacing any failed pods.
Services
Services expose applications running in pods to the network, providing a stable IP address and DNS name [1]. Services act as a load balancer, distributing traffic across multiple pods. Think of a service as the building’s reception desk, directing visitors to the correct apartment without them needing to know the specific unit number.
Example: A service can expose a web application to external users, routing traffic to the available pods.
Namespaces
Namespaces organize resources within a Kubernetes cluster, providing a way to isolate and group related resources [1]. Namespaces allow multiple teams or projects to share a single cluster without interfering with each other. Consider namespaces as different floors in a building, each floor containing apartments (pods) belonging to different tenants (teams or projects).
Example: Separate namespaces can be created for development, testing, and production environments.
ConfigMaps and Secrets
ConfigMaps and Secrets manage configuration data for applications [1]. ConfigMaps store non-confidential data, while Secrets store sensitive information such as passwords and API keys. Think of ConfigMaps as the building’s notice board, displaying public information, while Secrets are like secure mailboxes for private correspondence.
Example: A ConfigMap might store the application’s configuration file, while a Secret might store the database password.
These concepts relate to each other in a cohesive manner. Pods are the basic units managed by Deployments, which are exposed through Services. Namespaces organize these resources, and ConfigMaps/Secrets provide configuration data. In a typical application deployment, developers define these components to deploy and manage their applications effectively.
Kubegrade can help manage and monitor these core components, simplifying the developer’s workflow. With Kubegrade, developers can easily visualize, configure, and maintain these resources, reducing the complexity of Kubernetes management.
About Pods: The Building Blocks of Kubernetes
In Kubernetes, pods are the most basic and smallest deployable units [1]. A pod represents a single instance of an application. It can consist of one or more containers that are deployed and managed together [1].
Containers within a pod share the same network namespace, IPC (Inter-Process Communication) namespace, and storage volumes [1]. This means that containers within a pod can easily communicate with each other as if they were on the same machine. They also share the same IP address and port space.
For example, a pod might contain a web server container and an application server container. These containers can communicate with each other directly, sharing data and resources. Another example is a pod containing an application container and a logging container, where the logging container collects and processes logs from the application container.
Pods are typically managed by higher-level controllers, such as Deployments, ReplicaSets, or StatefulSets. These controllers automate the creation, scaling, and management of pods. Instead of directly creating and managing pods, developers usually define the desired state of their application using these controllers, and Kubernetes takes care of the rest.
Kubegrade simplifies pod management and monitoring by providing a user-friendly interface to visualize and interact with pods. Kubegrade allows developers to easily monitor pod health, resource utilization, and logs, making it easier to troubleshoot and manage applications running in Kubernetes.
Deployments: Managing Application Replicas
Deployments are a higher-level abstraction in Kubernetes that manage Pod replicas [1]. They provide a declarative way to define the desired state of an application, and Kubernetes ensures that the actual state matches the desired state.
The desired state includes the number of replicas, the container image to use, and other configuration details. Deployments continuously monitor the running pods and automatically create new pods or delete existing ones to maintain the desired number of replicas [1].
Deployments also handle updates and rollbacks. When a developer updates the deployment configuration (e.g., to use a new container image), the deployment gradually replaces the old pods with new ones, without downtime. If something goes wrong during the update, the deployment can easily roll back to the previous version [1].
For example, a deployment configuration might specify that three replicas of a web application should be running at all times. If one of the pods fails, the deployment automatically creates a new pod to replace it. If the developer updates the deployment to use a new version of the web application, the deployment gradually replaces the old pods with the new ones, one at a time.
Scaling applications using deployments is straightforward. Developers can simply update the desired number of replicas in the deployment configuration, and Kubernetes automatically adjusts the number of running pods to match the new desired state.
Kubegrade automates deployment management and scaling by providing a user-friendly interface to define and manage deployments. With Kubegrade, developers can easily update deployment configurations, scale applications, and monitor the status of their deployments.
Services: Exposing Applications to the World
Services in Kubernetes provide a stable way to expose applications running in pods to the network [1]. Because pods are ephemeral and can be created or destroyed, services offer a consistent endpoint for accessing these applications [1].
There are different types of services, each serving a different purpose:
ClusterIP: Exposes the service on a cluster-internal IP address. This type is only accessible from within the cluster [1].NodePort: Exposes the service on each node’s IP address at a static port. This allows external access to the service [1].LoadBalancer: Exposes the service externally using a cloud provider’s load balancer. Traffic from the load balancer is routed to the backend pods [1].
Services provide a stable endpoint by abstracting away the underlying pods. Clients can access the service without needing to know the IP addresses of the individual pods. The service automatically routes traffic to the available pods [1].
For example, a service can be configured to expose a web application running in multiple pods. Clients can access the web application through the service’s IP address and port, and the service distributes traffic across the available pods.
Services can also be used to route traffic to different pods based on labels. For example, a service can be configured to route traffic to pods with a specific version label, allowing for easy A/B testing or canary deployments.
Kubegrade simplifies service discovery and management by providing a centralized view of all services in the cluster. With Kubegrade, developers can easily create, update, and monitor services, as well as configure traffic routing rules.
ConfigMaps and Secrets: Managing Configuration Data
ConfigMaps and Secrets in Kubernetes are used to manage configuration data for applications [1]. They allow developers to decouple configuration from application code, making it easier to manage and update configurations without modifying the application itself [1].
The main difference between ConfigMaps and Secrets is the type of data they store. ConfigMaps store non-sensitive configuration data, such as application settings, environment variables, and configuration files. Secrets, store sensitive information, such as passwords, API keys, and certificates [1].
Configuration data can be injected into pods in several ways. ConfigMaps and Secrets can be mounted as volumes, exposing the configuration data as files within the pod. They can also be injected as environment variables, making the configuration data available to the application as environment variables [1].
For example, a ConfigMap might store the application’s database connection string, while a Secret might store the database password. These can be injected into the pod, and the application can read the configuration data from the mounted files or environment variables.
Configuration data can be updated without restarting pods. When a ConfigMap or Secret is updated, Kubernetes automatically updates the corresponding volumes and environment variables in the pods that use them. The application can then detect the changes and update its configuration accordingly [1].
Kubegrade provides secure and centralized configuration management by allowing developers to easily create, update, and manage ConfigMaps and Secrets. With Kubegrade, developers can store sensitive information securely, control access to configuration data, and easily update configurations without downtime.
Setting Up Your Kubernetes Development Environment
To start developing applications for Kubernetes, setting up a local Kubernetes development environment is important. This allows you to test and debug your applications before deploying them to a production cluster. Here are a few options for setting up a local Kubernetes environment:
Minikube
Minikube is a lightweight Kubernetes distribution that makes it easy to set up a single-node Kubernetes cluster on your local machine [1].
- Install Minikube: Follow the instructions on the Minikube website to download and install the appropriate version for your operating system.
- Start Minikube: Open a terminal and run
minikube start. This will download the necessary components and start the Kubernetes cluster. - Verify Installation: Run
kubectl get nodesto verify that the cluster is running correctly. You should see a single node in theReadystate.
Kind (Kubernetes in Docker)
Kind is a tool for running local Kubernetes clusters using Docker container “nodes” [1].
- Install Docker: Make sure Docker is installed and running on your machine.
- Install Kind: Follow the instructions on the Kind website to download and install Kind.
- Create a Cluster: Run
kind create clusterto create a local Kubernetes cluster. - Verify Installation: Run
kubectl get nodesto verify that the cluster is running correctly.
Docker Desktop with Kubernetes
Docker Desktop allows you to enable a single-node Kubernetes cluster directly within Docker [1].
- Install Docker Desktop: Download and install Docker Desktop from the Docker website.
- Enable Kubernetes: In the Docker Desktop settings, enable Kubernetes.
- Verify Installation: Run
kubectl get nodesto verify that the cluster is running correctly.
Using Kubectl
kubectl is the Kubernetes command-line tool that allows you to interact with the cluster [1]. It is used to deploy applications, inspect cluster resources, and view logs.
- Install Kubectl: Follow the instructions on the Kubernetes website to download and install
kubectl. - Configure Kubectl:
kubectlis usually configured automatically by Minikube, Kind, and Docker Desktop. If not, configure it to point to your local cluster.
Deploying a Simple Application
Here’s how to deploy a simple Nginx application to your local cluster:
kubectl create deployment nginx --image=nginxkubectl expose deployment nginx --port=80 --type=NodePortTo verify that the application is running correctly:
kubectl get podskubectl get service nginxAccess the application in your browser using the NodePort IP.
Troubleshooting Tips
- If
kubectlis not working, make sure it is configured correctly to point to your local cluster. - If pods are not starting, check the pod logs for errors using
kubectl logs <pod-name>. - Make sure that your local Kubernetes environment has enough resources (CPU, memory) allocated.
Kubegrade can integrate with these local environments to provide a consistent development experience. By connecting Kubegrade to your local cluster, you can use its features to manage and monitor your applications, just as you would in a production environment.
Minikube: A Lightweight Kubernetes Distribution
Minikube is a tool that allows you to run a single-node Kubernetes cluster inside a VM on your laptop [1]. This section guides you through installing and configuring Minikube on different operating systems.
Installing Minikube
Windows
- Install Chocolatey: Open PowerShell as an administrator and run:
Set-ExecutionPolicy Bypass -Scope Process -Force; [System.Net.ServicePointManager]::SecurityProtocol = [System.Net.ServicePointManager]::SecurityProtocol -bor 3072; iex ((New-Object System.Net.WebClient).DownloadString('https://community.chocolatey.org/install.ps1')) - Install Minikube: Run
choco install minikube - Install Kubectl: Run
choco install kubernetes-cli
macOS
- Install Homebrew: If you don’t have Homebrew, install it by running:
/bin/bash -c "$(curl -fsSL https://raw.githubusercontent.com/Homebrew/install/HEAD/install.sh)" - Install Minikube: Run
brew install minikube - Install Kubectl: Run
brew install kubectl
Linux
- Download Minikube:
curl -LO https://storage.googleapis.com/minikube/releases/latest/minikube-linux-amd64 - Make Executable:
chmod +x minikube-linux-amd64 - Move to Path:
sudo mv minikube-linux-amd64 /usr/local/bin/minikube - Install Kubectl: Follow the instructions on the Kubernetes website to install
kubectl.
Starting and Stopping Minikube
- Start Minikube: Open a terminal and run
minikube start. - Stop Minikube: Run
minikube stop.
Interacting with Minikube using Kubectl
kubectl is pre-configured to interact with the Minikube cluster. You can use it to deploy applications, inspect resources, and manage the cluster.
- Verify Connection: Run
kubectl get nodesto verify thatkubectlis connected to the Minikube cluster.
Troubleshooting Tips
- If Minikube fails to start, make sure virtualization is enabled in your BIOS/UEFI settings.
- If you encounter network issues, try running
minikube deleteand thenminikube startagain. - Check the Minikube documentation for more troubleshooting tips.
Kubegrade can integrate with Minikube to provide a streamlined development workflow. By connecting Kubegrade to your Minikube cluster, you can use Kubegrade’s features to manage and monitor your applications, simplifying the development process.
Kind: Kubernetes IN Docker
Kind (Kubernetes in Docker) is a tool that lets you run a Kubernetes cluster inside Docker containers [1]. It’s useful for local development and testing. This section guides you through installing and configuring Kind.
Installing Kind
- Install Docker: Make sure Docker is installed and running on your machine.
- Install Go: Kind requires Go to be installed. Download and install Go from the official website.
- Install Kind:
- macOS/Linux: Run
go install sigs.k8s.io/kind@latest - Windows: Download the pre-built binary from the Kind releases page and add it to your PATH.
- macOS/Linux: Run
Creating a Kubernetes Cluster using Kind
- Create a Cluster: Run
kind create clusterto create a local Kubernetes cluster. This will create a cluster with default settings. - Verify Installation: Run
kubectl get nodesto verify that the cluster is running correctly.
Interacting with the Kind Cluster using Kubectl
kubectl is configured to interact with the Kind cluster automatically. You can use it to deploy applications, inspect resources, and manage the cluster.
Configuring Networking and Storage in Kind
Kind uses Docker networking, so you can expose services using port forwarding. For storage, you can use hostPath volumes or configure a local storage provisioner.
Troubleshooting Tips
- If the cluster fails to create, make sure Docker is running and that you have the necessary permissions.
- If you encounter networking issues, check the Docker network settings.
- Check the Kind documentation for more troubleshooting tips.
Kubegrade can be used to manage Kind clusters, providing a user-friendly interface to monitor and manage your applications. By connecting Kubegrade to your Kind cluster, you can simplify the development and testing process.
Docker Desktop with Kubernetes: A Convenient Option
Docker Desktop provides a convenient way to run a single-node Kubernetes cluster on your local machine [1]. This section explains how to enable Kubernetes in Docker Desktop and use it for local development.
Enabling Kubernetes in Docker Desktop
- Install Docker Desktop: Download and install Docker Desktop from the Docker website.
- Enable Kubernetes:
- Open Docker Desktop settings.
- Go to the “Kubernetes” tab.
- Check the “Enable Kubernetes” box.
- Click “Apply & Restart”.
- Wait for Kubernetes to initialize. This may take a few minutes.
Interacting with the Docker Desktop Kubernetes Cluster using Kubectl
kubectl is configured automatically to interact with the Docker Desktop Kubernetes cluster. You can use it to deploy applications, inspect resources, and manage the cluster.
- Verify Connection: Run
kubectl get nodesto verify thatkubectlis connected to the Docker Desktop Kubernetes cluster.
Configuring Resources and Networking
Docker Desktop allows you to configure the amount of resources (CPU, memory) allocated to the Kubernetes cluster. You can also configure networking settings, such as port forwarding, to expose services running in the cluster.
Troubleshooting Tips
- If Kubernetes fails to start, try restarting Docker Desktop.
- Make sure that you have enough resources allocated to Docker Desktop.
- Check the Docker Desktop documentation for more troubleshooting tips.
Kubegrade can be used alongside Docker Desktop for improved Kubernetes management. By connecting Kubegrade to your Docker Desktop Kubernetes cluster, you can use Kubegrade’s features to manage and monitor your applications, simplifying the development process.
Verifying Your Setup and Deploying a Test Application
After setting up your local Kubernetes environment, it’s important to verify that everything is working correctly. This section guides you through deploying a simple test application to your cluster.
Verifying Your Kubernetes Setup
- Check Node Status: Run
kubectl get nodesto verify that your Kubernetes cluster is running and that all nodes are in theReadystate. - Check Kubectl Version: Run
kubectl versionto verify thatkubectlis properly configured and can communicate with the cluster.
Deploying a Simple Application
Let’s deploy a simple Nginx web server to your cluster:
- Create a Deployment: Run
kubectl create deployment nginx --image=nginxto create a deployment namednginxusing thenginximage. - Check Deployment Status: Run
kubectl get deploymentsto verify that the deployment is created and that the desired number of replicas is running. - Check Pod Status: Run
kubectl get podsto verify that the pods are running and in theReadystate.
Exposing the Application using a Service
To access the application from outside the cluster, you need to expose it using a Service:
- Create a Service: Run
kubectl expose deployment nginx --port=80 --type=NodePortto create a NodePort service namednginxthat exposes port 80 on the nodes. - Get Service Information: Run
kubectl get service nginxto get the service information, including the NodePort.
Accessing the Application in a Web Browser
Open your web browser and navigate to http://<node-ip>:<node-port>, where <node-ip> is the IP address of your Kubernetes node and <node-port> is the NodePort assigned to the service. You should see the default Nginx welcome page.
Troubleshooting Tips
- If the pods are not running, check the pod logs for errors using
kubectl logs <pod-name>. - If you cannot access the application in your web browser, make sure that the NodePort is open in your firewall.
- If you are using Minikube, you can get the node IP address by running
minikube ip.
Kubegrade can simplify the deployment process by providing a user-friendly interface to deploy and manage applications. With Kubegrade, you can easily define deployments and services, monitor their status, and troubleshoot issues.
Deploying and Managing Applications on Kubernetes

Deploying and managing applications on Kubernetes involves several steps, from defining the application’s desired state to monitoring its performance. This section guides you through the process.
Creating Deployment and Service Manifests (YAML Files)
Deployment and Service manifests are YAML files that define the desired state of your application [1]. The Deployment manifest specifies the number of replicas, the container image, and other configuration details. The Service manifest defines how the application is exposed to the network.
Example Deployment Manifest:
apiVersion: apps/v1kind: Deploymentmetadata: name: nginx-deploymentspec: replicas: 3 selector: matchLabels: app: nginx template: metadata: labels: app: nginx spec: containers: - name: nginx image: nginx:latest ports: - containerPort: 80Example Service Manifest:
apiVersion: v1kind: Servicemetadata: name: nginx-servicespec: selector: app: nginx ports: - protocol: TCP port: 80 targetPort: 80 type: NodePortUsing Kubectl to Apply Manifests and Deploy the Application
To deploy the application, use the kubectl apply command [1]:
kubectl apply -f deployment.yamlkubectl apply -f service.yamlUpdating and Scaling the Application using Kubectl
To update the application, modify the Deployment manifest and apply the changes using kubectl apply. To scale the application, use the kubectl scale command [1]:
kubectl scale deployment nginx-deployment --replicas=5Rolling Updates and Rollbacks
Kubernetes performs rolling updates by default, gradually replacing old pods with new ones without downtime. If something goes wrong during the update, you can roll back to the previous version [1]:
kubectl rollout undo deployment nginx-deploymentBasic Monitoring and Logging Techniques
Use kubectl get pods, kubectl get deployments, and kubectl get services to monitor the status of your application. Use kubectl logs <pod-name> to view the logs for a specific pod [1].
Optimizing Application Deployments
- Use resource limits and requests to ensure efficient resource utilization.
- Use liveness and readiness probes to ensure that pods are healthy.
- Use horizontal pod autoscaling to automatically scale the application based on traffic.
Kubegrade simplifies deployment and management through automation and monitoring features. With Kubegrade, you can easily define deployments and services, monitor their status, and automate scaling and updates.
Creating Deployment and Service Manifests
Kubernetes Deployment and Service manifests are YAML files that define the desired state of your applications. These manifests tell Kubernetes how to deploy, manage, and expose your applications [1].
Structure of a Deployment Manifest
A Deployment manifest defines how to create and update Pods. Here’s a detailed example:
apiVersion: apps/v1 # Specifies the API versionkind: Deployment # Specifies the type of resourcemetadata: name: nginx-deployment # Name of the Deployment labels: app: nginx # Labels to identify the Deploymentspec: # Specifies the desired state of the Deployment replicas: 3 # Number of Pod replicas to maintain selector: # Defines how the Deployment finds the Pods to manage matchLabels: app: nginx # Selects Pods with the label app: nginx template: # Defines the Pod template metadata: labels: app: nginx # Labels applied to the Pods spec: containers: # Defines the containers in the Pod - name: nginx # Name of the container image: nginx:latest # Image to use for the container ports: - containerPort: 80 # Port the container exposes resources: # Defines resource requests and limits requests: # Minimum resources required cpu: 100m # 100 millicores of CPU memory: 128Mi # 128 MB of memory limits: # Maximum resources allowed cpu: 200m # 200 millicores of CPU memory: 256Mi # 256 MB of memoryStructure of a Service Manifest
A Service manifest defines how to expose your application to the network. Here’s a detailed example:
apiVersion: v1 # Specifies the API versionkind: Service # Specifies the type of resourcemetadata: name: nginx-service # Name of the Servicespec: # Specifies the desired state of the Service selector: # Defines which Pods the Service should route traffic to app: nginx # Selects Pods with the label app: nginx ports: # Defines the ports the Service exposes - protocol: TCP # Protocol to use port: 80 # Port the Service exposes targetPort: 80 # Port the Pod exposes type: NodePort # Type of Service (ClusterIP, NodePort, LoadBalancer)Key Fields in Manifests
apiVersion: Specifies the API version of the Kubernetes API you’re using.kind: Specifies the type of resource you’re creating (e.g., Deployment, Service).metadata: Contains metadata about the resource, such as its name and labels.spec: Specifies the desired state of the resource.
Labels and Selectors
Labels are key-value pairs attached to resources, used to organize and select resources. Selectors are used to select resources based on their labels. In the examples above, the app: nginx label is used to identify Pods and Services.
Resource Requests and Limits
Resource requests and limits define the minimum and maximum resources a container can use. This helps Kubernetes schedule pods effectively and prevent resource contention.
Kubegrade can generate and validate these manifests, simplifying the process of defining your application’s desired state. With Kubegrade, you can create and manage manifests with a user-friendly interface, reducing the risk of errors and making sure that your applications are deployed correctly.
Deploying Applications with Kubectl
kubectl is the primary command-line tool for interacting with Kubernetes clusters. This section shows how to use kubectl to deploy applications using the manifests created earlier [1].
Using Kubectl Apply
The kubectl apply command is used to deploy resources defined in YAML manifests [1].
kubectl apply -f deployment.yaml # Applies the Deployment manifestkubectl apply -f service.yaml # Applies the Service manifestChecking the Status of Deployments and Services
After applying the manifests, it’s important to check the status of the deployments and services to make sure they are running correctly [1].
kubectl get deployments # Lists all Deployments in the namespacekubectl get services # Lists all Services in the namespaceTo get more detailed information about a specific Deployment or Service:
kubectl get deployment nginx-deployment # Gets details about the nginx-deploymentkubectl get service nginx-service # Gets details about the nginx-serviceRetrieving Information about Resources with Kubectl Get
The kubectl get command can be used to retrieve information about various Kubernetes resources, such as Pods, Deployments, and Services [1].
kubectl get pods # Lists all Pods in the namespacekubectl get pods -o wide # Lists Pods with more detailed informationGetting Detailed Information about Resources with Kubectl Describe
The kubectl describe command provides detailed information about a specific resource, including its configuration, status, and events [1].
kubectl describe pod nginx-deployment-7c6c78f8f9-m4v9q # Describes a specific Podkubectl describe service nginx-service # Describes the nginx-serviceTroubleshooting Tips
- If the Deployment or Service is not running, check the logs of the Pods for errors using
kubectl logs <pod-name>. - Make sure that the labels and selectors in the manifests are correctly configured.
- Check the events for the Deployment or Service using
kubectl describeto identify any issues.
Kubegrade provides a visual interface for managing deployments, making it easier to monitor the status of your applications and troubleshoot issues. With Kubegrade, you can visualize your deployments, view logs, and manage resources without using the command line.
Updating and Scaling Applications
Kubernetes makes it easy to update and scale applications with minimal downtime. This section explains how to perform rolling updates, scale deployments, and configure auto-scaling [1].
Performing Rolling Updates
Rolling updates allow you to update your application without interrupting service. To perform a rolling update, modify the Deployment manifest (e.g., change the container image) and apply the changes [1]:
kubectl apply -f deployment.yamlKubernetes will gradually replace the old Pods with new ones, making sure that there is always a minimum number of replicas running.
Scaling Applications
Scaling an application involves increasing or decreasing the number of replicas. You can scale a Deployment using the kubectl scale command [1]:
kubectl scale deployment nginx-deployment --replicas=5 # Scales the Deployment to 5 replicasThis will increase the number of Pods managed by the Deployment to 5.
Configuring Auto-Scaling
Kubernetes can automatically scale your application based on resource utilization using Horizontal Pod Autoscaling (HPA). To configure auto-scaling, you need to define a HPA resource [1]:
apiVersion: autoscaling/v2beta2kind: HorizontalPodAutoscalermetadata: name: nginx-hpaspec: scaleTargetRef: apiVersion: apps/v1 kind: Deployment name: nginx-deployment minReplicas: 3 maxReplicas: 10 metrics: - type: Resource resource: name: cpu target: type: Utilization averageUtilization: 70This HPA configuration will automatically scale the nginx-deployment between 3 and 10 replicas based on CPU utilization. If the average CPU utilization exceeds 70%, the HPA will increase the number of replicas. If the CPU utilization falls below 70%, the HPA will decrease the number of replicas.
Kubegrade automates the update and scaling process by providing a user-friendly interface to define update strategies, scale deployments, and configure auto-scaling rules. With Kubegrade, you can easily manage the scaling and updates of your applications.
Monitoring and Logging Basics
Monitoring and logging are crucial for maintaining the health and performance of your Kubernetes applications. This section covers basic techniques for monitoring and logging in Kubernetes [1].
Viewing Application Logs with Kubectl Logs
The kubectl logs command allows you to view the logs of a specific pod [1]:
kubectl logs <pod-name> # Shows the logs for a specific podkubectl logs -f <pod-name> # Streams the logs in real-timeMonitoring Resource Utilization with Kubectl Top
The kubectl top command allows you to monitor the resource utilization (CPU and memory) of nodes and pods [1]:
kubectl top nodes # Shows the resource utilization of nodeskubectl top pods # Shows the resource utilization of podsBasic Monitoring Tools: Prometheus and Grafana
Prometheus and Grafana are popular open-source tools for monitoring Kubernetes clusters [1]. Prometheus collects metrics from your applications and Kubernetes components, while Grafana provides a user-friendly interface for visualizing those metrics.
Setting Up Basic Alerts
You can set up basic alerts using Prometheus Alertmanager. Alertmanager allows you to define rules that trigger alerts based on certain conditions (e.g., high CPU utilization) [1].
Kubegrade provides comprehensive monitoring and logging capabilities, allowing you to monitor the health and performance of your applications in real-time. With Kubegrade, you can easily view logs, monitor resource utilization, and set up alerts, simplifying the process of maintaining your Kubernetes applications.
Best Practices for Kubernetes Development
Developing applications for Kubernetes requires following certain best practices to ensure reliability, scalability, and security. This section outlines key best practices for Kubernetes development [1].
Containerization Best Practices
Use small, immutable container images to reduce the size of your deployments and improve security [1]. Small images are faster to download and deploy, while immutable images prevent unexpected changes to your application.
- Use multi-stage builds to create small images.
- Use a minimal base image (e.g., Alpine Linux).
- Avoid storing sensitive information in the image.
Using Health Checks (Liveness and Readiness Probes)
Health checks allow Kubernetes to monitor the health of your pods and automatically restart them if they become unhealthy [1]. Liveness probes check if a pod is running, while readiness probes check if a pod is ready to serve traffic.
livenessProbe: httpGet: path: /healthz port: 8080 initialDelaySeconds: 3 periodSeconds: 10readinessProbe: httpGet: path: /readyz port: 8080 initialDelaySeconds: 5 periodSeconds: 15Managing Configurations with ConfigMaps and Secrets
Use ConfigMaps and Secrets to manage configuration data for your applications. This allows you to decouple configuration from code and easily update configurations without modifying the application [1].
Implementing Proper Logging and Monitoring
Implement proper logging and monitoring to track the health and performance of your applications. Use structured logging to make it easier to analyze logs, and use monitoring tools like Prometheus and Grafana to visualize metrics [1].
Securing Applications
Secure your applications by following security best practices, such as [1]:
- Using network policies to restrict network traffic.
- Using RBAC (Role-Based Access Control) to control access to resources.
- Using image scanning to identify vulnerabilities in container images.
Following these best practices improves the reliability, scalability, and security of your applications. These practices help ensure that your applications are deployed correctly, perform well, and are protected from security threats.
Kubegrade helps enforce these best practices through its built-in features and policies. With Kubegrade, you can easily configure health checks, manage configurations, implement security policies, and monitor the performance of your applications.
Containerization Best Practices
Containerization is a fundamental aspect of Kubernetes development. Following best practices for containerizing applications ensures that your deployments are efficient, secure, and reliable [1].
Creating Small, Immutable Images
Small container images are faster to download and deploy, which reduces deployment time and improves scalability. Immutable images prevent unexpected changes to your application, making it easier to troubleshoot issues [1].
Using Multi-Stage Builds
Multi-stage builds allow you to create small images by separating the build environment from the runtime environment. This involves using multiple FROM instructions in your Dockerfile, where each FROM instruction starts a new build stage. Only the final stage is included in the final image [1].
# Stage 1: Build the applicationFROM maven:3.6.3-jdk-11 AS builderWORKDIR /appCOPY pom.xml .COPY src ./srcRUN mvn clean install# Stage 2: Create the final imageFROM openjdk:11-jre-slimWORKDIR /appCOPY --from=builder /app/target/*.jar app.jarCMD ["java", "-jar", "app.jar"]Using a Minimal Base Image
Using a minimal base image, such as Alpine Linux, reduces the size of your container images. Alpine Linux is a lightweight Linux distribution that is designed for containers [1].
FROM alpine:latest# Install dependencies and copy application filesUsing a Consistent Tagging Strategy
A consistent tagging strategy makes it easier to manage and track different versions of your container images. Use tags to identify the version of the application, the build number, or other relevant information [1].
Optimizing Dockerfiles for Performance
Optimize your Dockerfiles for performance by following these tips [1]:
- Use a
.dockerignorefile to exclude unnecessary files from the image. - Combine multiple
RUNinstructions into a single instruction to reduce the number of layers in the image. - Use the
--no-cacheoption when building the image to prevent caching of intermediate layers.
Kubegrade can help automate container image building and management by providing a streamlined workflow for building, tagging, and pushing images to a container registry. With Kubegrade, you can easily manage your container images and ensure that they are built according to best practices.
Health Checks: Liveness and Readiness Probes
Health checks are important for making sure of the reliability and availability of your applications in Kubernetes [1]. Kubernetes uses health checks to monitor the health of your pods and automatically restart them if they become unhealthy. There are two main types of health checks: liveness probes and readiness probes [1].
Liveness Probes
Liveness probes check if a pod is running. If the liveness probe fails, Kubernetes restarts the pod [1]. This is useful for detecting and recovering from situations where the application is running but has become unresponsive.
Readiness Probes
Readiness probes check if a pod is ready to serve traffic. If the readiness probe fails, Kubernetes removes the pod from the service endpoints, preventing traffic from being routed to the pod [1]. This is useful for detecting and recovering from situations where the application is starting up or is temporarily unable to handle requests.
Configuring Probes
You can configure probes in your pod’s YAML manifest. There are three types of probes: HTTP, TCP, and command probes [1].
- HTTP Probes: Send an HTTP GET request to a specified path and port.
- TCP Probes: Attempt to establish a TCP connection to a specified port.
- Command Probes: Execute a command inside the container.
Example of an HTTP Probe:
livenessProbe: httpGet: path: /healthz port: 8080 initialDelaySeconds: 3 periodSeconds: 10Example of a TCP Probe:
readinessProbe: tcpSocket: port: 3306 initialDelaySeconds: 5 periodSeconds: 15Example of a Command Probe:
livenessProbe: exec: command: ["/bin/sh", "-c", "pg_isready -U postgres"] initialDelaySeconds: 10 periodSeconds: 20Health checks improve application reliability and availability by automatically detecting and recovering from failures. They also make sure that traffic is only routed to healthy pods, preventing users from experiencing errors [1].
Kubegrade provides built-in health check monitoring and alerting, making it easy to monitor the health of your applications and receive notifications when issues arise. With Kubegrade, you can easily configure health checks for your pods and make sure that your applications are running smoothly.
Configuration Management with ConfigMaps and Secrets
Managing application configurations effectively is important for Kubernetes deployments. ConfigMaps and Secrets are Kubernetes resources that allow you to decouple configuration data from your application code, making it easier to manage and update configurations without modifying the application itself [1].
Storing and Managing Sensitive Data
Sensitive data, such as passwords, API keys, and certificates, should be stored in Secrets. Secrets are stored securely in the Kubernetes cluster and can be accessed only by authorized pods [1]. Avoid storing sensitive data in ConfigMaps or environment variables.
Injecting Configuration Data into Pods
Configuration data can be injected into pods in several ways [1]:
- As environment variables: Use the
envfield in the pod’s YAML manifest to define environment variables that are populated from ConfigMaps or Secrets. - As volume mounts: Mount ConfigMaps or Secrets as volumes, exposing the configuration data as files within the pod.
Example of injecting a ConfigMap as environment variables:
containers:- name: my-app image: my-app-image env: - name: DATABASE_URL valueFrom: configMapKeyRef: name: my-configmap key: database_urlExample of mounting a Secret as a volume:
volumes:- name: my-secret-volume secret: secretName: my-secretcontainers:- name: my-app image: my-app-image volumeMounts: - name: my-secret-volume mountPath: /etc/secrets readOnly: trueUpdating Configurations without Restarting Pods
You can update configurations without restarting pods by using ConfigMap and Secret updates. When a ConfigMap or Secret is updated, Kubernetes automatically updates the corresponding volumes and environment variables in the pods that use them. The application can then detect the changes and update its configuration accordingly [1].
Centralized Configuration Management System
Using a centralized configuration management system helps to maintain consistency and control over your application configurations. This system makes it easier to manage configurations across multiple environments and applications, and provides features such as versioning, auditing, and access control [1].
Kubegrade provides secure and centralized configuration management, allowing you to easily create, update, and manage ConfigMaps and Secrets. With Kubegrade, you can store sensitive information securely, control access to configuration data, and easily update configurations without downtime.
Logging and Monitoring Strategies
Good logging and monitoring are key to knowing the behavior of your applications and quickly finding and fixing issues in Kubernetes [1]. This section outlines best practices for logging and monitoring Kubernetes applications.
Structured Logging and Log Aggregation
Structured logging involves formatting your log messages in a consistent, machine-readable format, such as JSON. This makes it easier to analyze logs and extract meaningful information [1]. Log aggregation involves collecting logs from all of your pods and storing them in a central location.
Tools like Fluentd, Elasticsearch, and Kibana (the EFK stack) are commonly used for log aggregation in Kubernetes [1]. Fluentd collects logs from the pods, Elasticsearch stores the logs, and Kibana provides a user-friendly interface for searching and analyzing the logs.
Using Prometheus and Grafana for Monitoring
Prometheus and Grafana are popular open-source tools for monitoring Kubernetes clusters [1]. Prometheus collects metrics from your applications and Kubernetes components, while Grafana provides a user-friendly interface for visualizing those metrics.
To use Prometheus and Grafana, you need to [1]:
- Deploy Prometheus and Grafana to your Kubernetes cluster.
- Configure Prometheus to scrape metrics from your applications and Kubernetes components.
- Create dashboards in Grafana to visualize the metrics.
Setting Up Alerts for Critical Events
Alerts notify you when critical events occur in your Kubernetes cluster, such as high CPU utilization, low memory, or application errors. You can set up alerts using Prometheus Alertmanager [1].
To set up alerts, you need to [1]:
- Define alert rules in Prometheus.
- Configure Alertmanager to receive alerts from Prometheus.
- Configure Alertmanager to send notifications to your preferred channel (e.g., email, Slack).
Monitoring Application Performance and Resource Utilization
Monitoring application performance and resource utilization is important for identifying bottlenecks and optimizing your deployments. Use Prometheus and Grafana to monitor metrics such as CPU utilization, memory utilization, network traffic, and request latency [1].
Kubegrade provides comprehensive monitoring and logging capabilities, allowing you to monitor the health and performance of your applications in real-time. With Kubegrade, you can easily view logs, monitor resource utilization, and set up alerts, simplifying the process of maintaining your Kubernetes applications.
Securing Your Kubernetes Applications
Securing your Kubernetes applications is important to protect against unauthorized access and data breaches. This section outlines best practices for securing Kubernetes applications [1].
Network Policies
Network policies control the network traffic between pods. By default, all pods in a Kubernetes cluster can communicate with each other. Network policies allow you to restrict this traffic, allowing only authorized pods to communicate with each other [1].
Example of a Network Policy:
apiVersion: networking.k8s.io/v1kind: NetworkPolicymetadata: name: my-network-policyspec: podSelector: matchLabels: app: my-app ingress: - from: - podSelector: matchLabels: app: allowed-app policyTypes: - IngressThis network policy allows only pods with the label app: allowed-app to access pods with the label app: my-app.
RBAC (Role-Based Access Control)
RBAC controls access to Kubernetes resources based on roles and permissions. You can define roles that specify which actions are allowed on which resources, and then assign those roles to users or groups [1].
Security Contexts
Security contexts define the security settings for a pod or container. You can use security contexts to control the privileges and capabilities of a pod or container, such as [1]:
- Running a container as a non-root user.
- Limiting the capabilities of a container.
- Enabling or disabling privileged mode.
Limiting Access to Resources
Limit access to resources by following the principle of least privilege. Grant users and applications only the permissions they need to perform their tasks [1].
Encrypting Sensitive Data
Encrypt sensitive data at rest and in transit. Use Kubernetes Secrets to store sensitive data, and enable encryption at rest for your etcd database [1]. Use TLS to encrypt communication between components.
Regularly Scanning for Vulnerabilities
Regularly scan your container images and Kubernetes components for vulnerabilities. Use tools like Clair, Trivy, or Anchore to scan your images for known vulnerabilities [1].
Kubegrade provides security features and policies to protect Kubernetes clusters, such as network policy management, RBAC configuration, and vulnerability scanning. With Kubegrade, you can easily implement security best practices and protect your Kubernetes applications from threats.
Conclusion: Kubernetes and the Future of Application Development
This guide has covered the key concepts and best practices for developing applications on Kubernetes. From knowing Pods, Deployments, and Services to implementing effective logging, monitoring, and security strategies, developers now have a foundation for building and managing applications in Kubernetes [1].
Using Kubernetes offers numerous benefits, including improved scalability, resilience, and resource utilization. Kubernetes enables developers to deploy and manage applications more efficiently, allowing them to focus on innovation and delivering value to their users [1].
The future of Kubernetes and containerization is exciting, with ongoing developments in areas such as serverless computing, service meshes, and edge computing. These technologies are expanding the capabilities of Kubernetes and making it even more versatile and effective [1].
Kubegrade simplifies Kubernetes adoption and management for developers by providing a user-friendly interface and automating many of the complex tasks involved in deploying and managing applications. Kubegrade helps developers streamline their workflows and focus on building great applications [1].
Developers are encouraged to continue learning and experimenting with Kubernetes. The Kubernetes community is active and supportive, and there are numerous resources available to help developers learn and grow.
Further Resources:
Explore Kubegrade and its features for streamlining your Kubernetes workflows. Kubegrade can help you simplify deployment, management, monitoring, and security, allowing you to focus on building and delivering great applications.

