





Kubernetes Examples: Practical Applications and Use Cases

by Tim
December 26, 2025
Kubernetes has become a cornerstone of modern application deployment, offering a platform for managing containerized workloads. Its ability to automate scaling, deployment, and operations across clusters makes it invaluable for businesses of all sizes. This article intends to present practical Kubernetes examples and use cases, providing a clear view of how this technology can be applied in real-world scenarios.
From managing microservices to orchestrating complex AI/ML workloads, Kubernetes offers a versatile solution for various challenges. By examining specific examples, one can discover how Kubernetes simplifies application deployment, ensures high availability, and optimizes resource utilization. The goal is to provide insights and code snippets that demonstrate the flexibility of Kubernetes in action.
Key Takeaways
- Kubernetes automates container deployment, scaling, and management, grouping containers into logical units for efficient application delivery.
- Kubernetes Deployments define the desired state of applications, including container images, resource requirements, and replica counts, using YAML files.
- Kubernetes Services expose applications, providing stable IP addresses and DNS names, with types like ClusterIP, NodePort, and LoadBalancer.
- Horizontal Pod Autoscaling (HPA) automatically adjusts the number of pods in a deployment based on metrics like CPU utilization, optimizing performance and resource use.
- Rolling updates allow deploying new application versions with minimal downtime by gradually replacing old pods with new ones.
- Kubernetes Secrets securely store sensitive information like passwords, while ConfigMaps manage non-sensitive configuration data, separating them from application code.
- Kubegrade simplifies Kubernetes management with automated features for deployment, monitoring, scaling, and security, reducing manual effort and potential errors.
Table of Contents
- Introduction to Kubernetes and Its Importance
- Example 1: Deploying a Simple Web Application
- Example 2: Scaling Applications with Kubernetes
- Example 3: Implementing Rolling Updates and Rollbacks
- Example 4: Managing Secrets and Configuration Data
- Conclusion: Kubernetes in Action and the Role of Kubegrade
- Frequently Asked Questions
Introduction to Kubernetes and Its Importance
Kubernetes (K8s) is a system for automating deployment, scaling, and management of containerized applications. It groups containers that make up an application into logical units for easy management and discovery. Kubernetes helps to deliver applications faster and more efficiently.
Container orchestration is important because it automates the deployment, scaling, networking, and availability of containers. This automation reduces the manual effort required to manage applications, allowing development teams to focus on coding and innovation. Kubernetes provides resilience and efficiency.
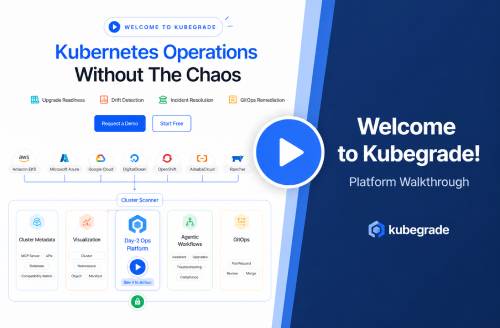
Kubegrade simplifies Kubernetes cluster management. It’s a platform for secure and automated K8s operations, enabling monitoring, upgrades, and optimization. Kubegrade helps teams manage K8s clusters more effectively.
This article provides practical Kubernetes examples and use cases to understand how to use this container orchestration platform for applications. The examples show real-world scenarios and code snippets.
“`
Example 1: Deploying a Simple Web Application
This example demonstrates how to deploy a basic web application using Kubernetes. A simple ‘Hello World’ application will be deployed, demonstrating the necessary YAML configurations for Deployments and Services.
Step 1: Create a Deployment YAML File
First, create a YAML file (e.g., hello-world-deployment.yaml) to define the deployment:
apiVersion: apps/v1 kind: Deployment metadata: name: hello-world-deployment spec: replicas: 3 selector: matchLabels: app: hello-world template: metadata: labels: app: hello-world spec: containers: - name: hello-world image: nginx:latest ports: - containerPort: 80 resources: limits: cpu: "0.1" memory: "128Mi" Explanation:
apiVersion: apps/v1: Specifies the API version for the Deployment.kind: Deployment: Defines that this is a Deployment configuration.metadata: name: Sets the name of the Deployment (hello-world-deployment).spec.replicas: Specifies the number of pod replicas to maintain (3 in this case).spec.selector: Defines how the Deployment finds which Pods to manage.spec.template: Defines the Pod template.spec.template.metadata.labels: Labels to apply to the Pods.spec.template.spec.containers: Defines the container(s) that will run in the Pod.spec.template.spec.containers.name: The name of the container (hello-world).spec.template.spec.containers.image: The Docker image to use for the container (nginx:latest).spec.template.spec.containers.ports: The ports the container will expose (port 80).spec.template.spec.containers.resources.limits: Resource limits for the container (CPU and memory).
Step 2: Create a Service YAML File
Next, create a Service YAML file (e.g., hello-world-service.yaml) to expose the application:
apiVersion: v1 kind: Service metadata: name: hello-world-service spec: selector: app: hello-world ports: - protocol: TCP port: 80 targetPort: 80 type: LoadBalancer Explanation:
apiVersion: v1: Specifies the API version for the Service.kind: Service: Defines that this is a Service configuration.metadata: name: Sets the name of the Service (hello-world-service).spec.selector: Defines how the Service finds which Pods to route traffic to.spec.ports: Defines the port mapping.spec.ports.protocol: The protocol to use (TCP).spec.ports.port: The port the Service will expose (80).spec.ports.targetPort: The port on the Pod that the Service will forward traffic to (80).type: LoadBalancer: Exposes the service externally using a cloud provider’s load balancer.
Step 3: Apply the Configurations
Use kubectl to apply the configurations:
kubectl apply -f hello-world-deployment.yaml kubectl apply -f hello-world-service.yaml Step 4: Verify the Deployment
Check if the deployment was successful:
kubectl get deployments kubectl get services You should see the hello-world-deployment and hello-world-service listed. To access the application, get the external IP of the service:
kubectl get service hello-world-service -o wide Open a web browser and navigate to the external IP address to see the ‘Hello World’ application.
Kubegrade Simplification
Kubegrade can streamline this deployment process with automated deployment features. It provides a user interface to define deployments and services, automatically generating the YAML configurations and applying them to the cluster. This reduces the manual steps and potential errors, making the deployment process faster and more efficient.
“`
Creating the Deployment YAML
The first step in deploying a web application on Kubernetes involves creating a Deployment YAML file. This file defines the desired state for application deployments, including the container image, resource requirements, and the number of replicas.
Here?s a breakdown of the key components:
apiVersion: Specifies the API version of the Kubernetes resource. For Deployments, it’s typicallyapps/v1.kind: Defines the type of Kubernetes resource, which in this case isDeployment.metadata: Contains metadata about the Deployment, such as itsname.spec: Specifies the desired state of the Deployment. This includes:replicas: The number of pod replicas to maintain.selector: Defines how the Deployment finds the Pods it manages usingmatchLabels.template: A template for creating new Pods. It includes:metadata.labels: Labels to apply to the Pods.spec.containers: A list of containers to run in the Pod. Each container definition includes:name: The name of the container.image: The Docker image to use (e.g., a simple ‘Hello World’ image from Docker Hub likenginx:latest).ports: The ports the container will expose.resources: Resource requests and limits for the container, such as CPU and memory.
Example YAML configuration:
apiVersion: apps/v1 kind: Deployment metadata: name: hello-world-deployment spec: replicas: 3 selector: matchLabels: app: hello-world template: metadata: labels: app: hello-world spec: containers: - name: hello-world image: nginx:latest ports: - containerPort: 80 resources: limits: cpu: "0.1" memory: "128Mi" Best practices for structuring the YAML file include using indentation consistently, providing meaningful names and labels, and keeping the file organized for readability and maintainability. This structured approach ensures that the deployment configuration is clear and easy to manage.
Creating this Deployment YAML file is the initial step in deploying the application to a Kubernetes cluster.
“`
Defining the Service YAML
After defining the Deployment, the next step is to create a Service YAML file. This file exposes the web application, allowing external access to the deployed pods. Services in Kubernetes provide a stable IP address and DNS name for accessing applications, regardless of pod failures or scaling events.
There are several types of Services in Kubernetes:
ClusterIP: Exposes the Service on a cluster-internal IP. This type makes the Service only reachable from within the cluster. It is the default Service type.NodePort: Exposes the Service on each node’s IP at a static port (the NodePort). AClusterIPService is automatically created to route to theNodePortService. You can access theNodePortService from outside the cluster by requestingNodeIP:NodePort.LoadBalancer: Exposes the Service externally using a cloud provider?s load balancer. The cloud provider load balancer routes to theNodePortandClusterIPServices, created automatically.
Here’s an example of a Service configuration using LoadBalancer:
apiVersion: v1 kind: Service metadata: name: hello-world-service spec: selector: app: hello-world ports: - protocol: TCP port: 80 targetPort: 80 type: LoadBalancer Key components explained:
apiVersion: Specifies the API version for the Service (typicallyv1).kind: Defines the type of Kubernetes resource, which isService.metadata: name: Sets the name of the Service (hello-world-service).spec.selector: This is crucial for linking the Service to the Deployment. It specifies which Pods the Service should route traffic to. Theselectormust match the labels defined in the Deployment’s pod template (app: hello-worldin this example).spec.ports: Defines the port mapping:protocol: The protocol to use (TCP).port: The port the Service will expose (80).targetPort: The port on the Pod that the Service will forward traffic to (80).
type: Determines how the Service is exposed.LoadBalanceris used here to expose the service externally using a cloud provider’s load balancer.
The selector is vital because it ensures that the Service correctly routes traffic to the Pods managed by the Deployment. Without a matching selector, the Service would not know which Pods to direct traffic to, rendering the application inaccessible.
This Service configuration enables external access to the deployed application by providing a stable IP address and port through which users can interact with the ‘Hello World’ application.
“`
Deploying and Verifying the Application
With the Deployment and Service YAML files created, the next step is to deploy the application to the Kubernetes cluster and verify that it is running correctly. Here are step-by-step instructions:
- Apply the Configurations: Use the
kubectl applycommand to deploy the application using the YAML files:kubectl apply -f hello-world-deployment.yaml kubectl apply -f hello-world-service.yamlThis command tells Kubernetes to create the resources defined in the YAML files.
- Check Deployment Status: Verify that the deployment is successful by checking the status of the deployment:
kubectl get deploymentsThis command shows the status of the deployments, including the number of replicas, the number of available replicas, and the age of the deployment. Ensure that the
hello-world-deploymentis listed and that the number of available replicas matches the desired number of replicas. - Check Service Status: Verify that the service is running correctly by checking the status of the service:
kubectl get servicesThis command shows the status of the services, including the type of service, the cluster IP, and the external IP (if applicable). For a
LoadBalancerservice, it may take a few minutes for the external IP to be provisioned. - Access the Application: Access the application through the Service’s endpoint. For a
LoadBalancerservice, use the external IP address. You can retrieve the external IP using:kubectl get service hello-world-service -o wideOpen a web browser and navigate to the external IP address to see the ‘Hello World’ application. Alternatively, use
curlto test the endpoint:curl <EXTERNAL-IP>
Troubleshooting Tips:
- If the deployment fails, check the logs of the pods for errors:
kubectl get pods kubectl logs <POD-NAME> - If the service is not accessible, ensure that the
selectorin the Service YAML matches the labels in the Deployment YAML. - Check the Kubernetes events for any issues:
kubectl get events
Kubegrade simplifies this verification process with its built-in monitoring and logging tools. It provides a dashboard to view the status of deployments and services, as well as real-time logs and metrics to help troubleshoot issues quickly. This reduces the manual effort required to verify the deployment and ensures that the application is running smoothly.
“`
Example 2: Scaling Applications with Kubernetes
This example demonstrates how Kubernetes can scale applications based on demand using Horizontal Pod Autoscaling (HPA). HPA automatically adjusts the number of pods in a deployment based on observed CPU utilization or other select metrics.
Step 1: Deploy a Sample Application
First, ensure a sample application is deployed. For this example, the hello-world-deployment from the previous example can be reused.
Step 2: Create an HPA YAML File
Create a YAML file (e.g., hpa.yaml) to define the HPA:
apiVersion: autoscaling/v2beta2 kind: HorizontalPodAutoscaler metadata: name: hello-world-hpa spec: scaleTargetRef: apiVersion: apps/v1 kind: Deployment name: hello-world-deployment minReplicas: 1 maxReplicas: 5 metrics: - type: Resource resource: name: cpu target: type: Utilization averageUtilization: 50 Explanation:
apiVersion: autoscaling/v2beta2: Specifies the API version for the HPA.kind: HorizontalPodAutoscaler: Defines that this is an HPA configuration.metadata: name: Sets the name of the HPA (hello-world-hpa).spec.scaleTargetRef: Specifies the target to scale:apiVersion: API version of the target (apps/v1).kind: Kind of the target (Deployment).name: Name of the target (hello-world-deployment).
spec.minReplicas: The minimum number of replicas the HPA will maintain (1).spec.maxReplicas: The maximum number of replicas the HPA will scale to (5).spec.metrics: The metrics to use for scaling:type: Resource: Indicates that a resource metric is being used.resource: name: cpu: Specifies that CPU utilization is the metric.target: type: Utilization averageUtilization: 50: Target CPU utilization percentage (50%).
Step 3: Apply the HPA Configuration
Use kubectl to apply the HPA configuration:
kubectl apply -f hpa.yaml Step 4: Monitor the Scaling Process
Monitor the scaling process using kubectl:
kubectl get hpa hello-world-hpa kubectl describe hpa hello-world-hpa These commands show the current status of the HPA, including the current number of replicas, the target CPU utilization, and any events related to scaling. To generate load, you can use a load testing tool to simulate traffic to the hello-world-service. As CPU utilization increases, the HPA will automatically increase the number of pods, up to the maxReplicas limit.
Kubegrade Monitoring and Scaling
Kubegrade’s monitoring capabilities provide insights into application performance, including CPU utilization, memory usage, and request latency. These insights can trigger scaling events automatically. Kubegrade can be configured to send alerts when certain thresholds are reached, allowing teams to address performance issues and ensure that applications are scaled appropriately to meet demand.
“`
Horizontal Pod Autoscaling (HPA)
Horizontal Pod Autoscaling (HPA) is a Kubernetes feature that automatically adjusts the number of pods in a deployment to match the application’s current demand. It adjusts the number of pods up or down based on observed metrics, such as CPU utilization, memory usage, or custom metrics provided by applications.
The primary goal of HPA is to maintain application performance and optimize resource utilization. By automatically adjusting the number of pods, HPA ensures that the application can handle increased traffic without performance degradation. It also helps to avoid over-provisioning resources during periods of low traffic, saving infrastructure costs.
Here?s how HPA relates to Deployments and Services:
- Deployments: HPA targets Deployments (or other resources like ReplicaSets) to manage the number of pods. The HPA monitors the metrics of the pods managed by the Deployment and adjusts the number of replicas as needed.
- Services: Services provide a stable endpoint for accessing the application, regardless of the number of pods. HPA ensures that there are enough pods behind the Service to handle the incoming traffic, maintaining application availability and performance.
In essence, HPA acts as a resource manager, continuously monitoring the application’s performance and adjusting the number of pods to meet the demand. This automated scaling ensures that the application remains responsive and efficient, providing a better user experience and optimizing resource costs.
This sets the stage for a practical example, demonstrating how to configure and use HPA to automatically adjust an application based on CPU utilization.
“`
Configuring the HPA YAML
Creating an HPA YAML configuration file involves defining the desired scaling behavior for a Kubernetes deployment. This configuration tells Kubernetes how to automatically adjust the number of pods based on resource utilization.
Here?s a detailed walkthrough of each field in the HPA YAML:
apiVersion: Specifies the API version for the HPA. The recommended version isautoscaling/v2beta2orautoscaling/v2, as they offer more features and stability.kind: Defines the type of Kubernetes resource, which isHorizontalPodAutoscaler.metadata: Contains metadata about the HPA, such as itsname.spec: Specifies the desired state of the HPA. This includes:scaleTargetRef: A reference to the target resource that the HPA will scale. It includes:apiVersion: The API version of the target resource (e.g.,apps/v1for Deployments).kind: The kind of the target resource (e.g.,Deployment).name: The name of the target resource (e.g.,hello-world-deployment).
minReplicas: The minimum number of replicas that the HPA will maintain. This ensures that the application always has a baseline level of availability.maxReplicas: The maximum number of replicas that the HPA will scale to. This prevents the HPA from creating too many pods and consuming excessive resources.metrics: A list of metrics that the HPA will use to determine when to scale. Common metrics include:type: Resource: Indicates that a resource metric is being used.resource: name: cpu: Specifies that CPU utilization is the metric.target: type: Utilization averageUtilization: 50: Defines the target CPU utilization percentage (e.g., 50%). The HPA will try to maintain this average CPU utilization across all pods.
Example HPA YAML configuration:
apiVersion: autoscaling/v2beta2 kind: HorizontalPodAutoscaler metadata: name: hello-world-hpa spec: scaleTargetRef: apiVersion: apps/v1 kind: Deployment name: hello-world-deployment minReplicas: 1 maxReplicas: 5 metrics: - type: Resource resource: name: cpu target: type: Utilization averageUtilization: 50 To link the HPA to the target Deployment, the scaleTargetRef section must accurately specify the API version, kind, and name of the Deployment. The HPA uses this information to identify and manage the scaling of the Deployment.
Best practices for setting appropriate scaling thresholds include:
- Setting realistic
minReplicasandmaxReplicasvalues based on the application’s expected traffic patterns and resource requirements. - Choosing an appropriate
averageUtilizationtarget that balances performance and resource utilization. - Monitoring the HPA’s behavior and adjusting the thresholds as needed to optimize scaling performance.
This configuration drives the scaling behavior of the application, allowing Kubernetes to automatically adjust the number of pods to meet the demand and maintain performance.
“`
Monitoring and Observing Scaling
After configuring and applying the HPA, it’s important to monitor its behavior to ensure that it’s scaling the application as expected. Here?s how to use kubectl commands to monitor the HPA and observe the scaling process:
- Check HPA Status: Use the
kubectl get hpacommand to view the current status of the HPA:kubectl get hpa hello-world-hpaThis command displays information such as the current number of replicas, the target CPU utilization, and the actual CPU utilization.
- Describe HPA: Use the
kubectl describe hpacommand to get more detailed information about the HPA:kubectl describe hpa hello-world-hpaThis command shows the HPA’s configuration, scaling events, and any conditions or issues that may be affecting its behavior.
- Monitor CPU Utilization: To monitor the CPU utilization of the pods, you can use the
kubectl top podscommand:kubectl top podsThis command displays the CPU and memory usage of each pod, allowing you to see how the HPA is responding to changes in CPU utilization.
- Interpret HPA Status: The HPA’s status provides valuable insights into its behavior. Look for the following:
TARGETS: Shows the current and target CPU utilization. If the current utilization is consistently above the target, the HPA should be scaling up the number of replicas.REPLICAS: Shows the current number of replicas. This should increase or decrease as the HPA scales the application.EVENTS: Shows any scaling events that have occurred, such as when the HPA added or removed replicas.
Identifying potential issues:
- If the HPA is not scaling as expected, check the HPA’s status and events for any errors or warnings.
- Ensure that the target deployment has sufficient resources (CPU and memory) to handle the increased load.
- Verify that the metrics server is running correctly and providing accurate CPU utilization data.
Kubegrade’s monitoring dashboards provide a more visual and intuitive way to track application performance and scaling activity. These dashboards display real-time metrics, scaling events, and historical trends, making it easier to identify performance bottlenecks and optimize scaling configurations. Kubegrade simplifies the process of verifying that the HPA is working as expected and ensures that the application is scaling appropriately to meet demand.
This practical guidance helps verify that the HPA is working as expected, assuring the application’s performance remains optimal under varying loads.
“`
Example 3: Implementing Rolling Updates and Rollbacks
This example explains how to perform rolling updates to deploy new versions of an application without downtime, and how to perform rollbacks to revert to a previous version if issues arise. Kubernetes Deployments support rolling updates and rollbacks, making it easier to manage application updates.
Step 1: Update the Deployment YAML
To perform a rolling update, update the Deployment YAML file with the new image version. For example, change the image field in the hello-world-deployment.yaml file:
spec: template: spec: containers: - name: hello-world image: nginx:1.21 # Updated image version ports: - containerPort: 80 resources: limits: cpu: "0.1" memory: "128Mi" Step 2: Apply the Updated Configuration
Use kubectl to apply the updated configuration:
kubectl apply -f hello-world-deployment.yaml Kubernetes will automatically perform a rolling update, gradually replacing the old pods with new pods running the updated image. The default update strategy is RollingUpdate, which ensures minimal disruption by only updating a few pods at a time.
Step 3: Monitor the Rolling Update
Monitor the rolling update process using kubectl:
kubectl rollout status deployment/hello-world-deployment kubectl get deployments kubectl get pods These commands show the status of the rolling update, the current state of the deployment, and the individual pods. Kubernetes ensures that the application remains available during the update process.
Step 4: Perform a Rollback (if needed)
If issues arise after the update, perform a rollback to revert to the previous version. First, check the rollout history:
kubectl rollout history deployment/hello-world-deployment This command shows the revision history of the deployment. To rollback to a specific revision, use the kubectl rollout undo command:
kubectl rollout undo deployment/hello-world-deployment --to-revision=1 Replace 1 with the desired revision number. Kubernetes will automatically rollback the deployment to the specified revision, reverting to the previous version of the application.
Kubegrade Simplification
Kubegrade simplifies these processes with its automated upgrade features and rollback mechanisms. It provides a user interface to manage deployments, making it easy to update the image version and apply the changes. Kubegrade also automates the rollback process, allowing teams to quickly revert to a previous version if issues are detected. This reduces the manual steps and potential errors, making the update and rollback processes faster and more reliable.
“`
Performing a Rolling Update
Rolling updates in Kubernetes are a method of updating Deployments with minimal downtime. This approach gradually replaces old pods with new pods, guaranteeing that the application remains available throughout the update process. Rolling updates are crucial for maintaining continuous availability and a positive user experience during deployments.
Here?s a step-by-step example of updating a Deployment with a new image version using kubectl set image:
- Update the Image: Use the
kubectl set imagecommand to update the image version in the Deployment:kubectl set image deployment/hello-world-deployment hello-world=nginx:1.21This command updates the
hello-worldcontainer in thehello-world-deploymentwith thenginx:1.21image. - Monitor the Update: Monitor the rolling update process using the
kubectl rollout statuscommand:kubectl rollout status deployment/hello-world-deploymentThis command shows the status of the rolling update, indicating when the new pods are ready and the old pods are being terminated.
Kubernetes gradually replaces old pods with new pods, guaranteeing continuous availability. The default update strategy for Deployments is RollingUpdate, which is configured with parameters such as maxSurge and maxUnavailable.
maxSurge: Specifies the maximum number of pods that can be created above the desired number of replicas during the update. It can be an absolute number (e.g., 2) or a percentage of the desired number of replicas (e.g., 25%).maxUnavailable: Specifies the maximum number of pods that can be unavailable during the update. It can also be an absolute number or a percentage.
By default, maxSurge is set to 25%, and maxUnavailable is set to 25%. These settings ensure that the update process is smooth and that the application remains available even during the update.
Rolling updates are the primary method for updating applications in Kubernetes, providing a reliable and efficient way to deploy new versions without downtime.
“`
Configuring Update Strategies
Kubernetes offers different update strategies to manage how Deployments are updated. The choice of strategy impacts downtime, deployment speed, and the overall user experience. The two primary update strategies are RollingUpdate and Recreate.
- RollingUpdate: This strategy gradually replaces old pods with new pods, minimizing downtime. It ensures that the application remains available during the update process by only updating a few pods at a time. The
RollingUpdatestrategy is configured with parameters such asmaxSurgeandmaxUnavailable, which control the speed and disruption of the update. - Recreate: This strategy terminates all old pods before creating new pods. This results in downtime during the update process but ensures that all pods are running the new version simultaneously. The
Recreatestrategy is simpler to implement but is not suitable for applications that require continuous availability.
Here?s how to configure the update strategy in the Deployment YAML file using the strategy field:
spec: strategy: type: RollingUpdate rollingUpdate: maxSurge: 25% maxUnavailable: 25% template: spec: containers: - name: hello-world image: nginx:1.21 ports: - containerPort: 80 resources: limits: cpu: "0.1" memory: "128Mi" To use the Recreate strategy, configure the strategy field as follows:
spec: strategy: type: Recreate template: spec: containers: - name: hello-world image: nginx:1.21 ports: - containerPort: 80 resources: limits: cpu: "0.1" memory: "128Mi" Examples of different configurations and their impact:
- RollingUpdate with High
maxSurgeand LowmaxUnavailable: This configuration results in a faster update process with minimal downtime. However, it may consume more resources during the update. - RollingUpdate with Low
maxSurgeand HighmaxUnavailable: This configuration results in a slower update process with less resource consumption. However, it may result in more downtime if the new pods encounter issues. - Recreate: This configuration results in downtime but ensures that all pods are running the new version simultaneously. It is suitable for applications where downtime is acceptable.
Choosing the right strategy depends on the application’s requirements. For applications that require continuous availability, the RollingUpdate strategy is the better choice. For applications where downtime is acceptable, the Recreate strategy may be simpler to implement.
“`
Performing Rollbacks
Rollbacks are a crucial part of managing application deployments in Kubernetes. If a new deployment introduces issues, performing a rollback allows you to revert to a previous, stable version of the application. Kubernetes maintains a history of revisions, making rollbacks straightforward.
Here?s how to use kubectl rollout undo to revert to the previous revision of a Deployment:
- Check Rollout History: Use the
kubectl rollout historycommand to view the revision history of the Deployment:kubectl rollout history deployment/hello-world-deploymentThis command displays a list of revisions, along with details such as the date and time of each revision.
- Perform Rollback: Use the
kubectl rollout undocommand to revert to the previous revision:kubectl rollout undo deployment/hello-world-deploymentThis command reverts the Deployment to the previous revision. To rollback to a specific revision, use the
--to-revisionflag:kubectl rollout undo deployment/hello-world-deployment --to-revision=2Replace
2with the desired revision number. - Monitor Rollback Status: Monitor the rollback process using the
kubectl rollout statuscommand:kubectl rollout status deployment/hello-world-deploymentThis command shows the status of the rollback, indicating when the previous version of the application is running.
Kubernetes maintains a history of revisions, allowing for easy rollbacks. By default, Kubernetes keeps a history of the last 10 revisions. This can be configured using the revisionHistoryLimit field in the Deployment YAML file.
Troubleshooting tips for common rollback scenarios:
- If the rollback fails, check the Deployment’s status and events for any errors or warnings.
- Ensure that the previous revision is still available in the revision history.
- Verify that the application is running correctly after the rollback by checking the logs and monitoring the application’s performance.
Kubegrade simplifies rollbacks with its automated rollback mechanisms and version control features. It provides a user interface to manage deployments, making it easy to view the revision history and perform rollbacks. Kubegrade also automates the rollback process, allowing teams to quickly revert to a previous version if issues are detected. This reduces the manual steps and potential errors, making the rollback process faster and more reliable.
“`
Example 4: Managing Secrets and Configuration Data

This example illustrates how Kubernetes Secrets and ConfigMaps can manage sensitive information and configuration data separately from application code. This separation improves security and simplifies application configuration.
Step 1: Create a Secret
Create a Secret to store sensitive information, such as a database password. Use kubectl create secret generic:
kubectl create secret generic db-password --from-literal=password=SecretPassword This command creates a Secret named db-password with a key password and the value SecretPassword.
Step 2: Create a ConfigMap
Create a ConfigMap to store application settings. Use kubectl create configmap:
kubectl create configmap app-config --from-literal=log_level=DEBUG --from-literal=api_url=http://example.com/api This command creates a ConfigMap named app-config with two key-value pairs: log_level=DEBUG and api_url=http://example.com/api.
Step 3: Mount Secrets and ConfigMaps into a Pod
Update the Deployment YAML file to mount the Secret and ConfigMap into a pod as environment variables:
spec: template: spec: containers: - name: hello-world image: nginx:latest ports: - containerPort: 80 env: - name: DB_PASSWORD valueFrom: secretKeyRef: name: db-password key: password - name: LOG_LEVEL valueFrom: configMapKeyRef: name: app-config key: log_level - name: API_URL valueFrom: configMapKeyRef: name: app-config key: api_url Explanation:
env: Defines environment variables for the container.valueFrom: Specifies that the value of the environment variable should be retrieved from a Secret or ConfigMap.secretKeyRef: Specifies the Secret and key to retrieve the value from.configMapKeyRef: Specifies the ConfigMap and key to retrieve the value from.
Step 4: Apply the Updated Configuration
kubectl apply -f hello-world-deployment.yaml The application can now access the database password, log level, and API URL through environment variables.
Benefits
- Security: Sensitive information (like passwords) is stored securely in Secrets, separate from the application code.
- Maintainability: Configuration data is stored in ConfigMaps, making it easy to update application settings without modifying the code.
Kubegrade Security
Kubegrade provides secure storage and management of secrets, improving the security posture of Kubernetes deployments. It offers features such as encryption at rest, access control, and audit logging to protect sensitive information. Kubegrade simplifies the process of managing secrets and ensures that they are stored and accessed securely.
“`
Creating and Using Secrets
Kubernetes Secrets are objects used to store sensitive information, such as passwords, API keys, and certificates. Secrets allow you to keep sensitive data separate from your application code and configuration files, which is important for security.
Here?s a step-by-step example of creating a Secret using kubectl create secret:
- Create a Secret: Use the
kubectl create secret genericcommand to create a Secret:kubectl create secret generic my-secret --from-literal=username=myuser --from-literal=password=mypasswordThis command creates a Secret named
my-secretwith two key-value pairs:username=myuserandpassword=mypassword. - Encode Data (Optional): While
kubectl create secrethandles encoding, you can manually encode the data before creating the Secret:echo -n 'myuser' | base64 echo -n 'mypassword' | base64Then, create the Secret using the encoded values:
kubectl create secret generic my-secret \ --from-literal=username=$(echo -n 'myuser' | base64) \ --from-literal=password=$(echo -n 'mypassword' | base64) - Mount Secret as Environment Variables: Update the Deployment YAML file to mount the Secret as environment variables within a pod:
spec: template: spec: containers: - name: my-app image: busybox:latest env: - name: DB_USERNAME valueFrom: secretKeyRef: name: my-secret key: username - name: DB_PASSWORD valueFrom: secretKeyRef: name: my-secret key: password - Mount Secret as Files: Alternatively, mount the Secret as files within a pod:
spec: template: spec: containers: - name: my-app image: busybox:latest volumeMounts: - name: secret-volume mountPath: "/etc/secrets" readOnly: true volumes: - name: secret-volume secret: secretName: my-secret
Security benefits of using Secrets:
- Avoid Hardcoding: Prevents sensitive data from being hardcoded in application code or configuration files.
- Centralized Management: Provides a centralized way to manage and update sensitive data.
- Access Control: Allows you to control which pods have access to sensitive data.
By using Kubernetes Secrets, you can protect sensitive information and improve the security of your applications.
“`
Creating and Using ConfigMaps
Kubernetes ConfigMaps are objects used to store non-sensitive configuration data, such as application settings, feature flags, and environment-specific configurations. ConfigMaps allow you to decouple application code from configuration, making it easier to manage and update configurations without redeploying the application.
Here?s a step-by-step example of creating a ConfigMap using kubectl create configmap:
- Create a ConfigMap: Use the
kubectl create configmapcommand to create a ConfigMap:kubectl create configmap my-config \ --from-literal=log_level=INFO \ --from-literal=feature_flag=trueThis command creates a ConfigMap named
my-configwith two key-value pairs:log_level=INFOandfeature_flag=true. - Mount ConfigMap as Environment Variables: Update the Deployment YAML file to mount the ConfigMap as environment variables within a pod:
spec: template: spec: containers: - name: my-app image: busybox:latest env: - name: LOG_LEVEL valueFrom: configMapKeyRef: name: my-config key: log_level - name: FEATURE_FLAG valueFrom: configMapKeyRef: name: my-config key: feature_flag - Mount ConfigMap as Files: Alternatively, mount the ConfigMap as files within a pod:
spec: template: spec: containers: - name: my-app image: busybox:latest volumeMounts: - name: config-volume mountPath: "/etc/config" readOnly: true volumes: - name: config-volume configMap: name: my-config
Benefits of using ConfigMaps:
- Decoupling: Decouples application code from configuration, making it easier to manage and update configurations.
- Centralized Configuration: Provides a centralized way to manage and update configuration data.
- Reusability: Allows you to reuse the same configuration data across multiple pods and deployments.
By using Kubernetes ConfigMaps, you can externalize configuration data and improve the flexibility and maintainability of your applications.
“`
Best Practices for Secrets and ConfigMaps
Managing Secrets and ConfigMaps effectively is crucial for maintaining secure and well-organized Kubernetes deployments. Here are some best practices to follow:
- Use Namespaces for Isolation: Use Kubernetes namespaces to isolate Secrets and ConfigMaps. This ensures that only the pods within the same namespace can access the Secrets and ConfigMaps.
kubectl create namespace my-namespace kubectl create secret generic my-secret -n my-namespace ... - Update Secrets and ConfigMaps Without Restarting Pods: To update Secrets and ConfigMaps without restarting pods, use the
kubectl applycommand:kubectl apply -f my-secret.yaml kubectl apply -f my-configmap.yamlPods that consume the updated Secrets and ConfigMaps will automatically receive the changes. For environment variables, a pod restart may be required.
- Use External Secret Stores: For more advanced secret management, consider using external secret stores such as HashiCorp Vault or AWS Secrets Manager. These tools provide features such as encryption at rest, access control, and audit logging.
- Use Operators for Secret Management: Kubernetes operators can automate the management of Secrets and ConfigMaps. Operators can handle tasks such as creating, updating, and rotating Secrets, making it easier to manage sensitive information.
“`
Conclusion: Kubernetes in Action and the Role of Kubegrade
This article explored several Kubernetes examples, demonstrating the platform’s versatility and ability to manage applications. From deploying a simple web application to scaling based on demand, implementing rolling updates, and managing secrets, Kubernetes offers tools for application deployment, scaling, and management.
Kubegrade simplifies Kubernetes operations, providing a secure, , and automated solution for managing K8s clusters. For those looking to streamline their Kubernetes experience, consider exploring Kubegrade for your Kubernetes management needs.
“`

